Workflow Trigger - Payment Received
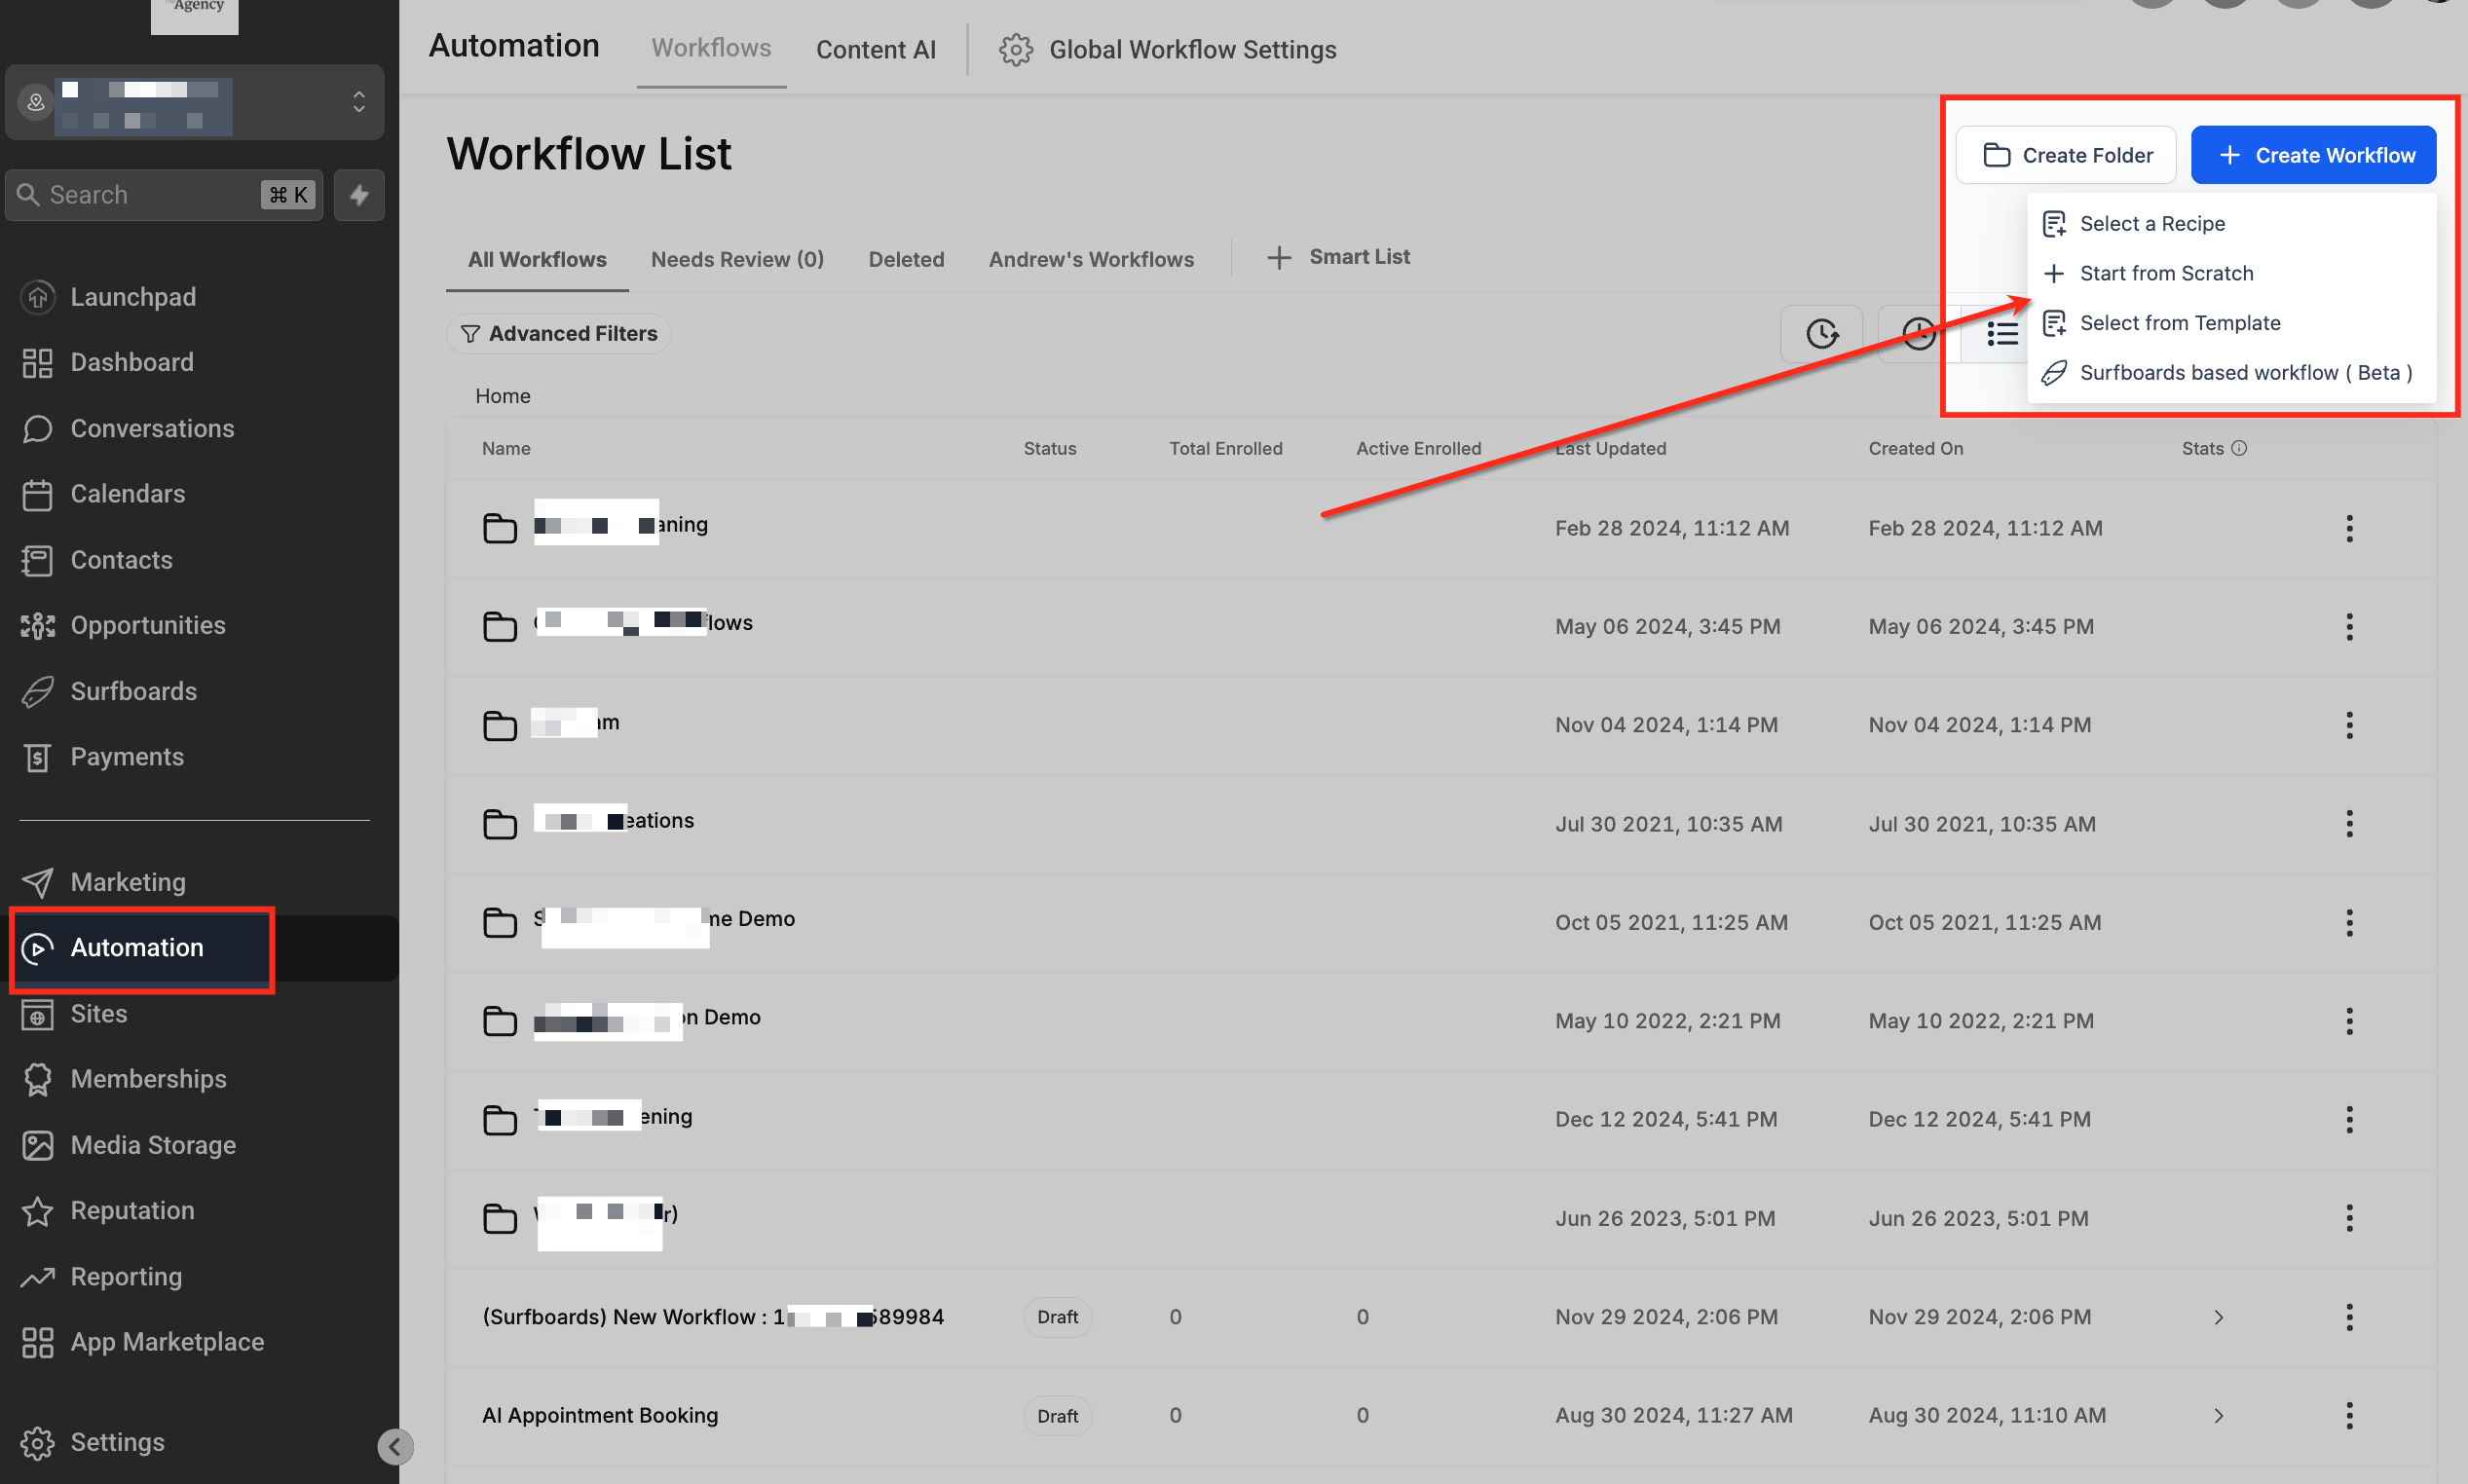
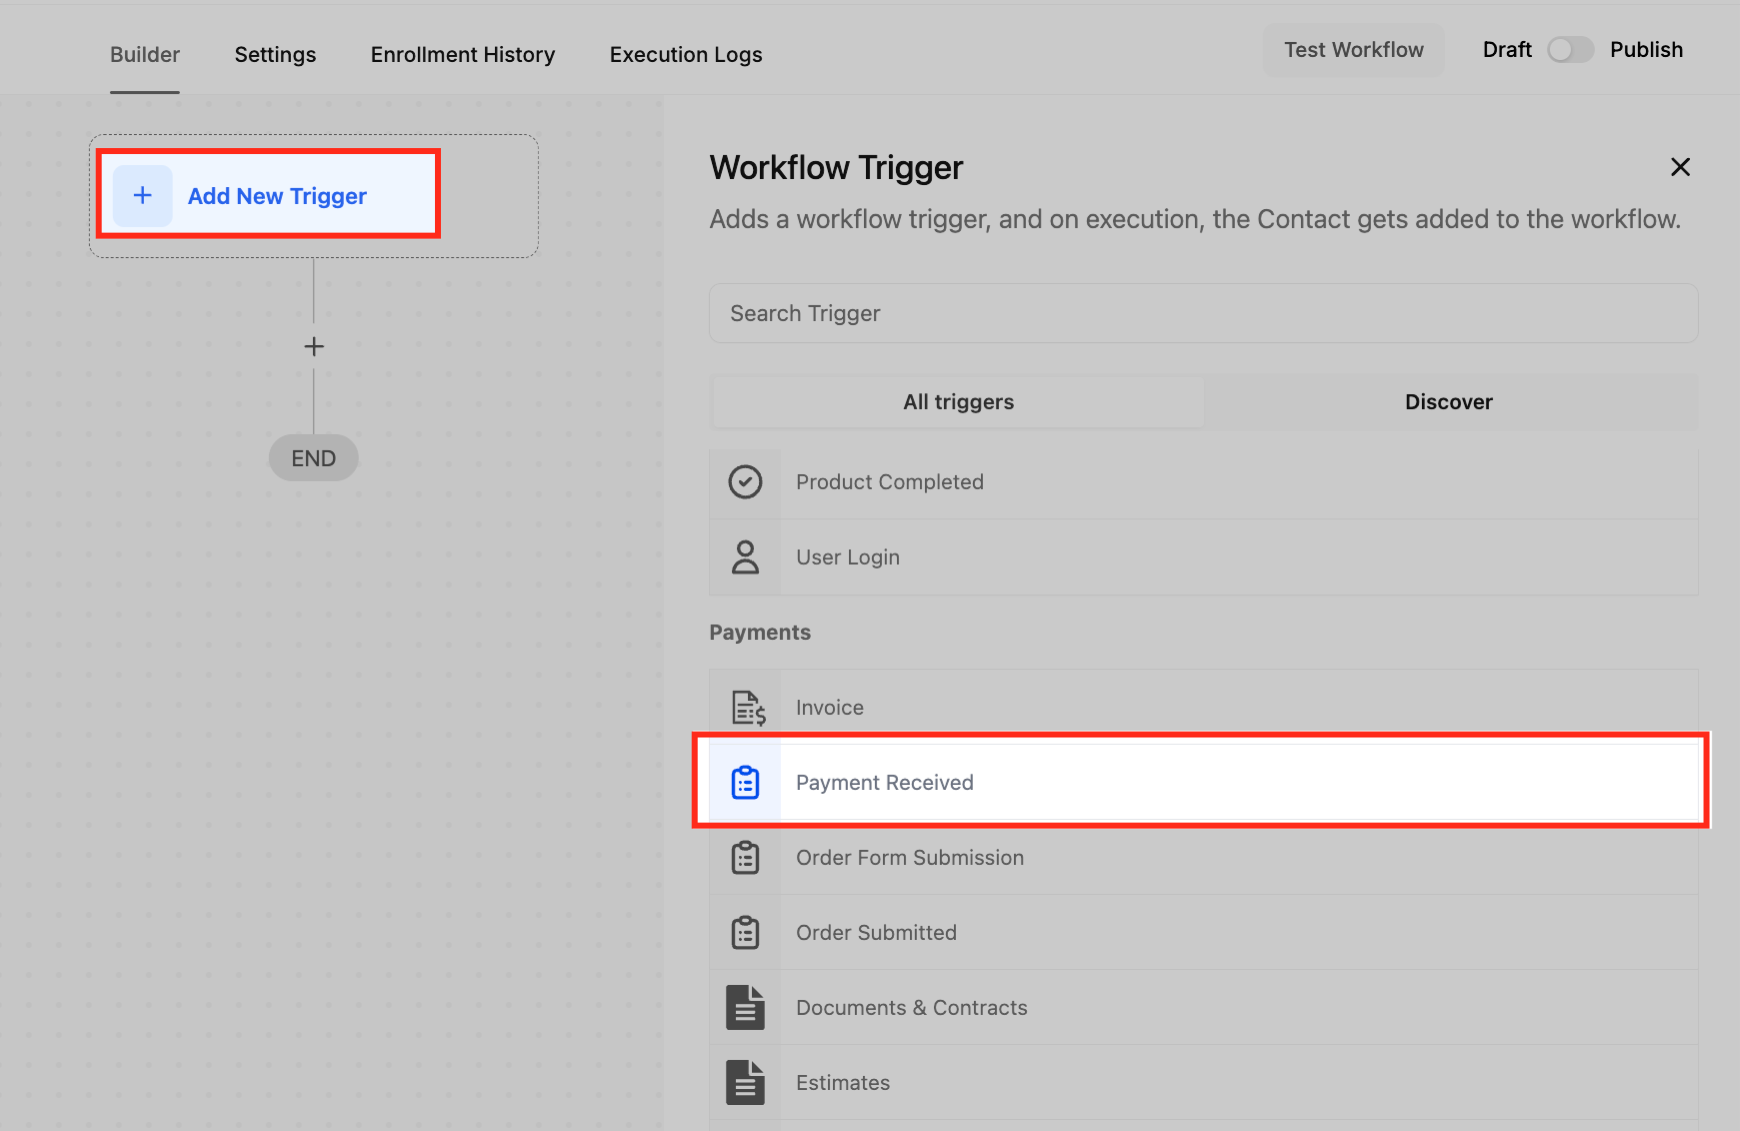
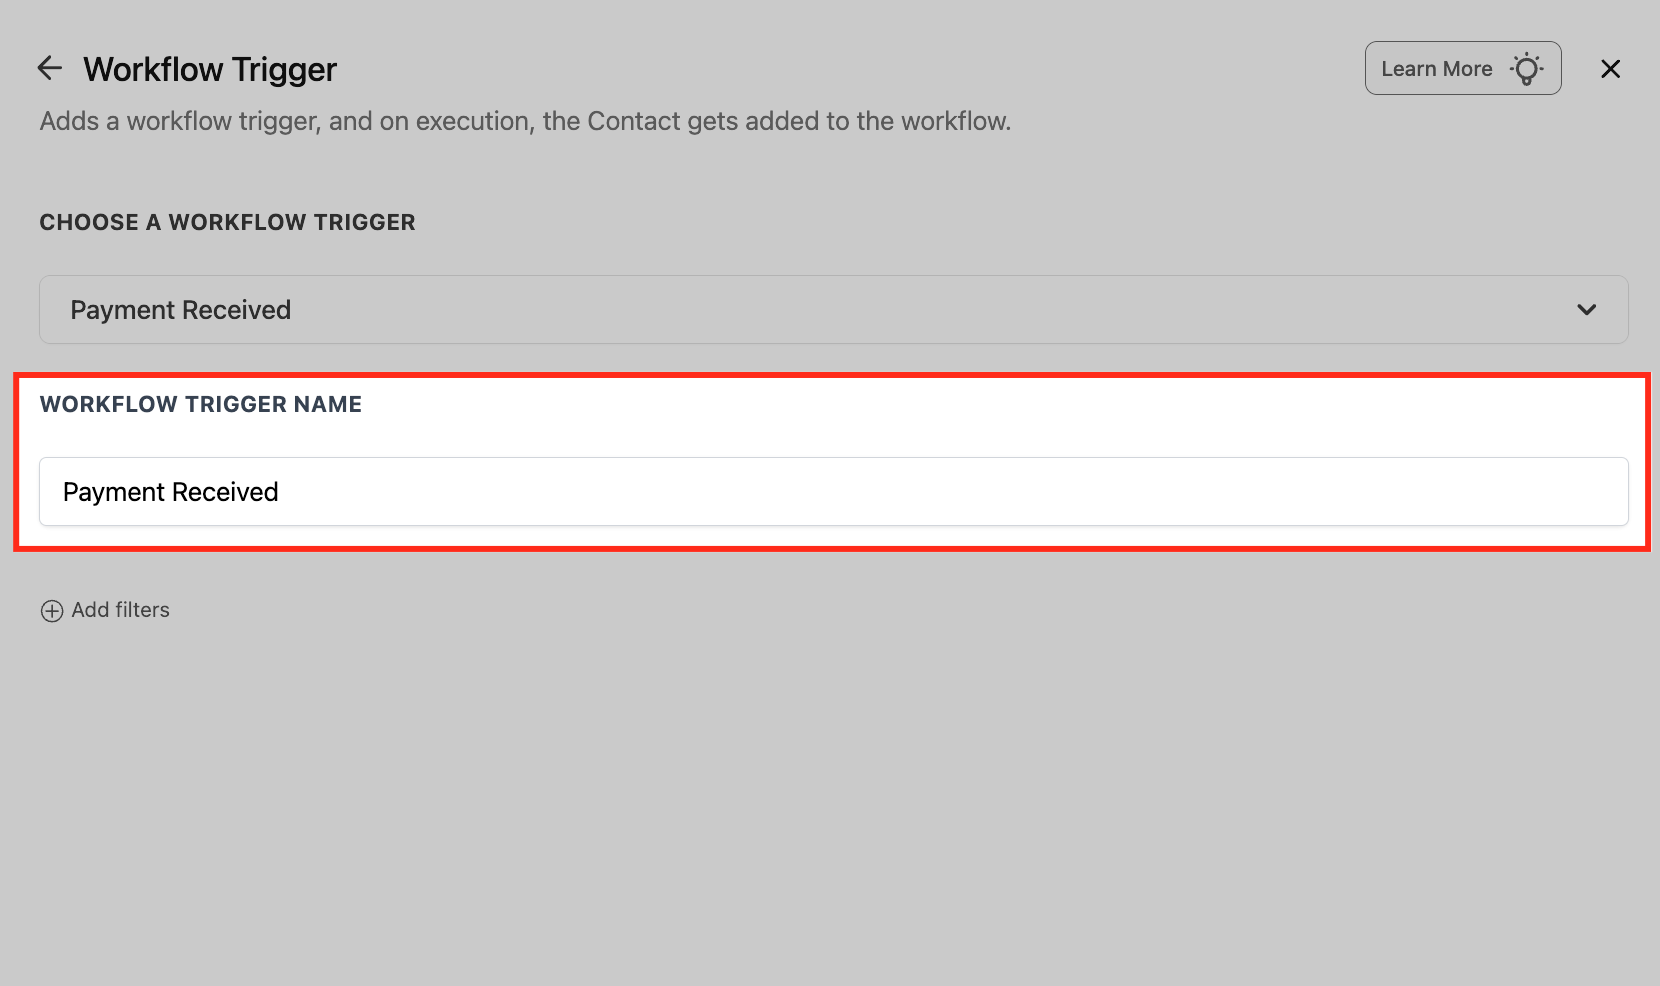
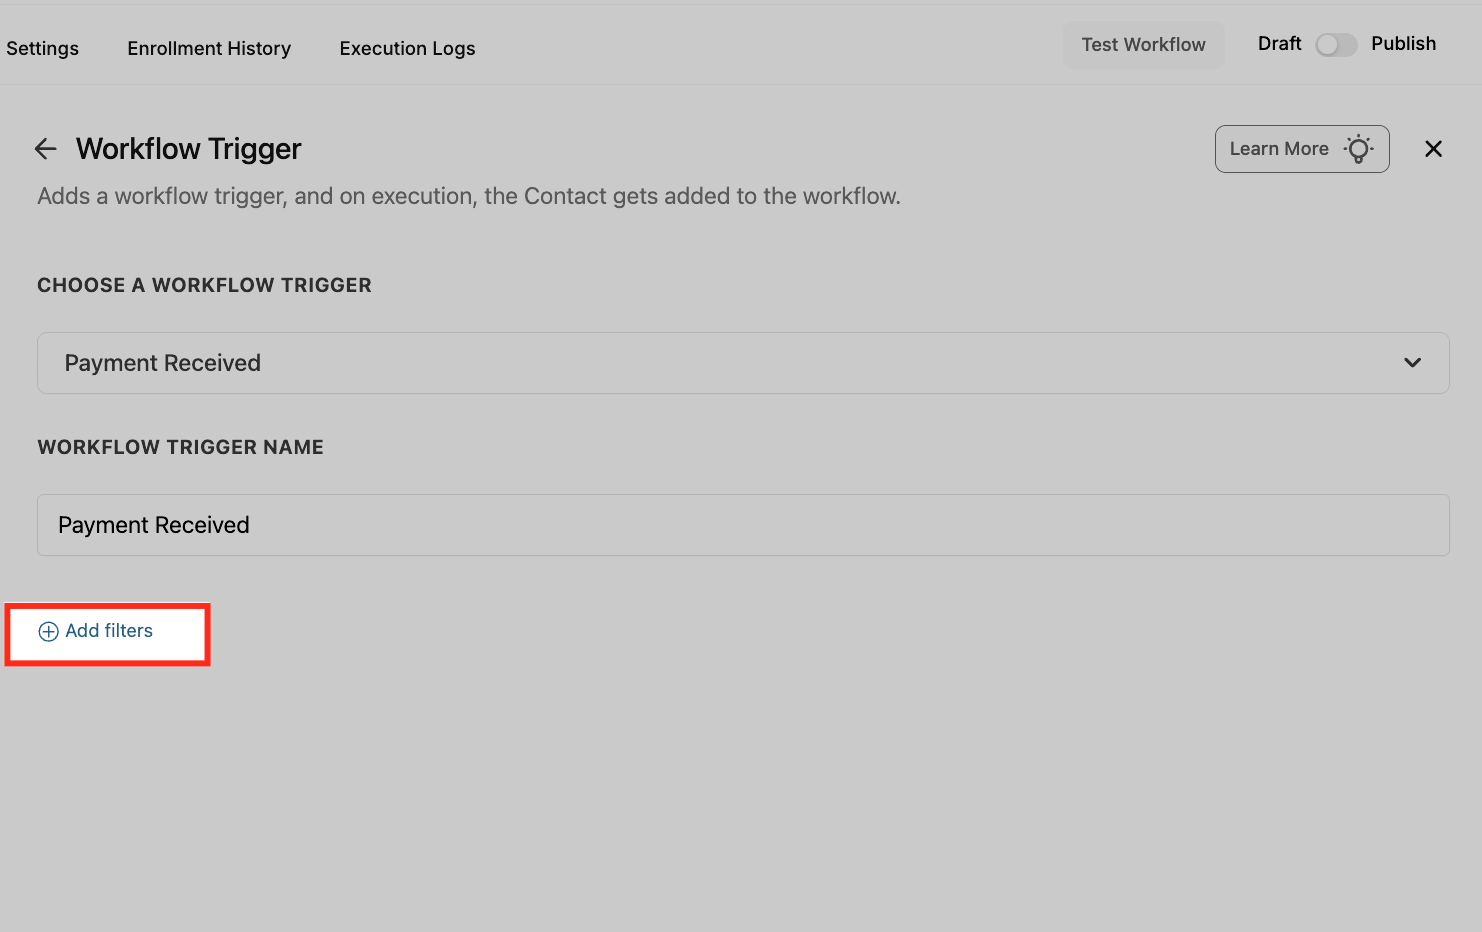
This article will show you how to use Payment Received workflow trigger to automate follow-up actions after any successful payment. Whether it’s a one-time charge, subscription renewal, or invoice payment, you can streamline confirmations, updates, and team notifications, saving time and improving customer experience. * * * ## What is Payment Received Trigger? The Payment Received trigger allows you to initiate automated workflows when a payment is successfully made through your Patient Copilot account. This includes payments from funnels, invoices, calendars, memberships, forms, and even manual entries. Whether it’s a one-time transaction or a recurring subscription payment, this trigger lets you respond immediately—without lifting a finger. This is an essential automation tool for reducing manual follow-up, confirming payments, and ensuring consistent communication with customers and internal teams. * * * ## Key Benefits of Payment Received Trigger Leverage automation to eliminate manual payment follow-ups, improve response times, and keep your CRM and team instantly updated. This trigger creates a seamless post-payment experience for both your business and your customers. - Send Instant Confirmations: Automatically deliver confirmation emails or SMS messages the moment a payment is processed, keeping your customers informed and reassured. - Update Contact Records: Apply tags, update custom fields, or trigger internal notes to reflect the customer’s payment status in their profile without manual input. - Notify Your Team Immediately: Alert your sales, support, or fulfillment teams in real-time so they can take timely action after a successful transaction. - Trigger Upsell or Membership Access: Kick off sequences like upsell offers, bonus content delivery, or grant membership access based on the type of purchase. - Automate Failed Payment Follow-Up: Set up workflows to respond to failed transactions with retries, alerts, or personalized communication to recover lost revenue. - Simplify Subscription & Invoice Tracking: Track recurring payments or invoice completions and tie them to specific follow-up actions or CRM updates effortlessly. * * * ## How to Configure Payment Received Trigger Setting up this trigger ensures your system responds to payments instantly. Here’s a clear step-by-step guide to configure it efficiently and accurately. ### Start a New Workflow Navigate to Automation > Workflows in the left menu, then click + Create Workflow in the top right. From the dropdown, select Start from Scratch to begin building a custom workflow from the ground up.!(https://assets.patientcopilot.ai/fbc3416ad0137907.png) ### Select Trigger Type Click + Add New Trigger to open the trigger options. Scroll to the Payments section and choose Payment Received to begin building your payment automation.!(https://assets.patientcopilot.ai/5ff02cf4bca5c3a0.png) ### Name Your Trigger Enter a clear and descriptive name for your trigger (e.g., “Payment for Course Access”). Naming helps keep workflows organized and easily identifiable, especially when using multiple payment triggers.!(https://assets.patientcopilot.ai/c833e99711671d6a.png) ### Add Filters Click + Add filters to narrow down which payment events trigger this workflow. Filters allow you to target specific transaction types, sources, products, or statuses. - Source Filter: Specify where the payment originated. This helps tailor automation based on the payment channel used.
- Calendar: Payment received from a calendar appointment booking.
- External: Payment made through third-party sources like Stripe, PayPal, or external API integrations.
- Form: Payment submitted through a form that includes a payment element.
- Funnel: Payment made through a funnel page, such as a one-step or two-step order form.
- Invoice: Payment completed via an invoice sent through Patient Copilot’s invoicing feature.
- Manual Payment: A payment recorded manually inside the CRM.
- Memberships: Payment triggered by access to a membership product or course.
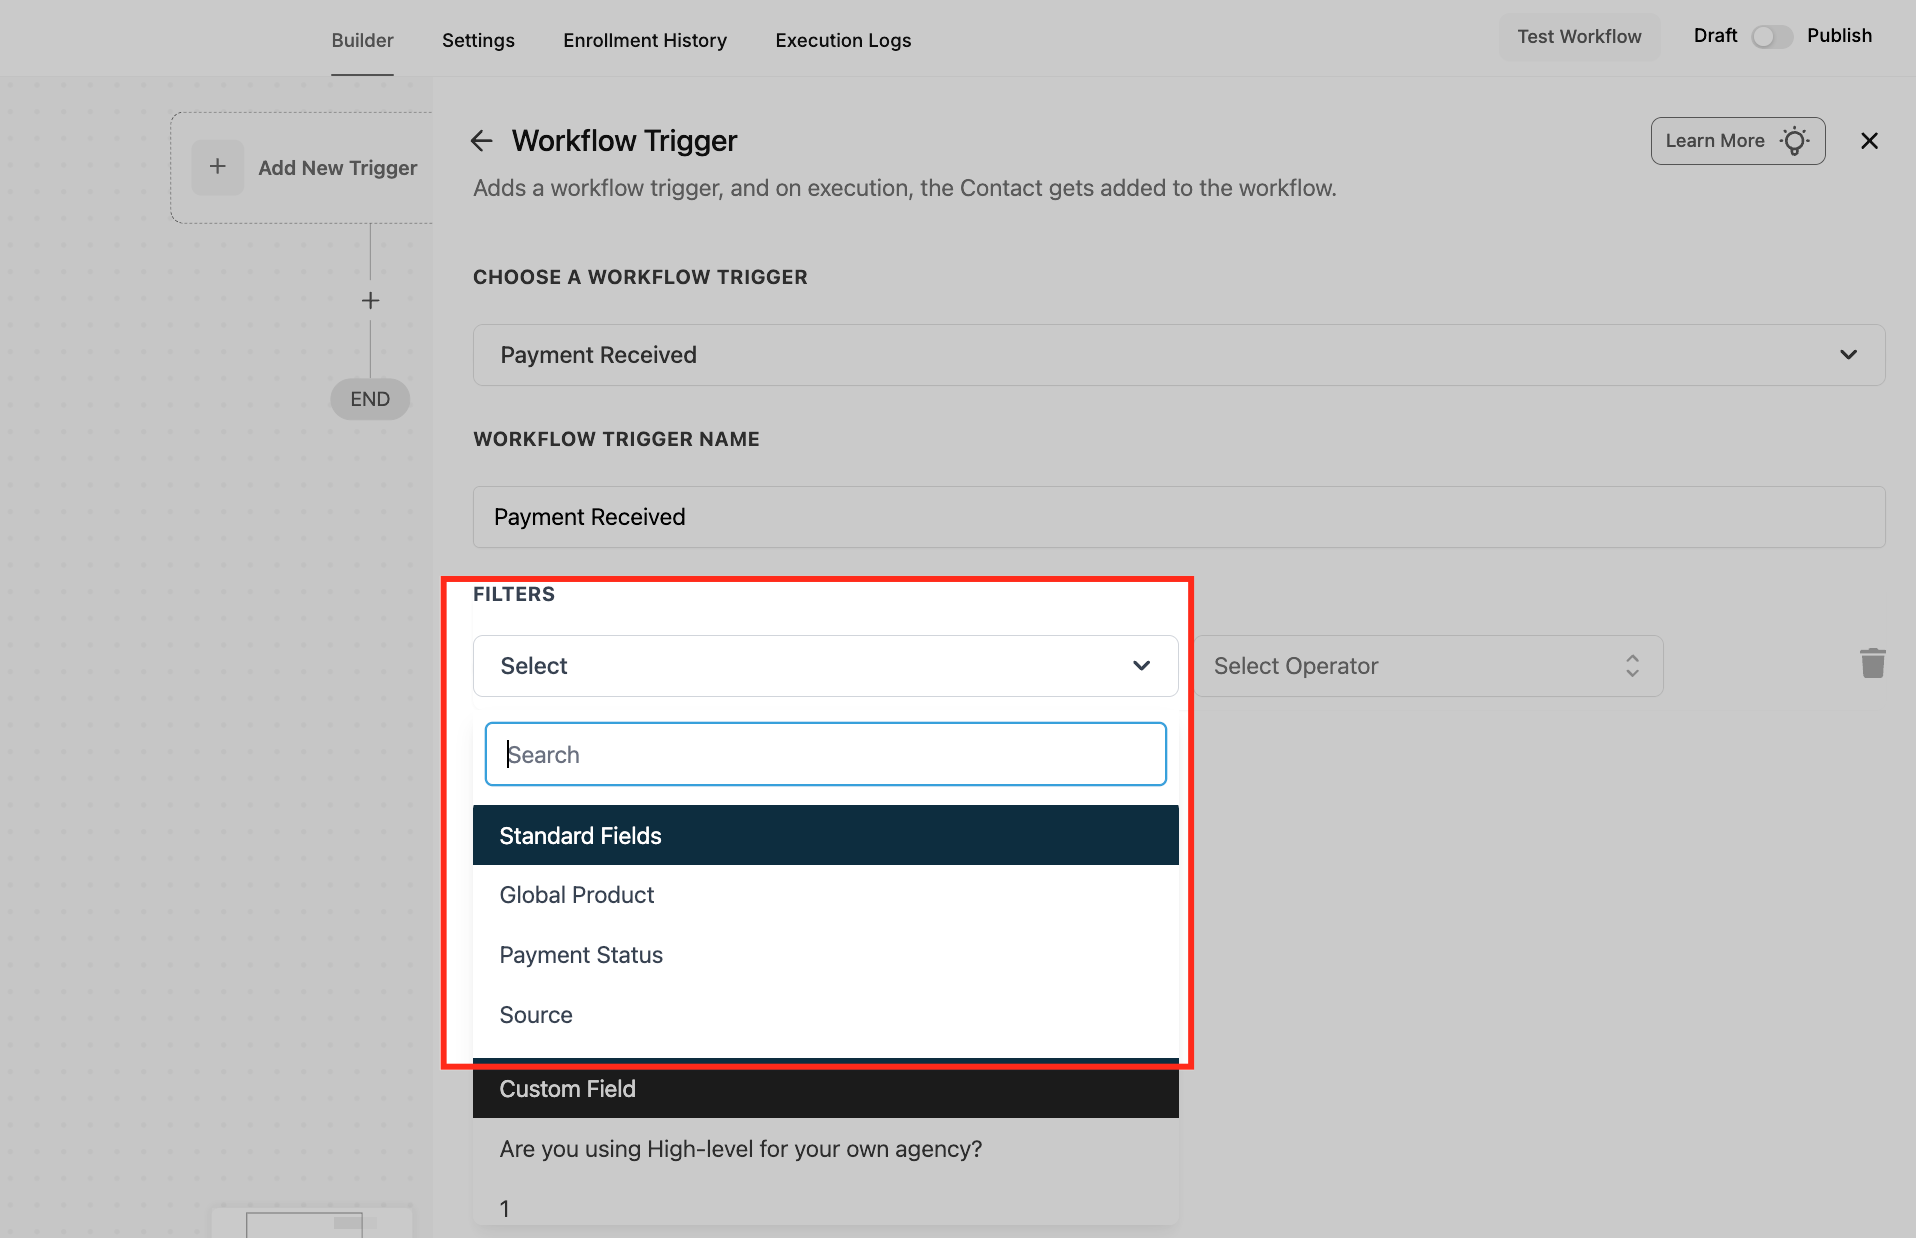
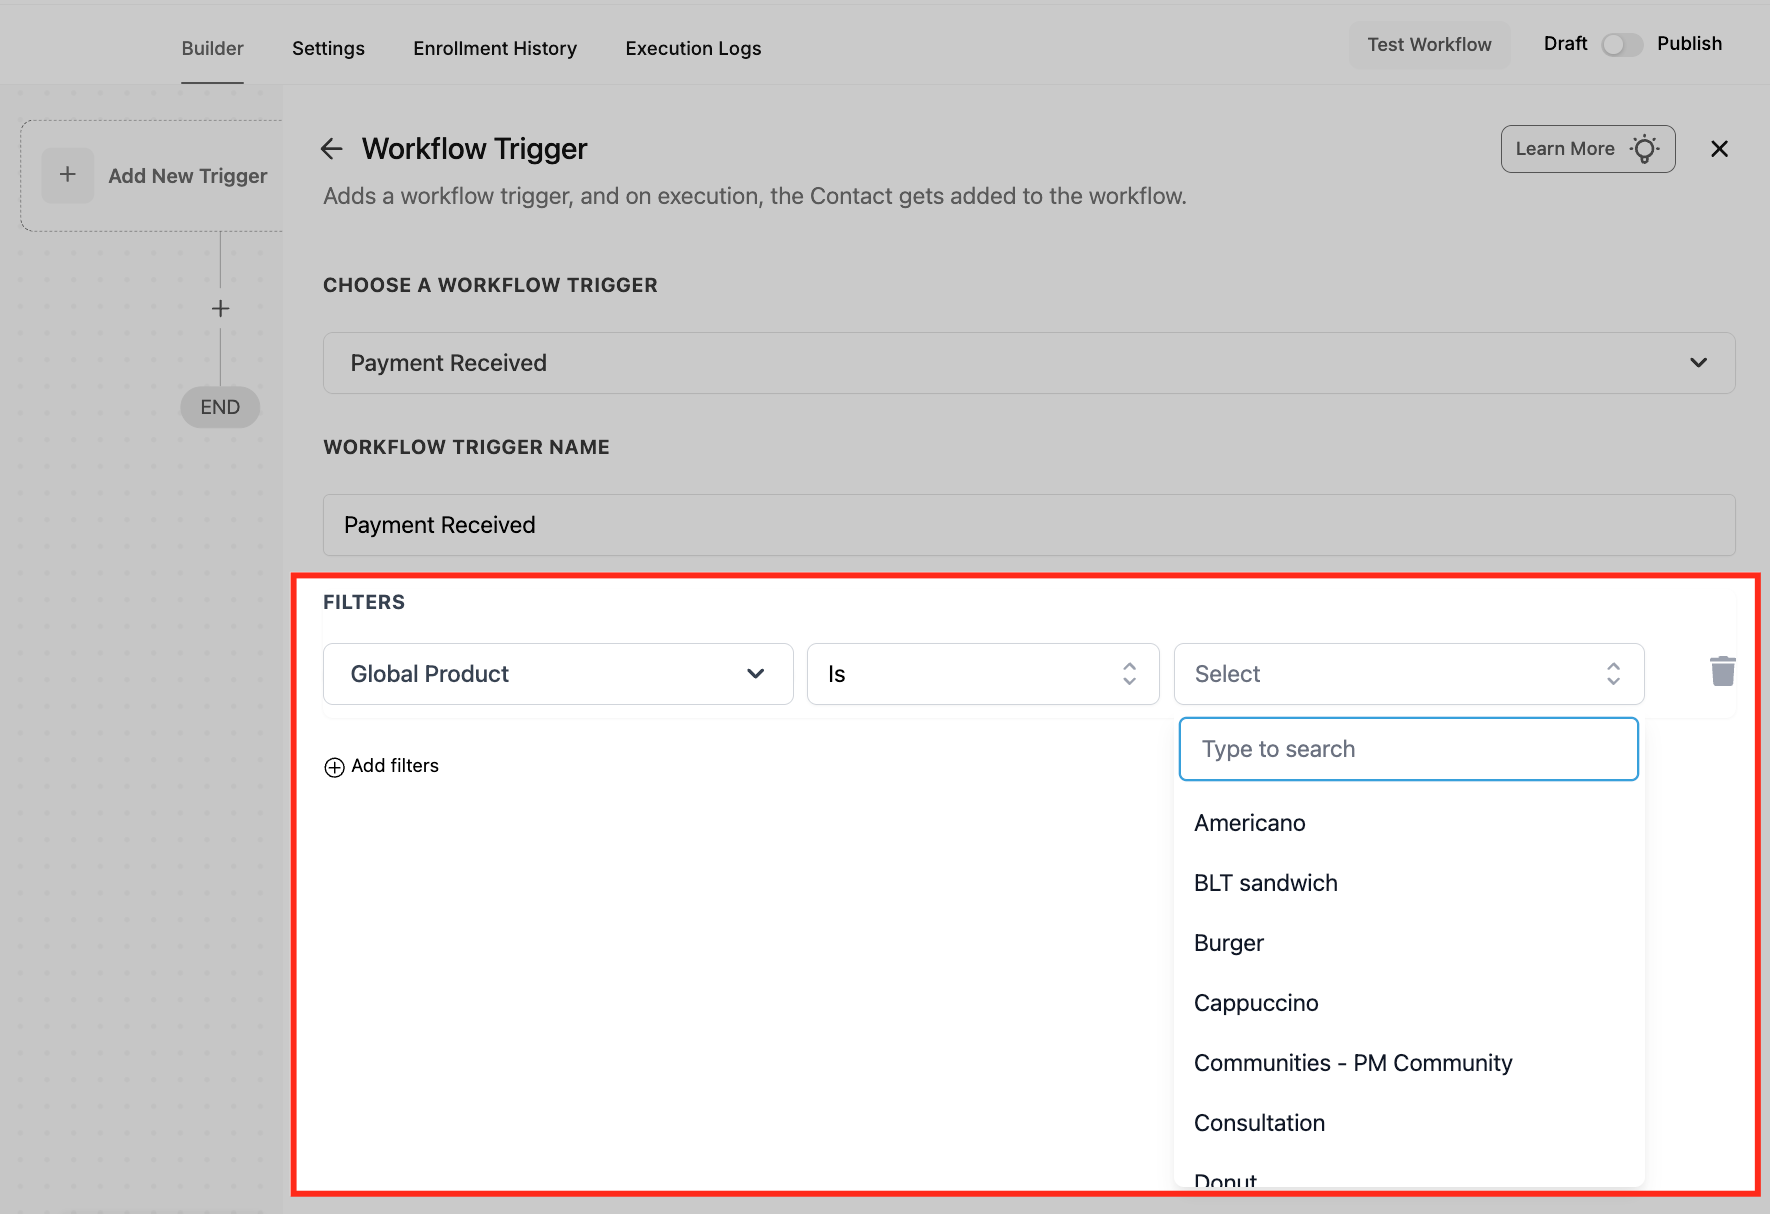
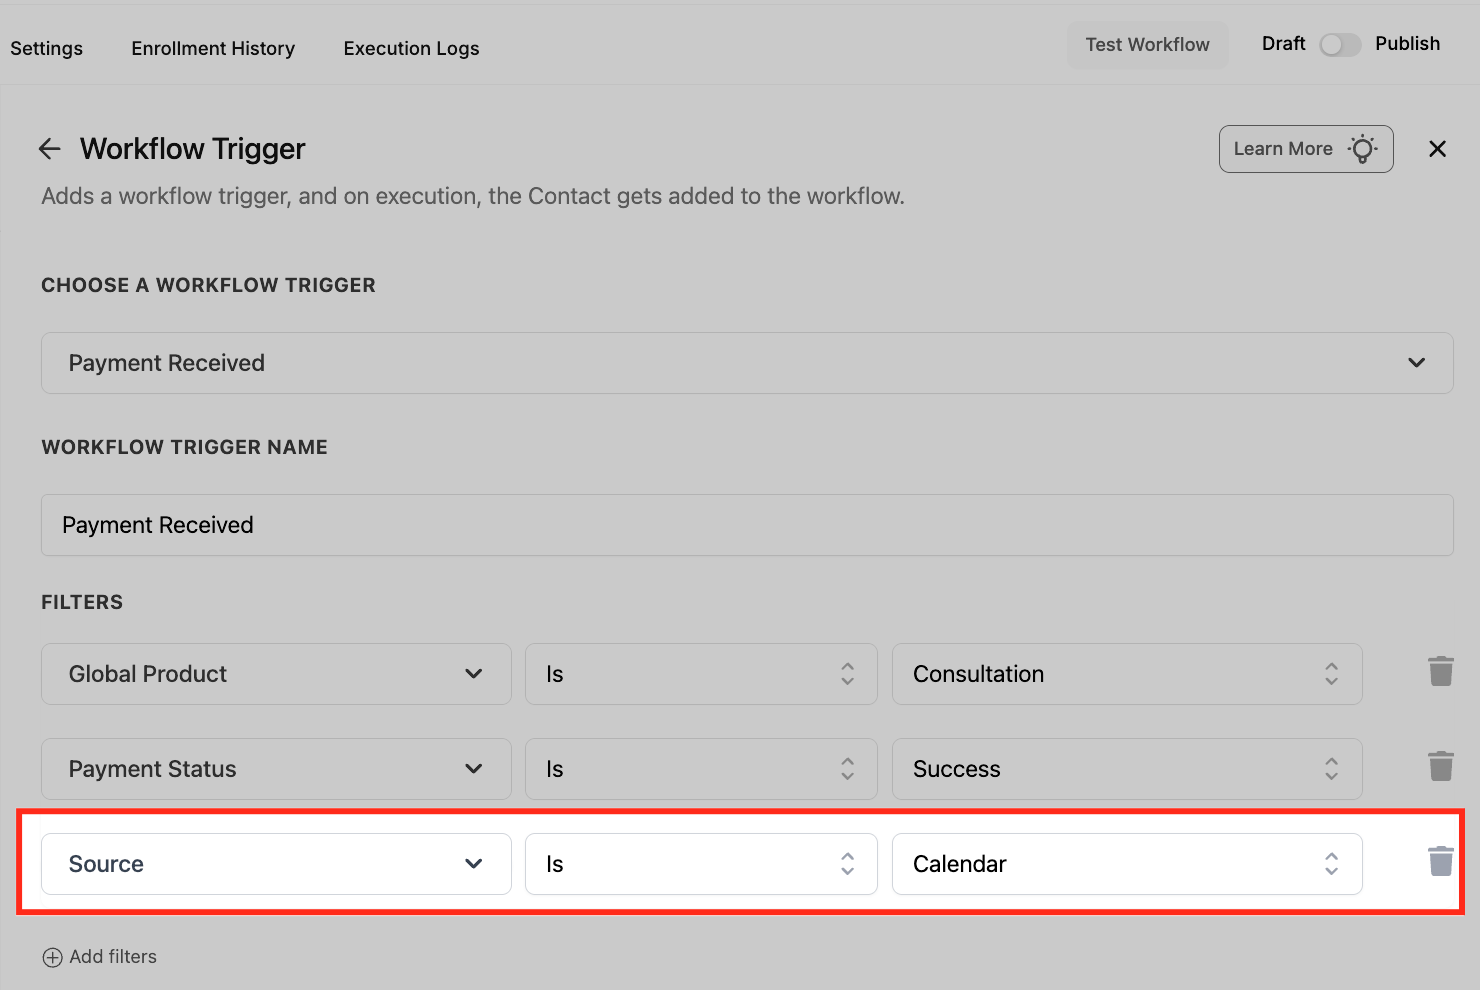
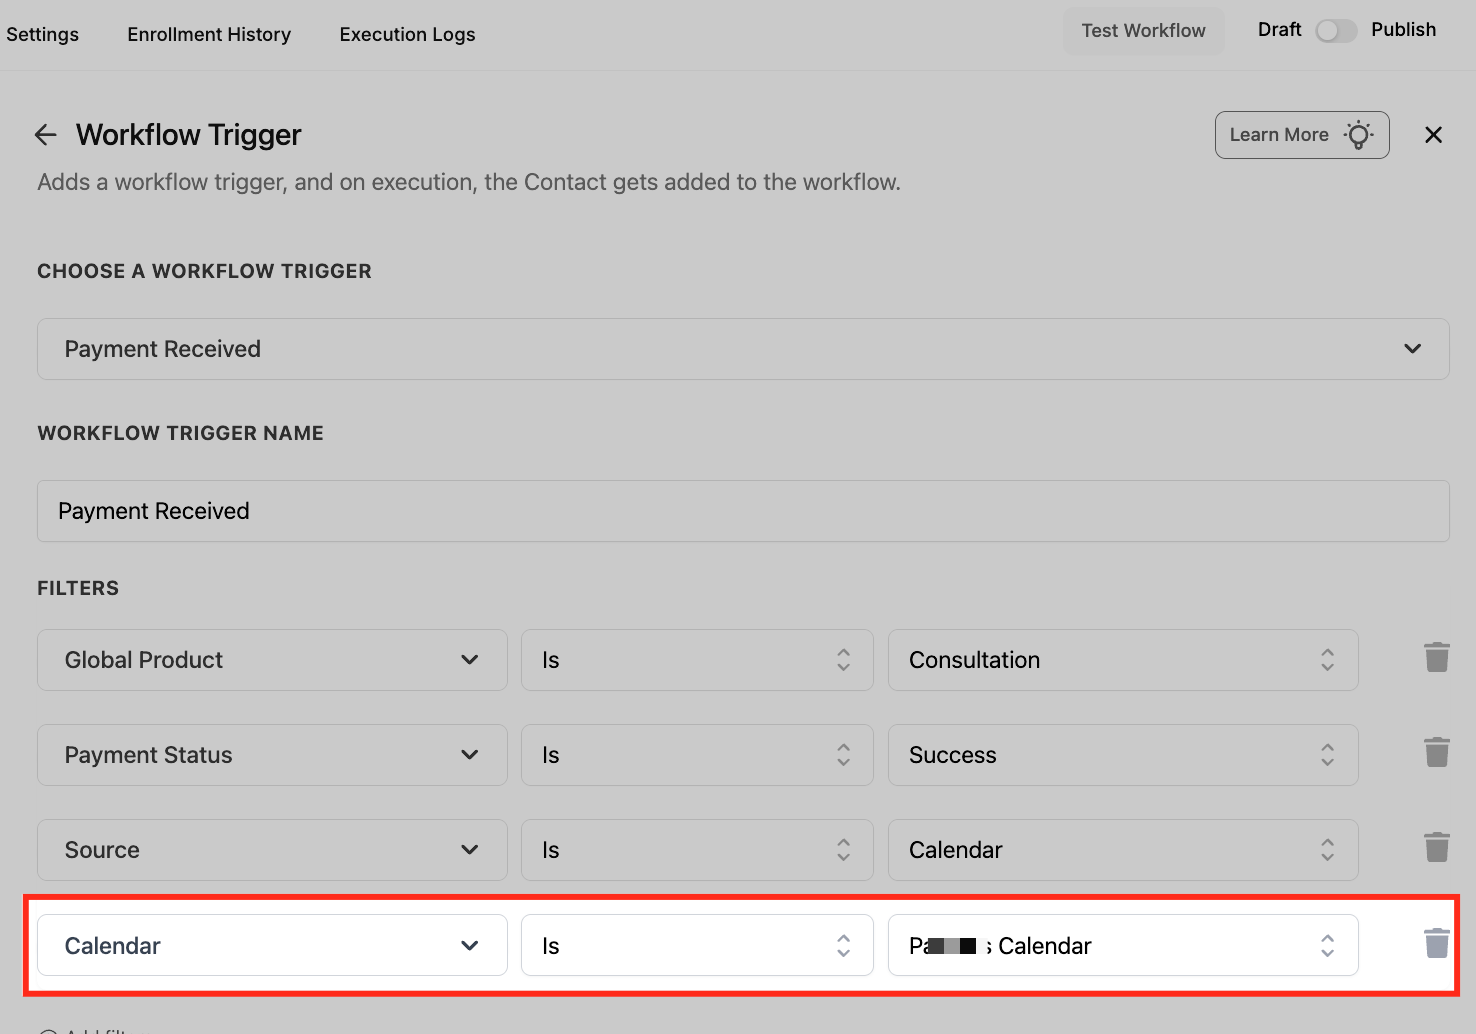
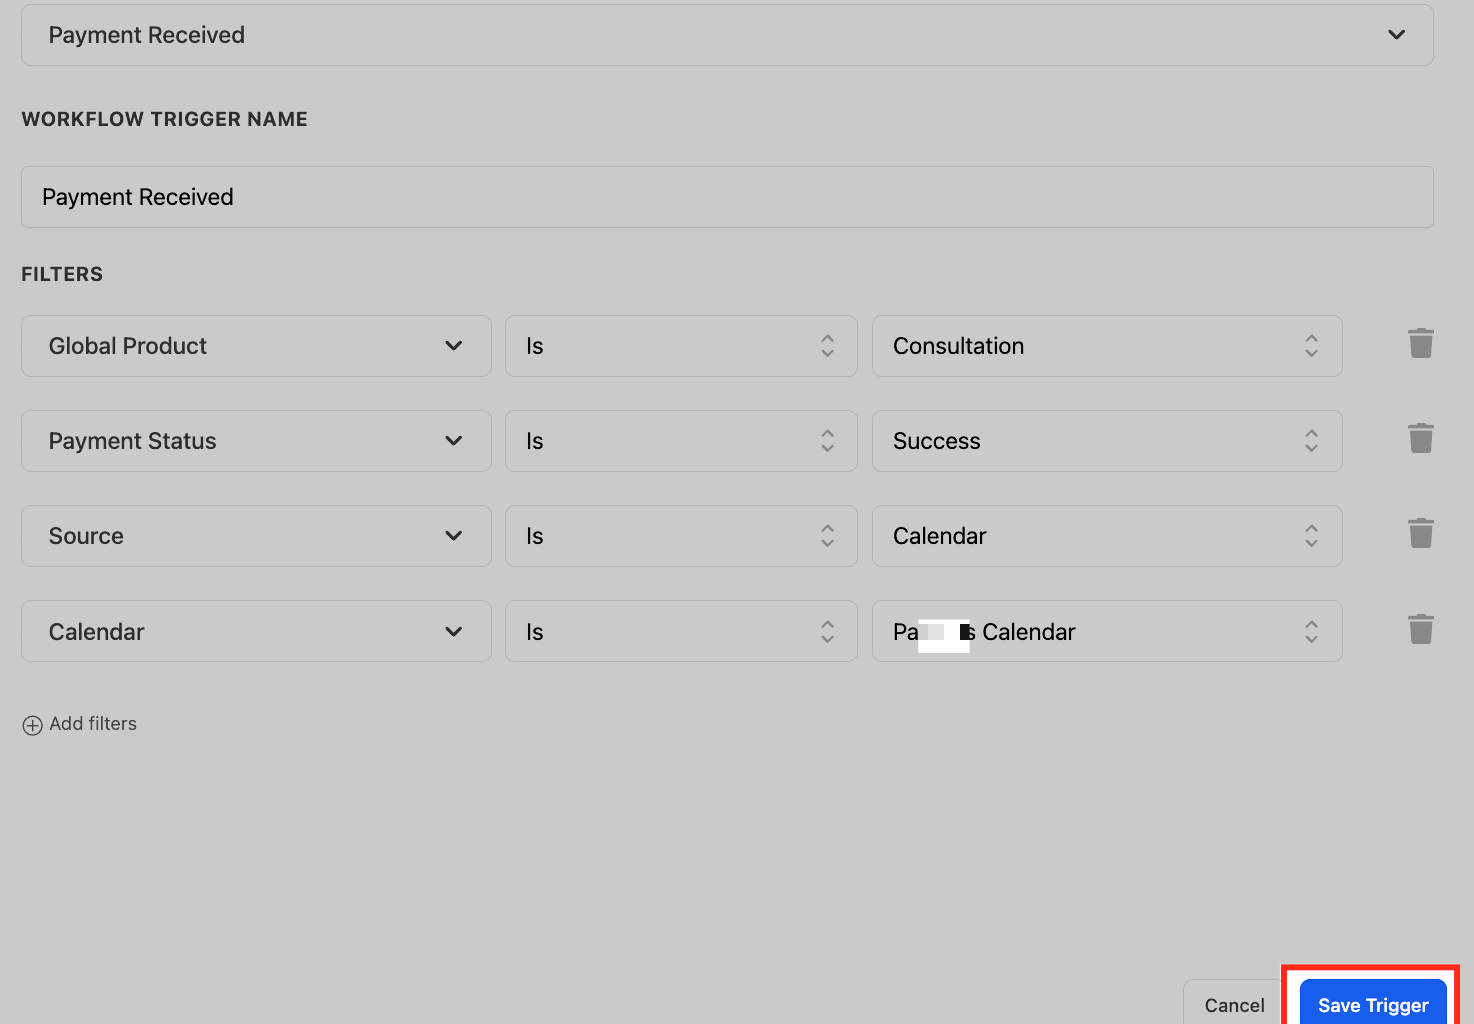
- Website: Payment made through the e-commerce Storefront (Products or Subscriptions).!(https://assets.patientcopilot.ai/2f6370df79280387.png) ### Choose Filter Criteria Select from available standard fields like Global Product, Payment Status, or Source. These filters help you target specific types of transactions for precise workflow control.!(https://assets.patientcopilot.ai/c0664a140f304cc3.png) ### Filter by Product Choose Global Product as your filter type and select the specific product name. This ensures the workflow only triggers when a payment is received for that exact product.!(https://assets.patientcopilot.ai/2cd9d09213783d95.png) ### Filter by Payment Status Add a Payment Status filter and set it to Success. This ensures the workflow only runs when a payment is successfully completed.!(https://assets.patientcopilot.ai/035caceb8c70ea44.png) ### Filter by Source Add the Source filter and set it to Calendar. This restricts the trigger to only activate for payments made through calendar-based bookings.!(https://assets.patientcopilot.ai/354f0f9a6e84d752.png) ### Specify Calendar Use the Calendar filter to select the exact calendar (e.g., “Pat’s Calendar”). This adds another layer of precision by tying the workflow to a specific booking calendar.!(https://assets.patientcopilot.ai/2a7c0ce86ed9d9ec.png) ### Save the Trigger Once all filters are applied, click Save Trigger to finalize your configuration. This locks in your criteria so the workflow only activates under the defined conditions.!(https://assets.patientcopilot.ai/06a87535de4d74b9.png) * * * ## Frequently Asked Questions Q: Can I filter by product or membership plan? Yes, use the Source and Sub-Source filters to pinpoint payments from specific funnels, calendars, or memberships. Q: Can this trigger failed payments too? Absolutely! Use the “Payment Status = Failed” filter to create follow-up workflows for retries or dunning emails. Q: Can I use Custom Values (like payment amount)? Yes, you can use dynamic fields like {{Payment Amount}}, {{Transaction ID}}, and others in emails or internal notifications. Q: How do I test the trigger? Use sandbox payment environments or process a real payment with test products. Make sure your workflow is activated before testing. Q: Can I combine this with other triggers? Yes! You can include multiple triggers in a single workflow or use If/Else branches to split logic based on payment source or result. Q: Can I combine this with other triggers? Yes! You can include multiple triggers in a single workflow or use If/Else branches to split logic based on payment source or result. Q.Is there a stripe recurring payment trigger? We have no Stripe specific trigger, the architecture is gateway agnostic by design. But recurring Stripe charges are captured by three different triggers, each suited for a different use case.
- Need to act on every recurring charge, including failures? → Payment Received + filter “Customer not present/subscription transaction” + Payment Status filterTrigger Fires on recurring charge? Best for Payment Received Yes — filter by “Customer not present/subscription transaction” Most granular control. Gateway-agnostic. Supports failed payments via Payment Status filter. Rich {{payment.*}} custom values (card last4, brand, transaction ID, gateway) Order Submitted Yes — fires on successful recurring charges Post-purchase upsells, Shopping Cart email template auto-population, order-level custom values (cart total, products, coupon, gateway). V2 funnels only Subscription Yes — lifecycle events only (create, update, pause, resume, cancel) Reacting to subscription state changes, not individual charges - Sending confirmation emails with product details after successful recurring charges? → Order Submitted (the Shopping Cart email element auto-populates line items)
- Reacting to subscription create/pause/cancel? → Subscription trigger Important Notes - No native Stripe recurring charge action. The Stripe One-Time Charge action is for one-time charges only. For recurring Stripe billing, set it up in Stripe directly — then use one of the triggers above to react to the charges.
- Order Submitted requires V2 funnels. If you’re on V1, use Payment Received.
- All three triggers work across Stripe, PayPal, and any other connected gateway — we normalizes payment events.