Create Appointment Note - Workflow Action
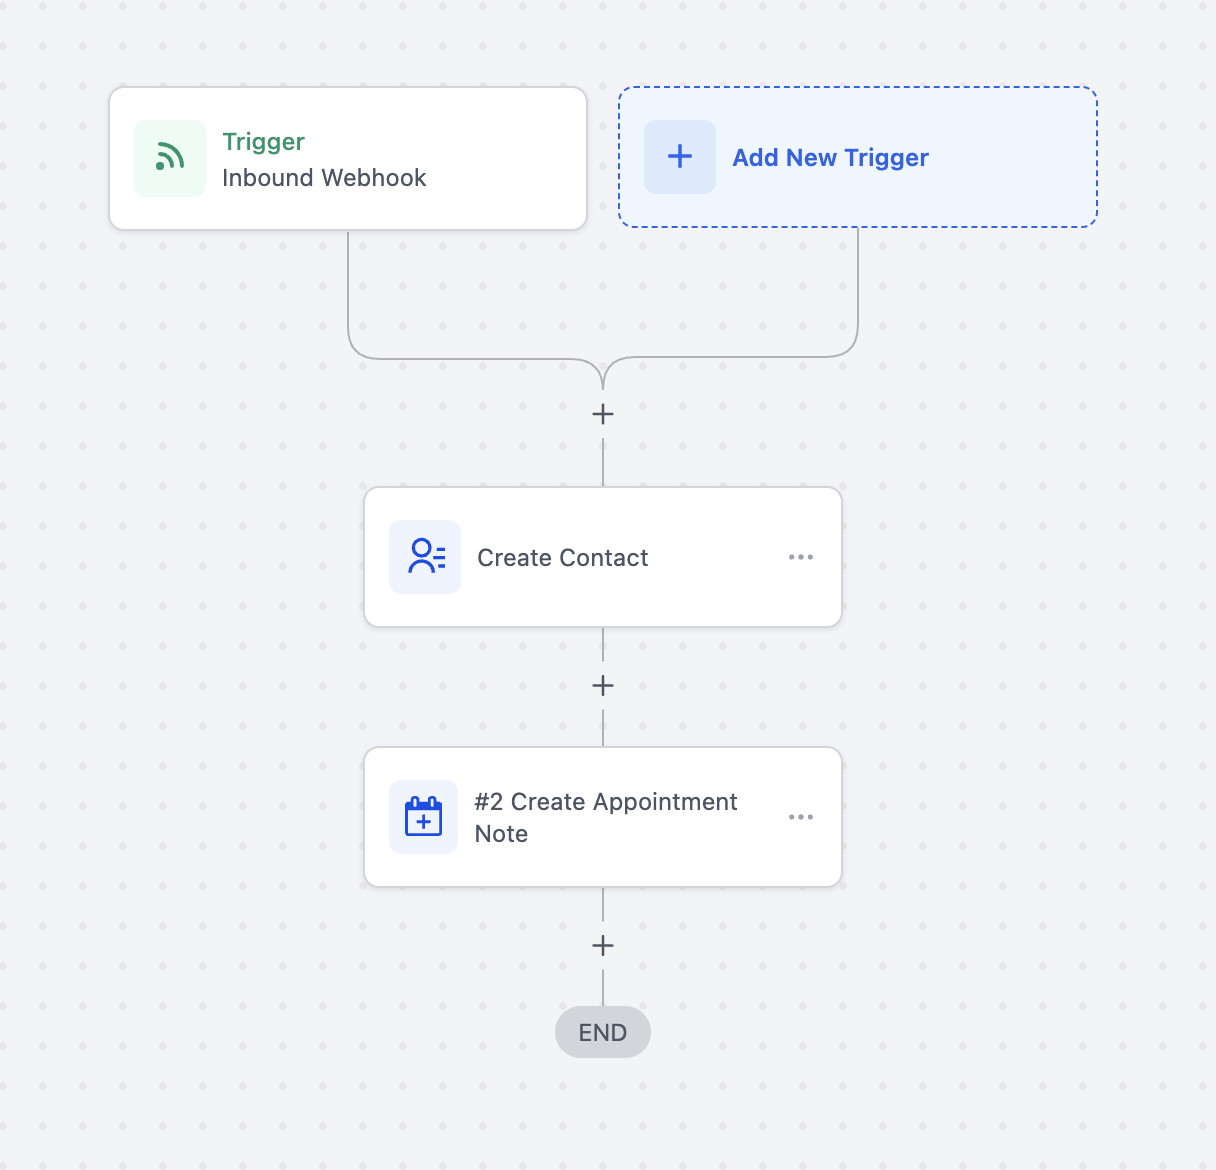
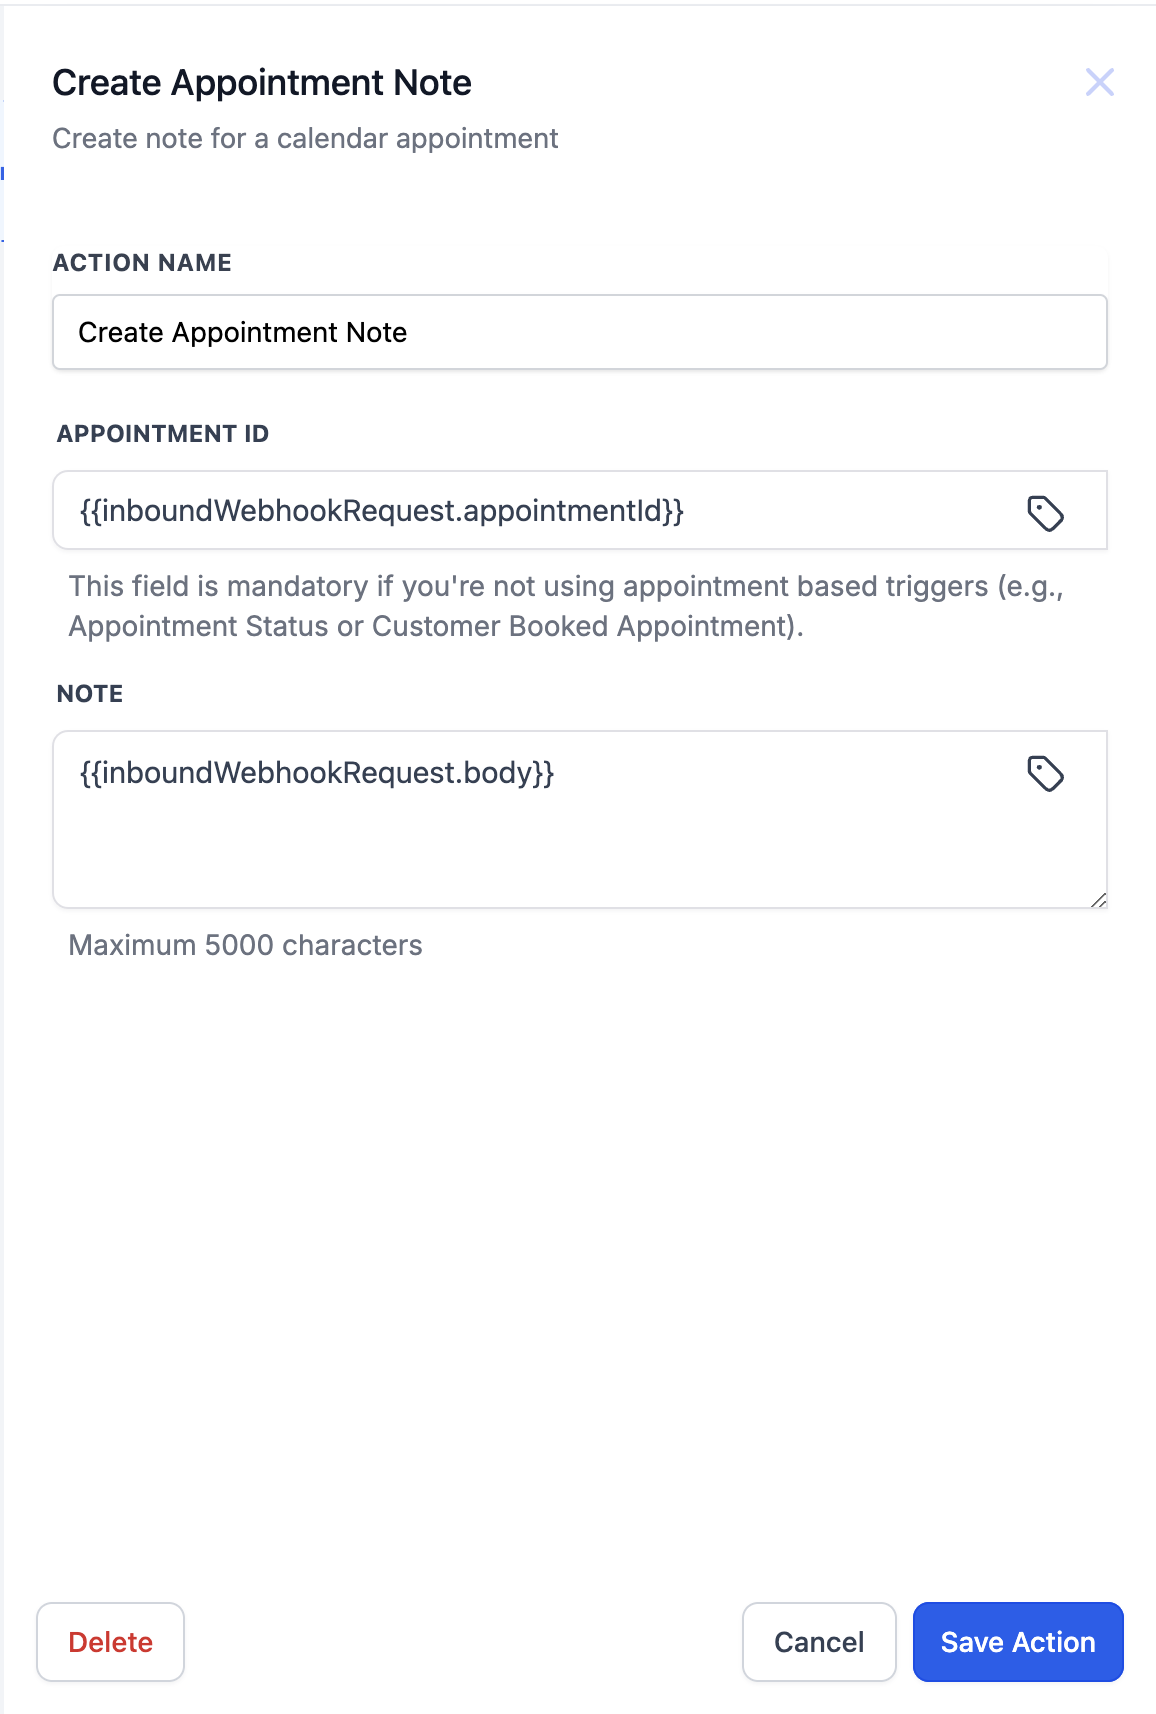
Automations > Create New Workflow > Start From Scratch 2. Add a Trigger: - Choose a trigger such as Inbound Webhook, Appointment Status, or Customer Booked Appointment. 3. Add an Action: - Select Add Action > Create Appointment Note. - Enter an action name. * * * ### Configuring Inputs #### If using an Inbound Webhook trigger: - Appointment ID: Add the appointment ID using this custom value: {{inboundWebhookRequest.appointmentId}} - Note Body: Use the following custom value to add the note content: {{inboundWebhookRequest.body}} ####!(https://assets.patientcopilot.ai/91fd62c3bd87a9d9.png) #### If using an Appointment-based trigger (Appointment Status or Customer Booked Appointment): - Appointment ID is not required. - Note Body: You can manually enter a custom note of your choice. * * * ## Important Considerations - If using Inbound Webhooks, ensure that the webhook payload includes both appointmentId and body for seamless functionality. - The body field has a maximum limit of 5000 characters. This feature allows businesses to efficiently log appointment-related notes directly through workflow automation, reducing manual effort and improving organization. * * * ### Note visibility across records Appointment notes created through this workflow action are internal appointment notes. They appear on the associated Contact, Opportunity, and Conversation records, so teams can review the same context across modules. If the note is edited or deleted later, the change is reflected everywhere the same appointment note appears. For complete details about note visibility, filtering, and sync behavior, see How to Create & Manage Appointment Notes & Sync them Across Records. Was this article helpful? That’s Great! Thank you for your feedback Sorry! We couldn’t be helpful Thank you for your feedback Feedback sent We appreciate your effort and will try to fix the article