Embedding Patient Copilot Forms on Non-Patient Copilot Websites
This article provides step-by-step instructions for embedding Patient Copilot forms on popular website platforms, including SquareSpace, Wix, Shopify, WordPress, and Duda. Forms are a powerful way to capture leads, engage visitors, and increase conversions directly on your website, even if it’s not hosted on Patient Copilot. * * * ## What is Embedding of Patient Copilot Forms Embedding Patient Copilot forms means integrating a form directly onto your website using your own website editor, allowing visitors to fill it out without being redirected elsewhere. This makes the process seamless, ensuring that lead capture, customer inquiries, or appointment bookings happen right within your branded environment. The best part? You won’t need to switch between multiple platforms or make adjustments in different places—just copy the embed code from Patient Copilot and paste it into your website editor. * * * ## Key Benefits of Embedding Patient Copilot Forms Embedding Patient Copilot forms can significantly improve engagement and lead generation on your website. Here are the key benefits: - Capture More Leads: Patient Copilot forms enable you to collect visitor information directly on your site, making it easier to nurture leads.
- Cross-Platform Integration: Use the forms on various website platforms such as SquareSpace, Wix, Shopify, WordPress, and Duda.
- Seamless CRM Syncing: Automatically sync collected data with your Patient Copilot CRM for streamlined follow-up and automation.
- Improved Engagement: Use customizable forms to display targeted messages, promotions, or surveys.
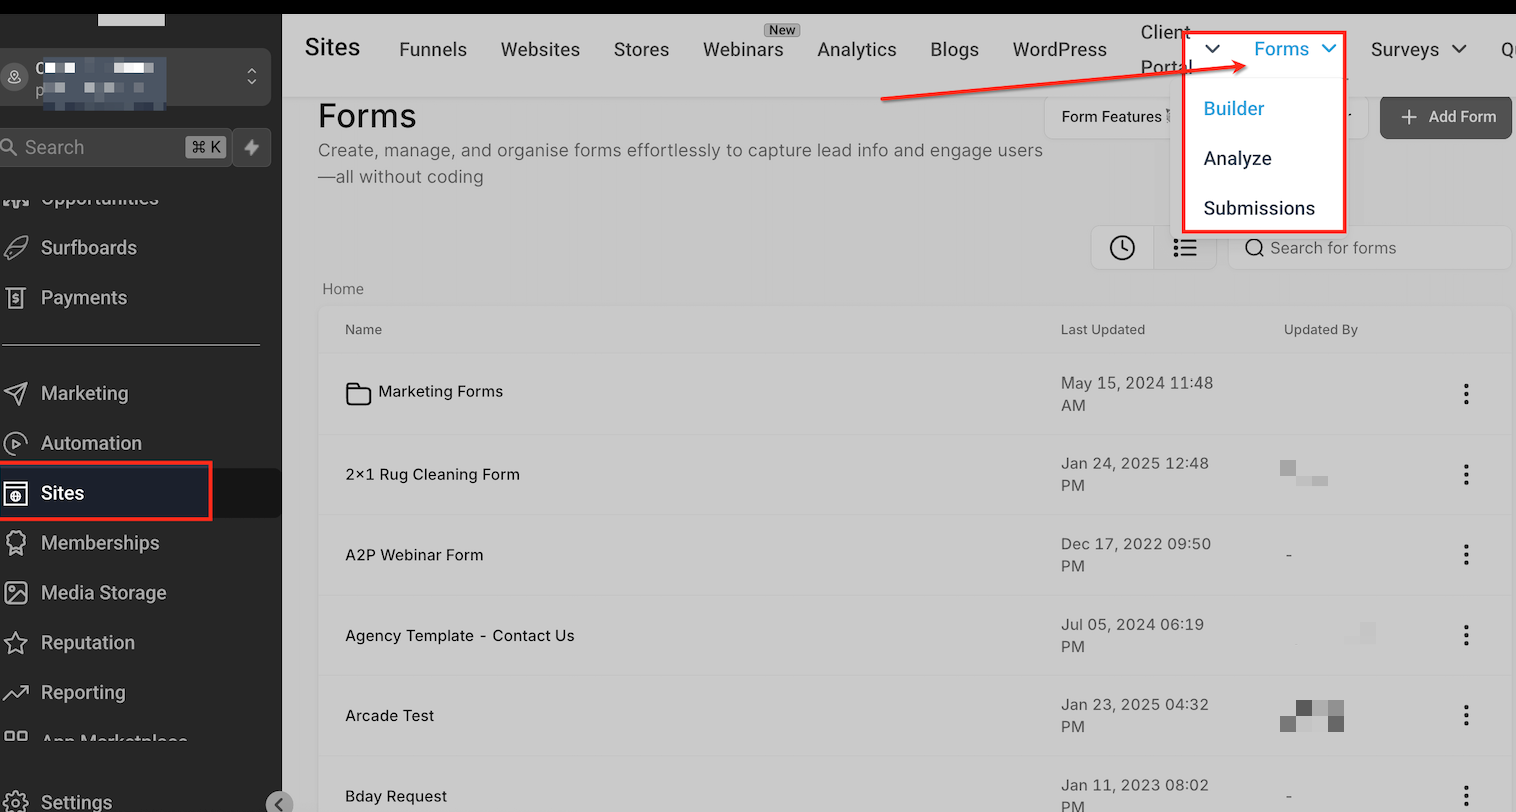
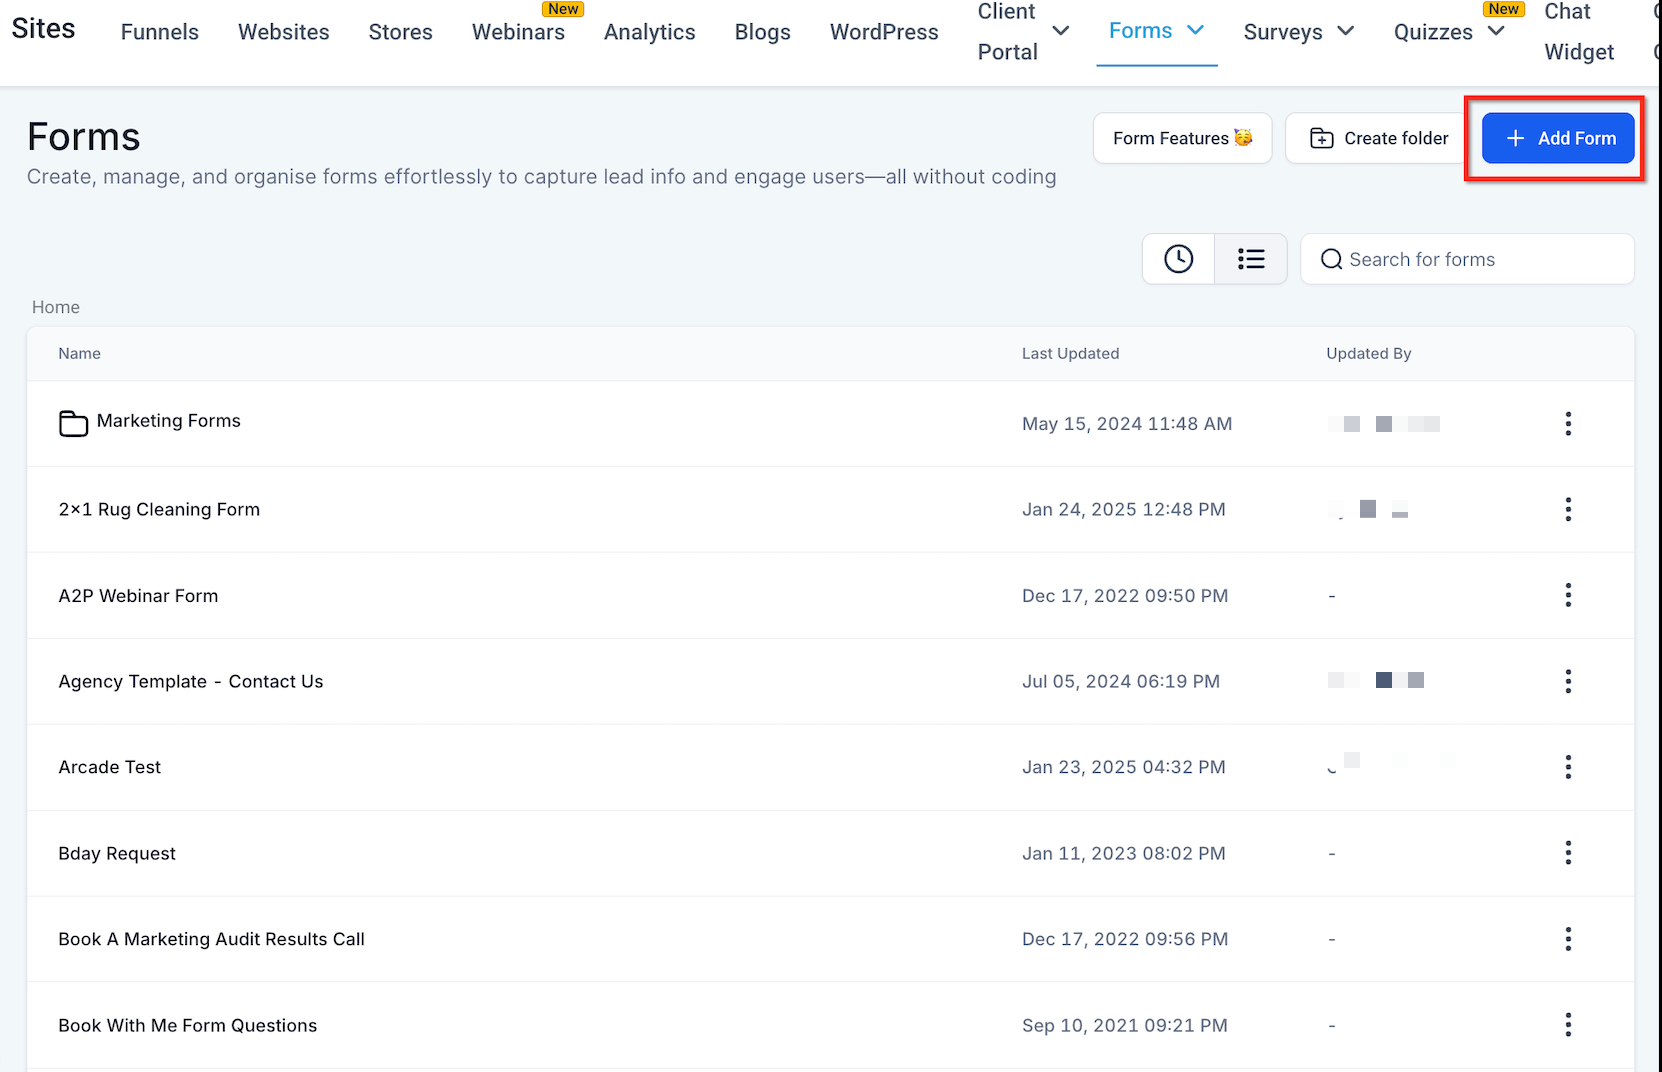
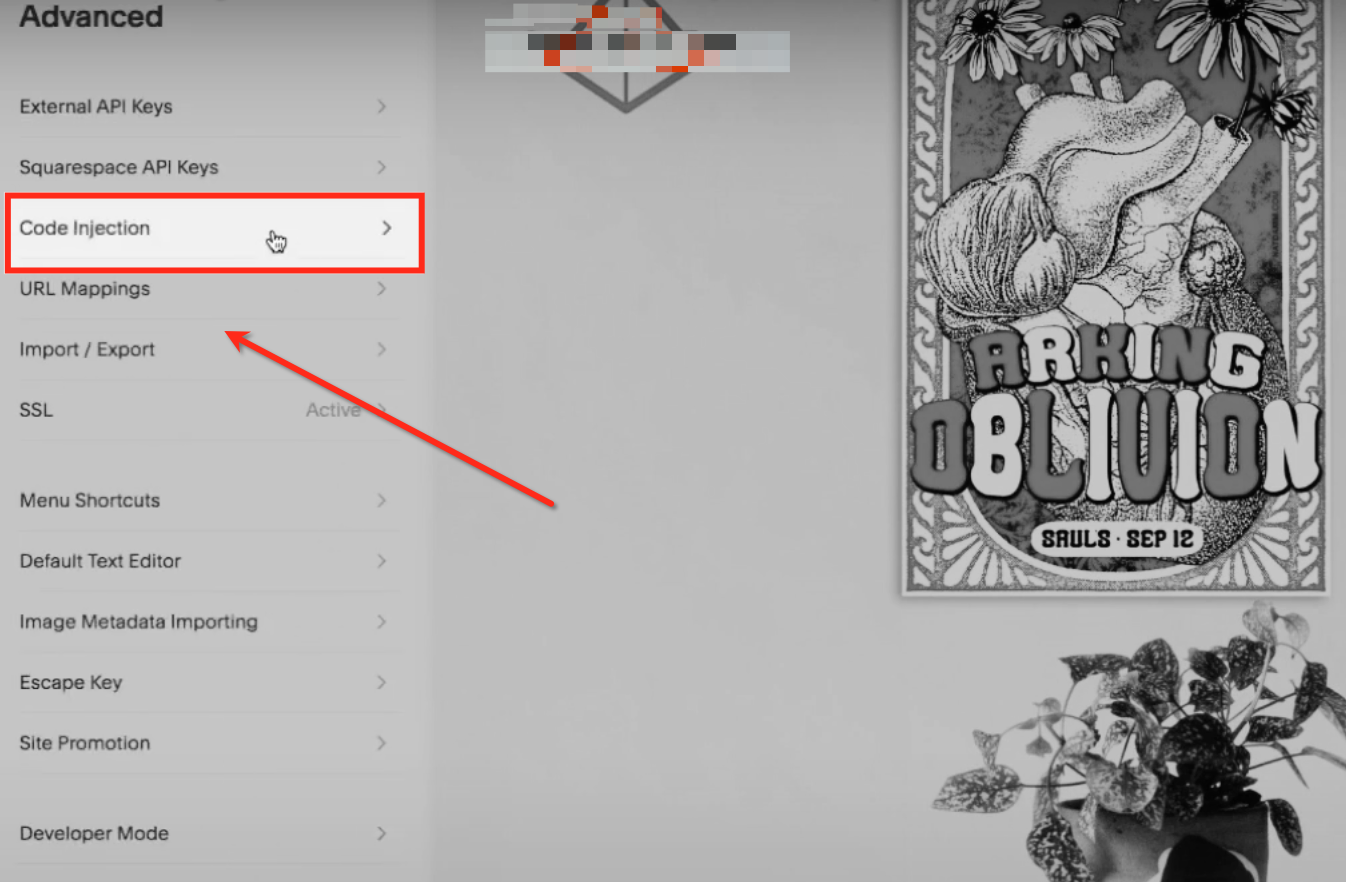
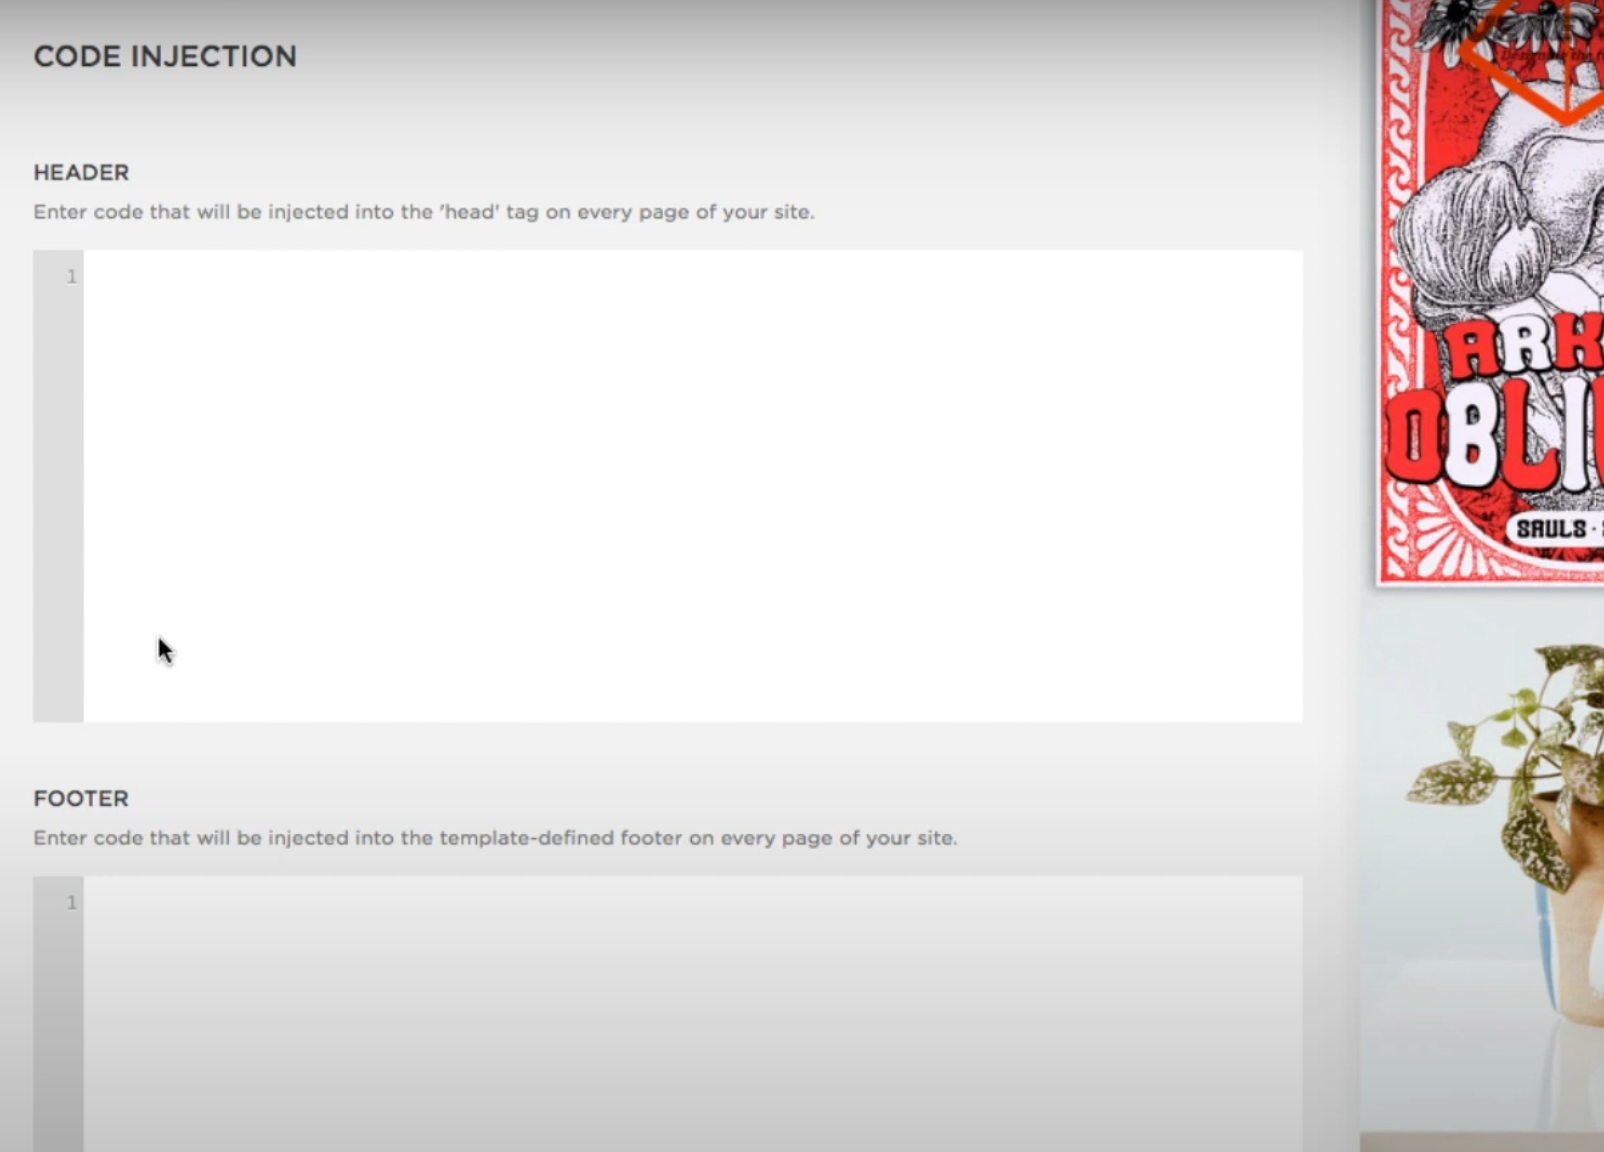
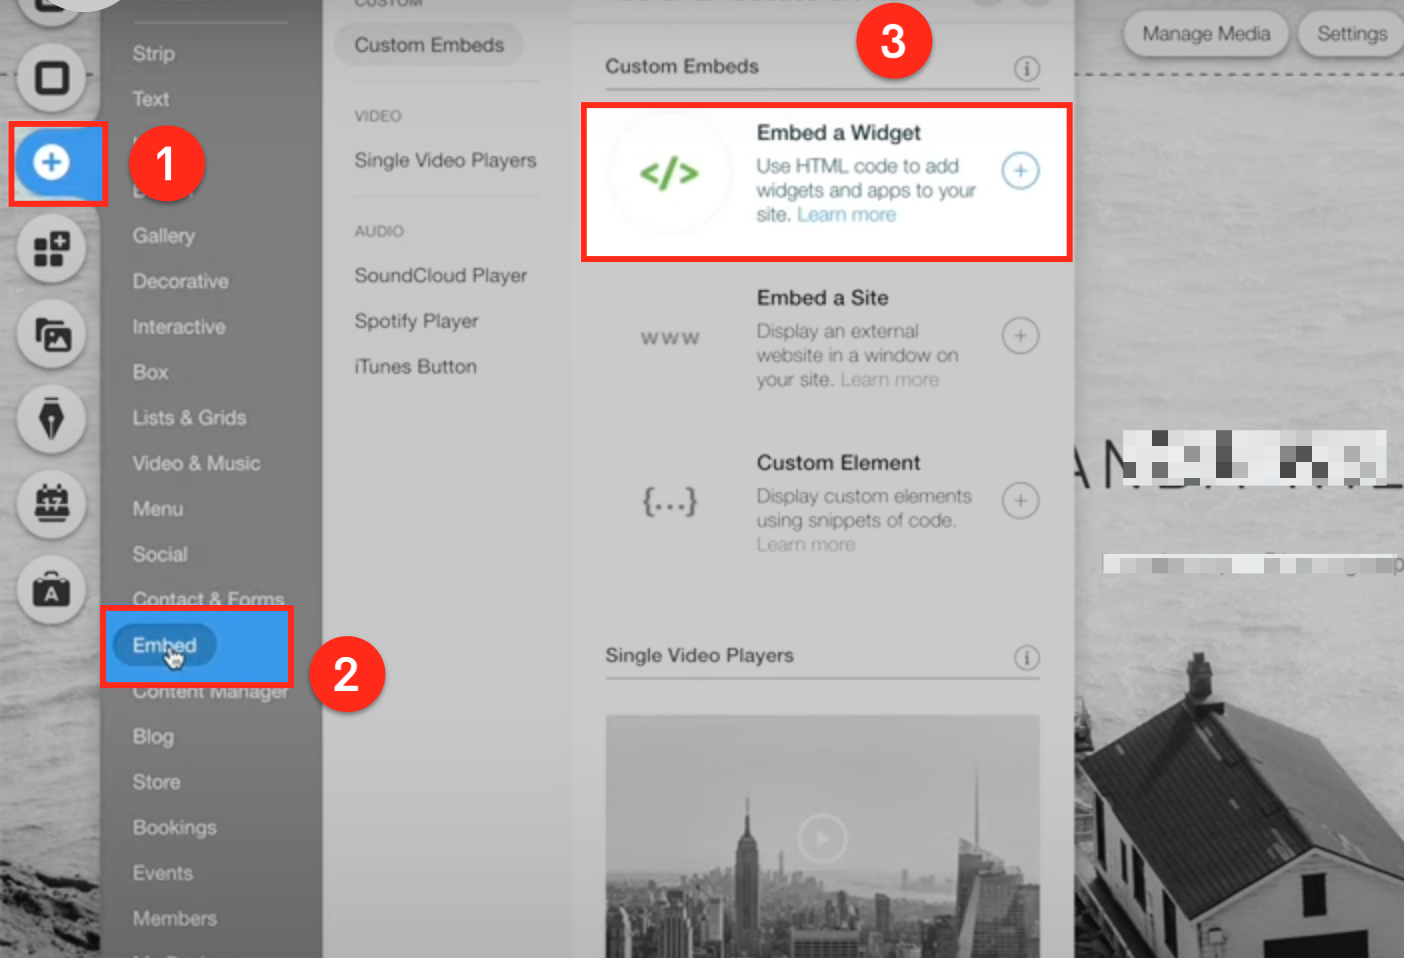
- Performance Tracking: Leverage Patient Copilot’s built-in analytics to monitor and optimize the performance of your forms. * * * ## Where to Find the Embed Link in Patient Copilot? To embed Patient Copilot forms on your website, you first need to locate the embed link in your Patient Copilot account. This link provides the script that allows the form to appear on your chosen website. Here’s how you can find it: ### Access Form Builder From the dashboard, go to the “Sites” section in the main navigation menu. Click on the “Forms” menu located at the top right corner. It will take you to the form builder area.!(https://assets.patientcopilot.ai/db2c074aa5461eff.png) ### Choose or Create a Form To embed a form, you can either select an existing one from the list or create a new form. If you’re starting fresh, simply click the “+ Add Form” button to build your form. If you already have a form ready, just select it from the available options.!(https://assets.patientcopilot.ai/1574f2a85db8e6e3.png) ### Access the Embed Link Once your form is ready, go to the “Integrate” tab located at the top right corner. Select the type of form from the options and click on the Copy Embed Code option.!(https://assets.patientcopilot.ai/e8a0a7490465d3b7.gif) ### Ready to Use Your embed link is now ready to be pasted into your website’s code, following the platform-specific instructions outlined below. * * * ## How to Embed Patient Copilot Pop-Up Forms Now that you’ve obtained the embed code for your pop-up form, let’s walk through the steps to seamlessly integrate it into your website. We’ve outlined detailed instructions for the most popular website builders. ### Squarespace #### Squarespace allows adding custom code through its code injection tool, enabling easy embedding of different types of forms. Let’s understand each step in details: Access Settings Start by logging in to your website builder account and navigating to the Settings menu in your dashboard.!(https://assets.patientcopilot.ai/8c87248382399ae7.png) #### Click Advanced Within the Settings menu, look for the Advanced option. Click on it to access additional customization features.!(https://assets.patientcopilot.ai/f0a23faa91f144b6.png) #### Select Code Injection In the Advanced settings, locate the tab labeled as “Code Injection.”!(https://assets.patientcopilot.ai/b9c395df5dfd4ba5.png) #### Add the Embed Code Decide where to add the embed code: To display the form across all pages, paste the code into the Header or Footer section of the Code Injection panel.!(https://assets.patientcopilot.ai/d5035a8c2a3b9273.png) #### Save and Publish Once the code is added, click Save in the Code Injection panel or the Per-Page Code Injection field. Publish your website to apply the changes. ** SquareSpace does not support embedding of forms on checkout pages. Ensure your forms target other areas of your website. * * * ### Wix Integration #### Wix Website Builder Options 1. Click the ”+” button to find the embed option.
- Click Embed option.
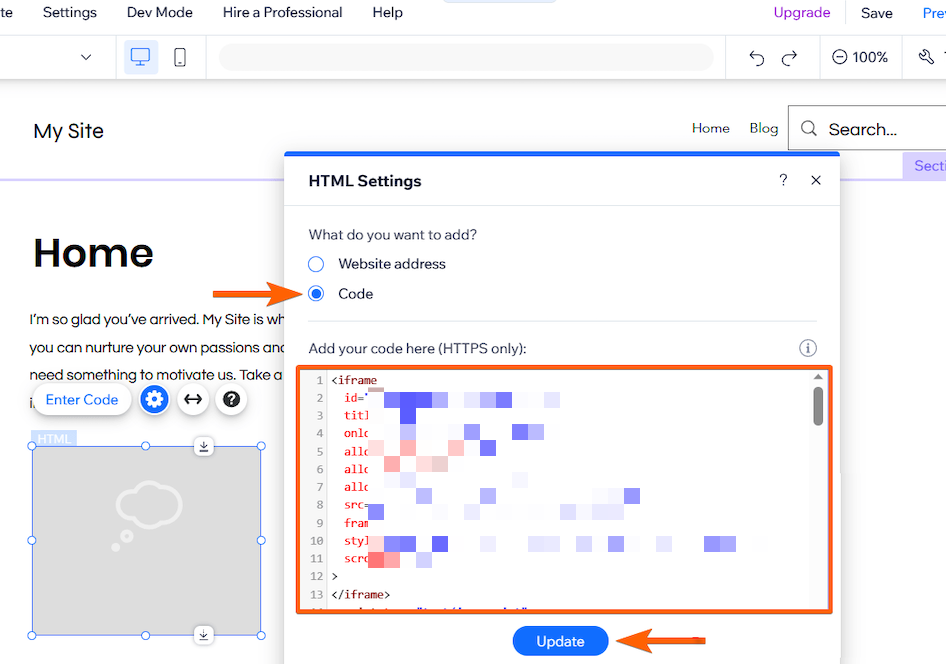
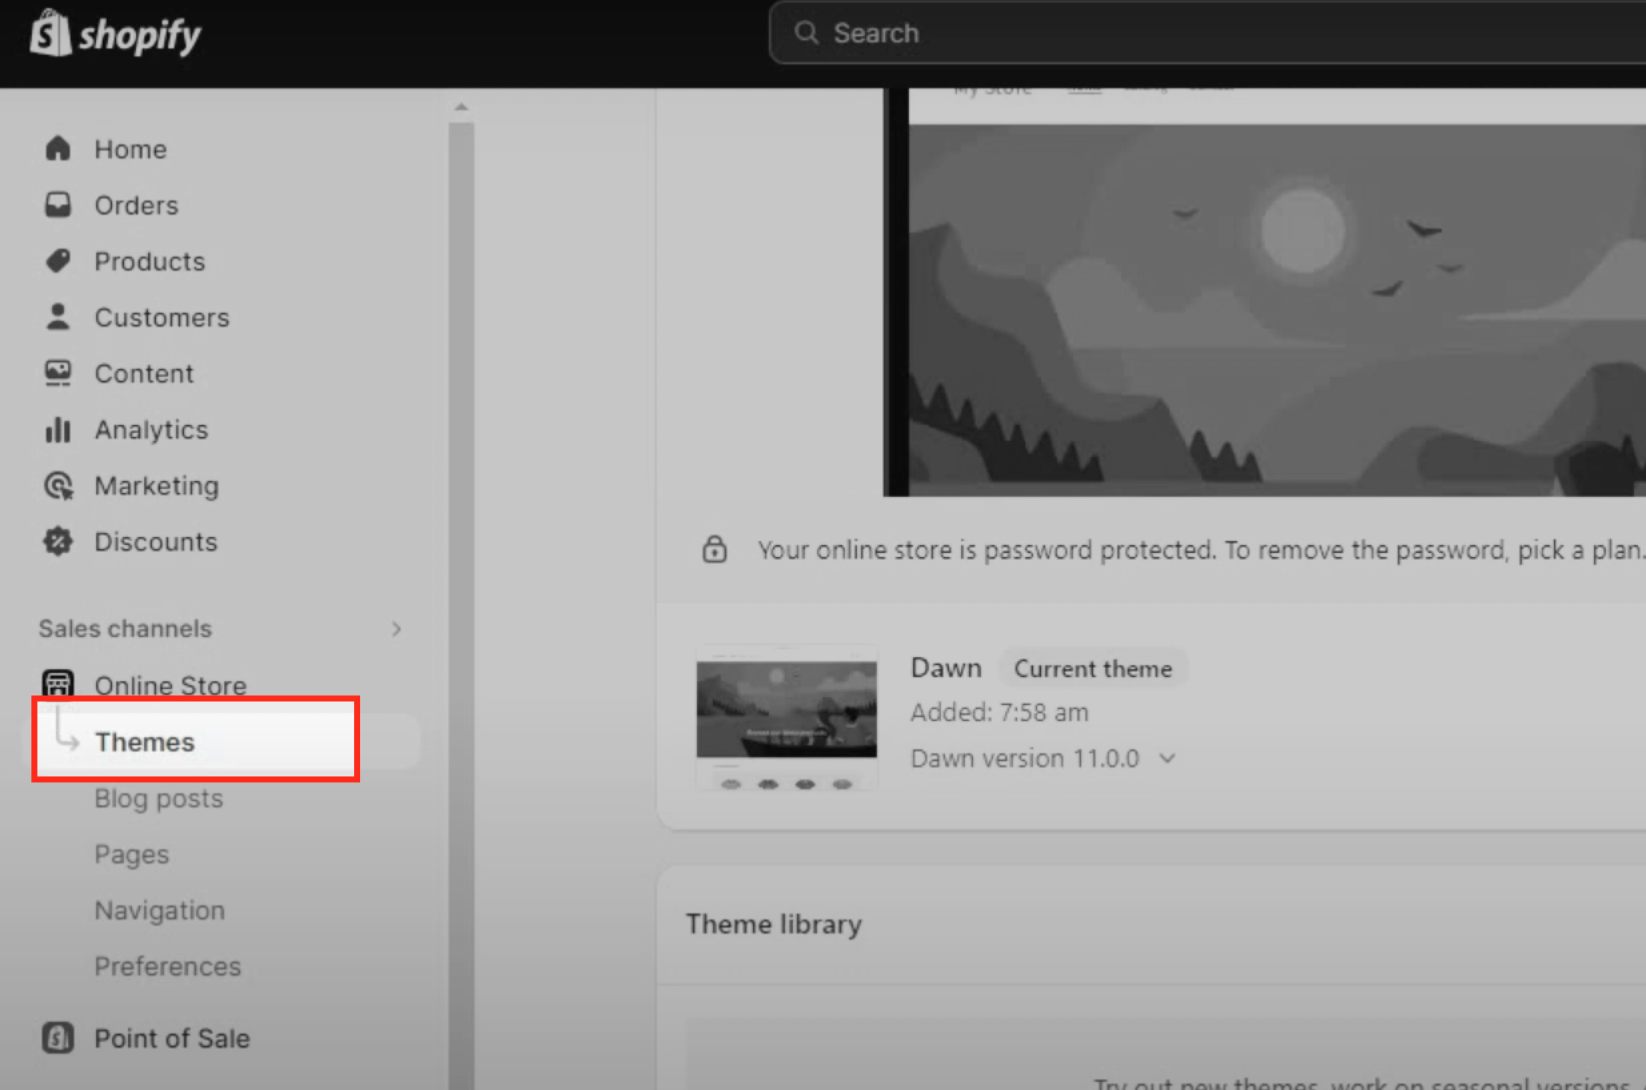
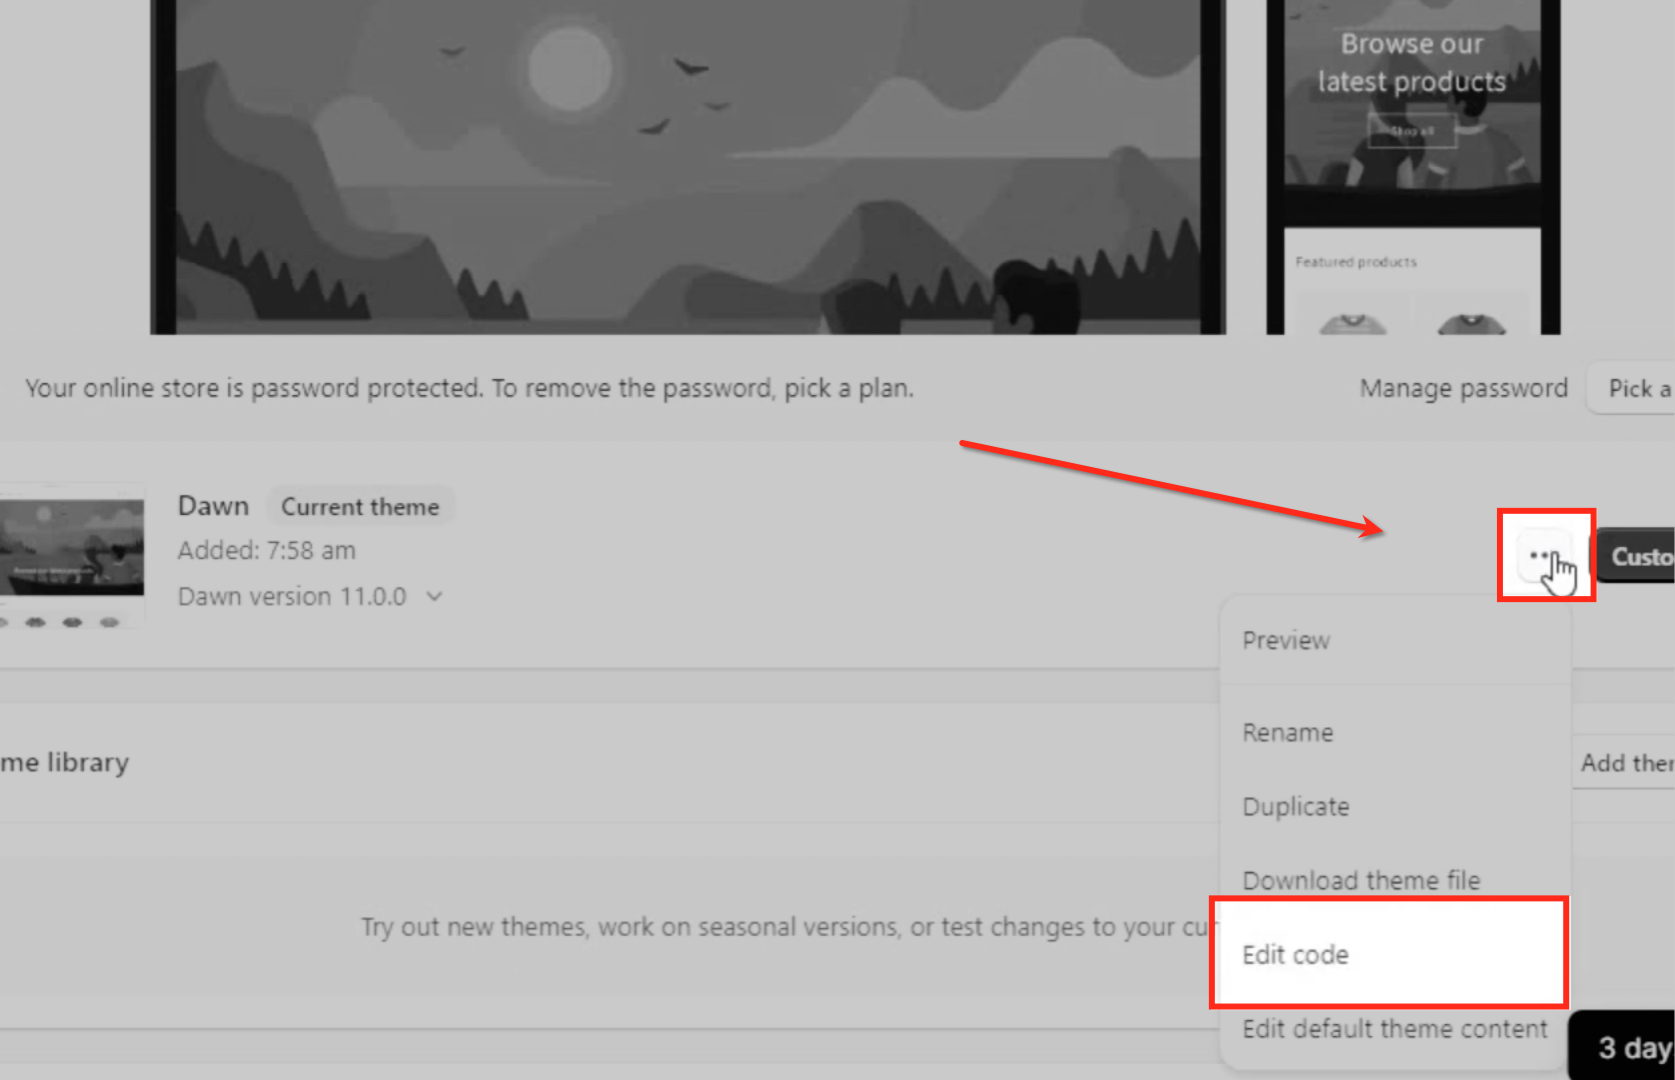
- Select the Embed a Widget option.!(https://assets.patientcopilot.ai/f7cd82510ccfa18d.png) #### Paste the Code in Wix Editor Select Code option. Paste the embed script and click Update option to save your changes.!(https://assets.patientcopilot.ai/69a4880a78d00f20.png) #### Publish Your Website Preview the site to confirm the form appears correctly. Once confirmed, publish your Wix website. * * * ### Shopify Integration Log in to your Shopify account and navigate to Online Store from the left-hand menu to manage your store’s themes. Click Themes to view all available themes, with your active theme displayed at the top.!(https://assets.patientcopilot.ai/a63947ef502bf99a.png) #### Accessing and Editing Theme Code Locate the theme you want to edit and click Three dots Actions next to its name to access customization options. From the dropdown menu, select Edit Code to open your theme’s files for adding or modifying custom code.!(https://assets.patientcopilot.ai/2b59c918ab85764a.png) Locate the theme.liquid file in the Layout section. Paste the embed code in the `` or `