Workflow Trigger – Service Booking (Services v2)
Learn what the Service Booking (Services v2) workflow trigger does, when it fires, and how it differs from the appointment status triggers. This article covers the information you need to know to start use the Service Booking Trigger in your workflows. * * * ## What is the Service Booking Trigger? The Service Booking trigger lets you automate workflows whenever a Service Booking (which may include multiple services/appointments) is created or updated. Unlike appointment-level triggers (which act on individual calendar appointments), this trigger works at the main booking level. So if a customer books multiple services at once (for example, a haircut, facial, and massage in a single checkout), the workflow is triggered only once for the entire booking — not three times. This helps you avoid duplicate actions while still giving you access to all the service details in one place.!(https://assets.patientcopilot.ai/f4726bc3d99c8b5c.png) * * * ## Key Benefits of the Service Booking Trigger Understanding the benefits helps you decide when to use the Service Booking Workflow Trigger. - Avoid Duplicate Messages: One run per booking keeps communications clean, even when multiple services are purchased. - Personalized Communication: Booking details (service, date/time, duration, staff, add-ons, timezone) help customers understand exactly what they scheduled. - Target the Right Audiences: Filter by status, service, category, tags, location, or who created/modified the booking to send relevant messages to the right people. - Multi-Service Summaries: One confirmation can list every booked service and selected add-ons, reducing confusion and follow-up questions * * * ## When It’s Triggered The workflow activates whenever a new Service Booking is created through: - Booking Page: when a customer self-books online
- User: when staff manually create a booking * * * ## Key Differences from Appointment Status Trigger Avoid mixing up booking-level and appointment-level automation by comparing the core behaviors - Appointment Status Trigger → Works only for calendar appointments.
- Service Booking Trigger → Works only for Services (v2) bookings.
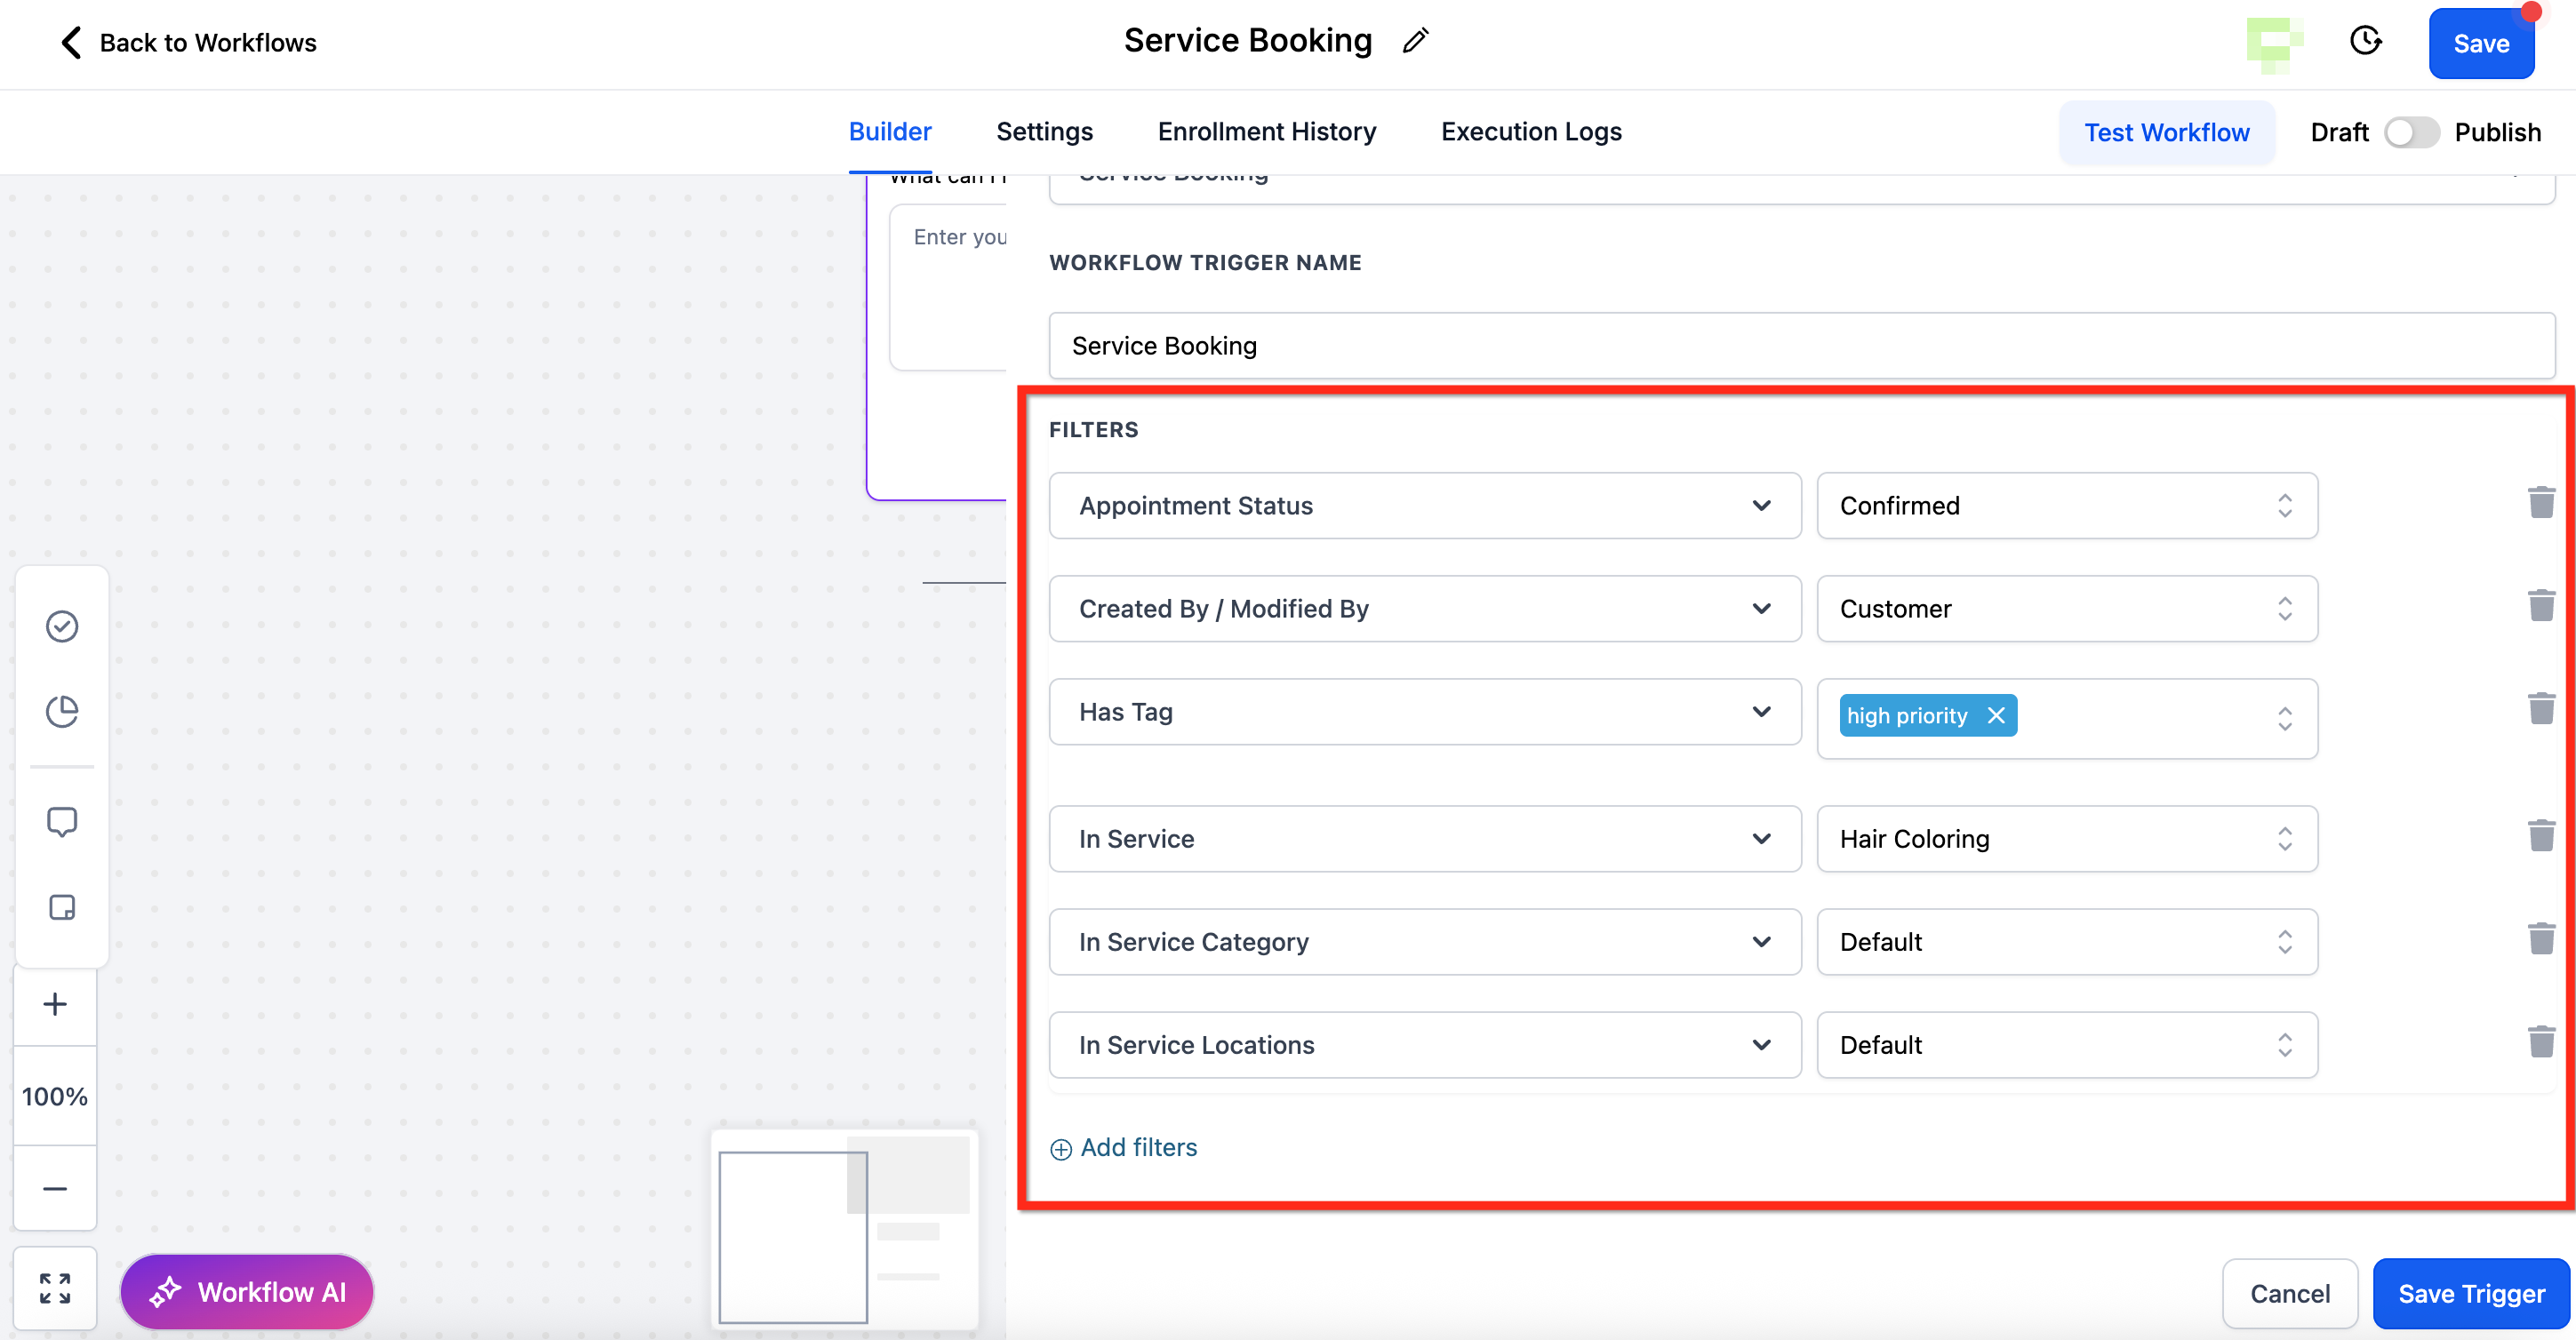
- If a booker schedules multiple services (e.g., 5 services) under one Service Booking, the workflow triggers once (not 5 times). - Example: If your workflow action is “Send Email,” only one email is sent containing all booked services — provided you use Service Booking custom values. * * * ## Available Filters Filters narrow down which bookings will start the workflow so your automation stays focused and relevant. The available filters for this trigger include: - Appointment Status (Unconfirmed, Confirmed, Showed, No Show, Cancelled, Invalid)
- Created By / Modified By
- Has Tag
- In Service (specific service)
- In Service Category (service grouping)
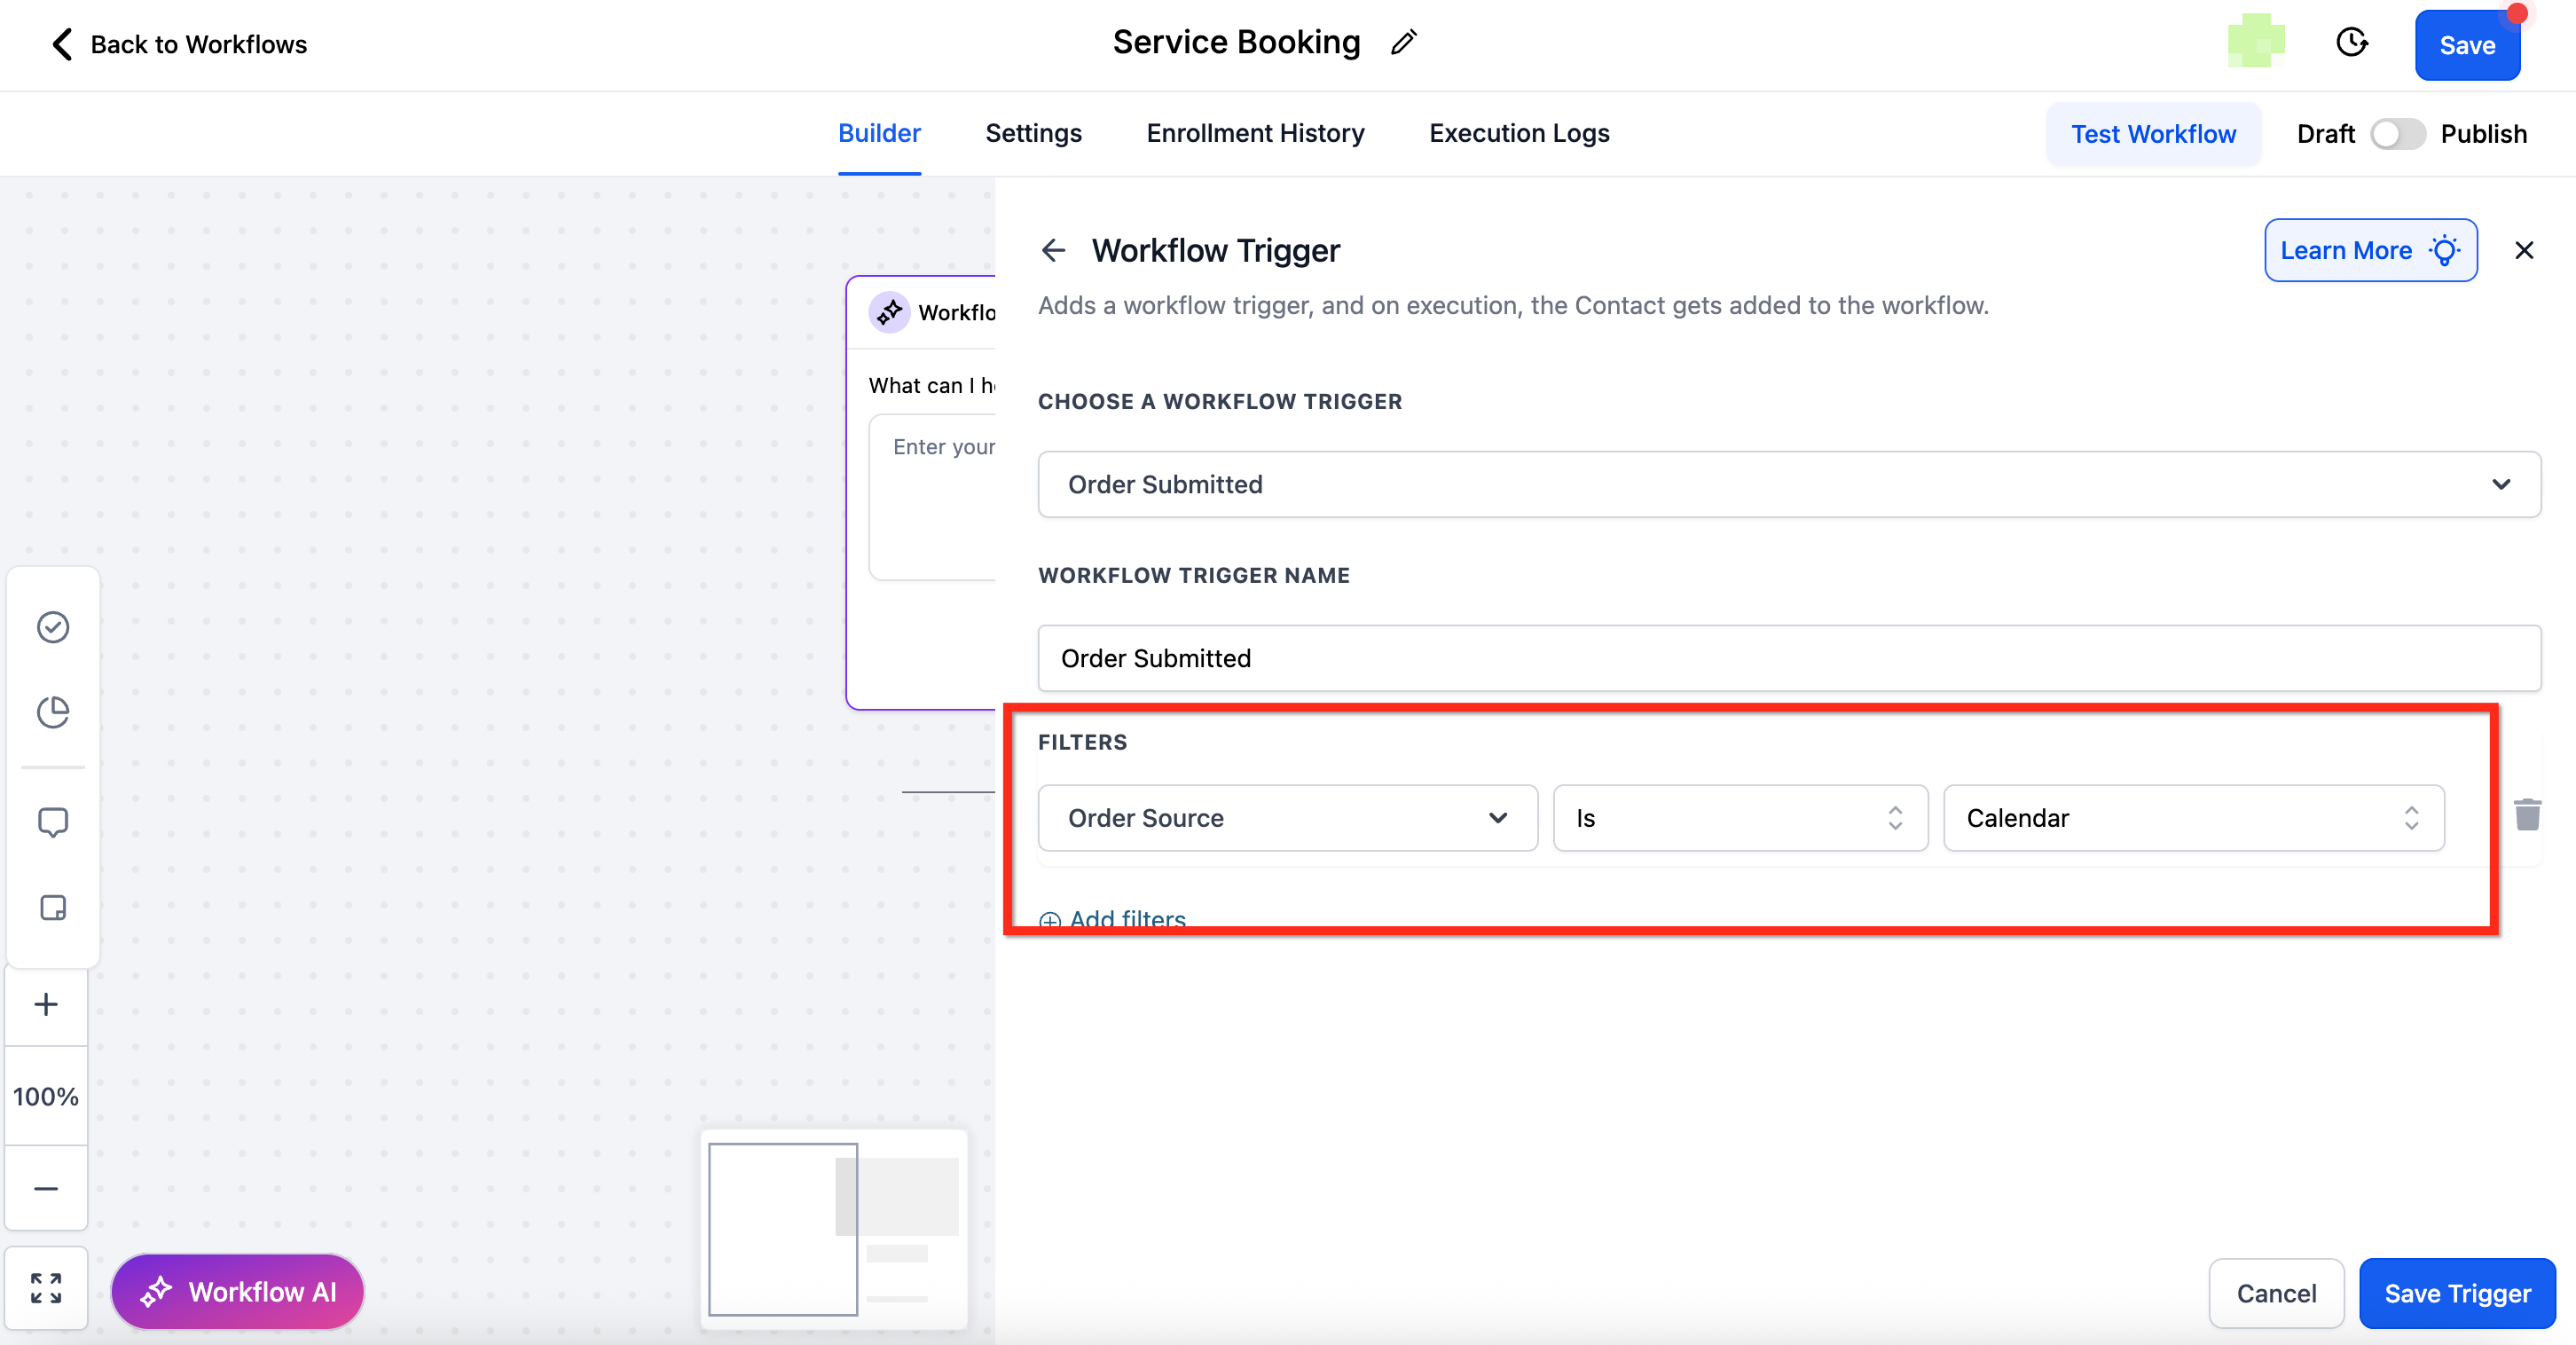
- In Service Location!(https://assets.patientcopilot.ai/cffc1df1cd70d06a.png) * * * ## Trigger Visibility This trigger is only visible if Services (v2) is enabled in the sub-account. If Services (v2) is disabled for a sub-account: - New workflows → The Service Booking trigger will not be available for selection.
- Existing workflows (that already include this trigger): - New bookings will be blocked (the trigger will not fire). - Existing bookings → If the booking status is updated, the workflow will still trigger as expected. * * * ## Order Submission Trigger Behavior with Service Bookings By default, whenever a Service Booking is created, an Order is automatically generated. To prevent duplicate automations, the Order Submitted trigger will not fire for the orders created via service-bookings. However, if you want workflows to also trigger for these orders, you must explicitly add a filter: - Order Source = Calendar This ensures that Order-based workflows only run for service-booking orders when the business explicitly wants them to — by applying the filter Order Source = Calendar to the Order Submitted trigger.!(https://assets.patientcopilot.ai/ed30051a7ec972f6.png) * * * ## Supported Appointment Actions | Action | Status | Notes |
| --- | --- | --- |
| Update Appointment Status | ✅ Supported | Based on Service Booking ID |
| Create Appointment Note | ✅ Supported | Based on Service Booking ID. Notes apply to the Service Booking as a whole |
| Book Appointment | Not supported | NA |
| Conversation AI Booking Bot | Not supported | NA |
| Eliza Booking | Not supported | NA | * * * ## Using Custom Values with Service Bookings When someone books a service, you can automatically include their booking details (like service name, date, time, price, staff, and add-ons) in your emails, texts, or reminders. ###!(https://assets.patientcopilot.ai/7d1f9b3af3bc4b4f.gif) ### What details are available? For each booked service, you can display: - Service Name: e.g., “Haircut” or “Massage” - Price: the cost of the service - Duration: how long the service lasts (e.g., 60 minutes) - Date & Time: when the appointment is scheduled - Timezone: the customer’s local timezone - Assigned Staff: which team member the appointment is with - Add-ons: any extras the customer selected (with prices) If multiple services are booked together, each service (and its add-ons) will be listed one after another. ### Example: How it looks in your template What this does: - The
{{#each serviceBooking.services}}... {{/each}}block repeats everything inside it for each booked service. - So if a customer books 3 services, this section will repeat 3 times (once for each service). - Add-ons (if selected) will be listed under the respective service. Looking for more information on custom values? Check out How to use Custom Values * * * ## How to Customize It If you want to show additional information (like a staff member’s full name), simply place your cursor inside the block and add the extra placeholder. Example with staff name included: This way, you can fully personalize confirmation emails or reminders with the exact service details your customer booked. * * * ## How to Set Up the Service Booking Workflow Trigger A proper setup ensures your workflow runs at the right time, targets the right bookings, and communicates the right details. #### Step 1: Create or Open a Workflow - Select the Automation tab in the left-side navigation bar - To open an existing workflow, click on the workflow name
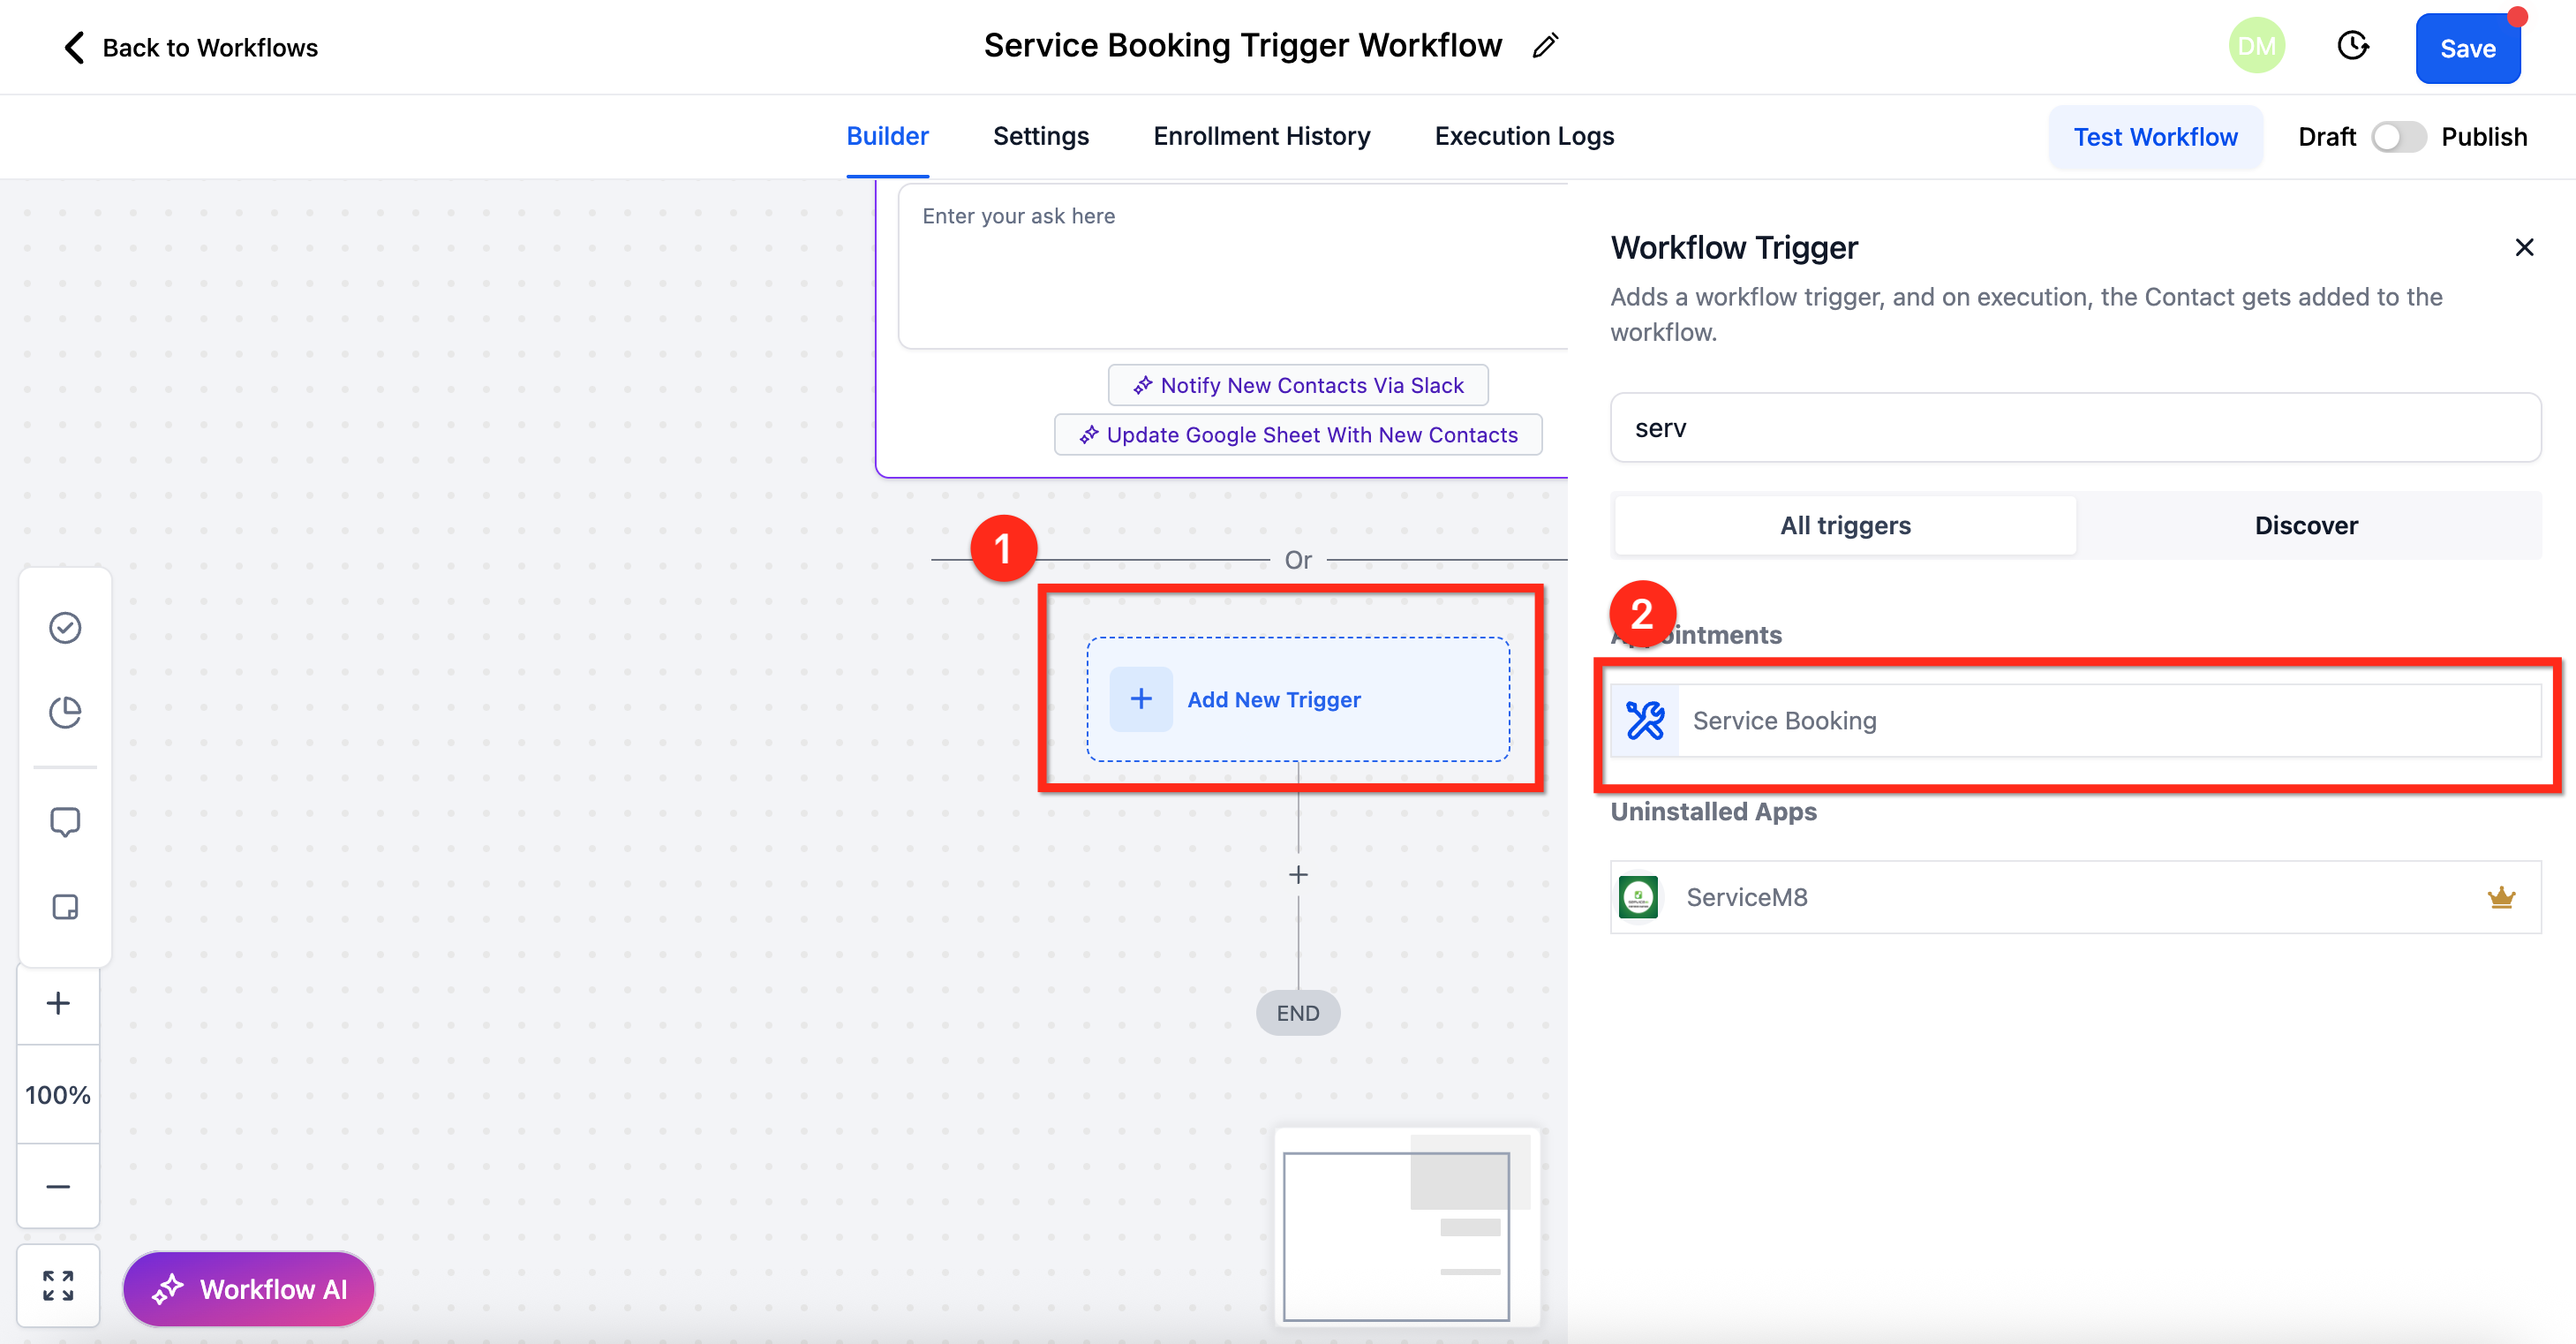
- To create a new Workflow, use the + Create New Workflow button!(https://assets.patientcopilot.ai/311b5de38c03fce5.png) #### Step 2: Add the Trigger - Create a new trigger by clicking + Add New Trigger
- Using the search bar, select the Service Booking trigger!(https://assets.patientcopilot.ai/bbd903634ee95c8f.png) #### Step 3: Add Filters - Configure the trigger to your needs using the necessary filters. Click here for more information on the available filters.
- Once fully configured, save your changes using the blue Save Trigger button!(https://assets.patientcopilot.ai/c02e6f54f9acc2d2.png) * * * ## Frequently Asked Questions Q: How do I make the Service Booking trigger available in my sub-account? Ensure Services (v2) is enabled. If Services is disabled, the trigger will not be available for new workflows. Click here for more information on enabling Services Q: Can I include staff details in my confirmations or reminders? Yes. You can use customer values to reference the assigned staff member (or other information such as price, date, location, etc) in your communications. * * * ## Related Articles - (https://help.patientcopilot.ai/en/support/solutions/articles/155000006240)[Services - Overview & How to Get Started](https://help.patientcopilot.ai/en/support/solutions/articles/155000006240)(https://help.patientcopilot.ai/en/support/solutions/articles/155000006240)
- Global Settings in Services
- How to Create Services
- Configuring Staff in Services
- Categories in Services
- Resources in Services
- How to use Custom Values(https://help.patientcopilot.ai/en/support/solutions/articles/155000006140)