Creating and Managing Custom Unsubscribe Links
Email Compliance A clean, branded opt-out flow built on trigger links and workflows — keeping you CAN-SPAM and GDPR compliant while protecting your sender reputation. Ensuring that your email recipients have a clear and easy way to unsubscribe isn’t just a best practice — it’s essential for maintaining trust and improving engagement. Patient Copilot lets you create custom unsubscribe links, giving your contacts a seamless branded experience while keeping you compliant with email regulations. Table of Contents 1. 1 What Are Custom Unsubscribe Links? 2. 2 Key Benefits of Custom Unsubscribe Links 3. 3 Create an Unsubscribe Landing Page 4. 4 Set Up a Trigger Link 5. 5 Create a Workflow to Manage Unsubscribes 6. 6 Insert the Unsubscribe Link Into Your Emails 7. 7 Frequently Asked Questions 8. 8 Related Articles 1 ## What Are Custom Unsubscribe Links? Custom unsubscribe links are personalized opt-out links embedded in marketing emails, allowing recipients to unsubscribe from future communications in a way that aligns with your brand. Unlike default unsubscribe links — which often redirect users to a generic confirmation page — custom unsubscribe links give you full control over the experience, from the click through to the confirmation screen. 2 ## Key Benefits of Custom Unsubscribe Links Four reasons to replace the default unsubscribe experience with a custom flow: - Enhance User Experience: Direct users to a branded landing page that confirms their opt-out decision.
- Provide Subscription Preferences: Allow users the option to opt out of specific types of emails instead of all communications.
- Maintain Compliance: Ensure compliance with email marketing regulations like the CAN-SPAM Act and GDPR.
- Improve Deliverability: Reduce spam complaints by offering a clear and easy way for recipients to unsubscribe. Note Custom unsubscribe links in Patient Copilot use trigger links and workflows to automatically mark contacts as “Do Not Disturb” (DND), preventing them from receiving further emails. Setup Guide ## Creating Custom Unsubscribe Links Follow these four steps to set up a complete custom unsubscribe flow in Patient Copilot. 3 ## Step 1: Create an Unsubscribe Landing Page Design a landing page that confirms the unsubscribe action. This page should inform users they have successfully unsubscribed — and, if desired, offer options to manage their subscription preferences. 1. Navigate to Sites and then Funnels from your Patient Copilot sub-account.
- Click on + New Funnel and name it Email Unsubscribe.
- Within this funnel, add a new step named “Email Unsubscribe Page” with a path like /unsubscribe.
 Design Tip Design the page content to reflect the unsubscribe confirmation message. A demo page is shown below for reference. Check out the Funnel Styling guide for more information.
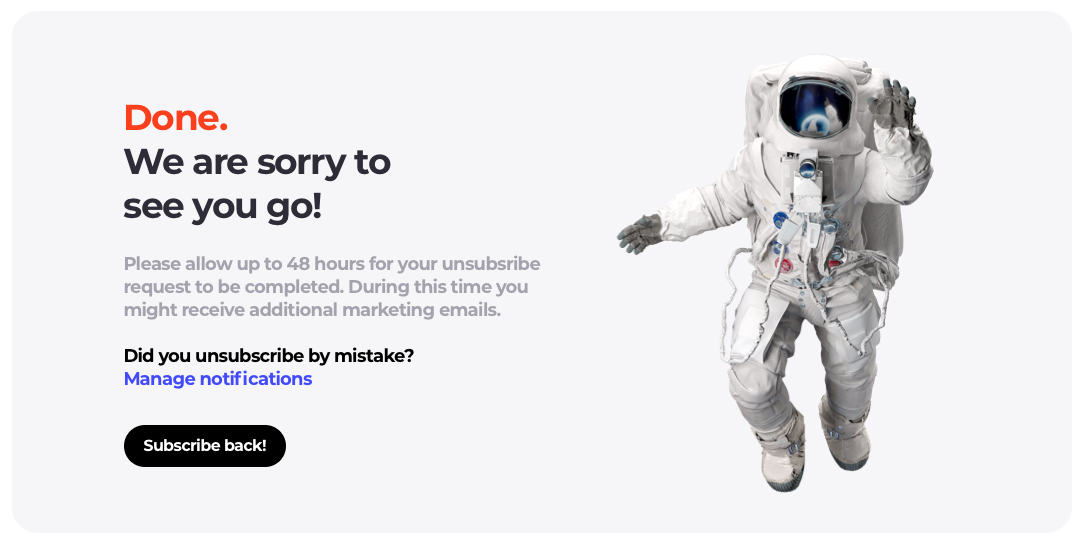 4 ## Step 2: Set Up a Trigger Link A trigger link in Patient Copilot allows you to perform specific actions when a contact clicks on a particular link. In this case, clicking the unsubscribe link will update their preferences. 1. Go to Marketing then Trigger Links from your Patient Copilot sub-account.
 - Select Links from the dropdown and click the Add Link button.
- Add the name of the link.
- Paste the URL of the unsubscribe landing page you created earlier into the Link URL field.
- Click Save.
 5 ## Step 3: Create a Workflow to Manage Unsubscribes Set up a workflow that automatically updates the contact’s status when they click the unsubscribe link. 1. Navigate to Automation from your Patient Copilot sub-account and select Workflows.
 - Click + Create Workflow and select + Start from Scratch.
- Name the workflow.
 Sub-step A Set Up the Trigger 1. Click Add New Trigger and select Trigger Link Clicked from events.
 - Add the Workflow Trigger Name.
- Click Add Filter and select Trigger Link from the drop-down.
- Select your previously saved Email Unsubscribe Trigger Link from the drop-down.
- Click the Save Trigger button.
 Sub-step B Add the DND Action 1. Click the + button to add an Action.
 - Select the Enable/Disable DND action.
- Select Enable DND for Specific Channels and Email from the Channels drop-down.
- Save and Publish the workflow.
 6 ## Step 4: Insert the Unsubscribe Link Into Your Emails 1. In your email template editor, add text like Unsubscribe or Unsubscribe from this list.
 - Highlight this text and click the link icon.
- Click Trigger Links from the Link URL dropdown and select the saved Unsubscribe Link.
- Save the template. Important: Workflow Emails Need Manual Unsubscribe Links Emails sent via workflows do not automatically include unsubscribe links. To stay compliant, you must manually add the unsubscribe trigger link to each email template used in a workflow. Highlight text such as “Unsubscribe” or “Click here to unsubscribe” in your email template, click the link icon, and select your custom unsubscribe trigger link from the dropdown. This ensures recipients can opt out no matter where the email originates.
 You’re All Set Custom unsubscribe links protect your sender reputation, keep your list healthy, and give your audience a clean, branded experience. Once these four steps are in place, every email you send can carry a compliant opt-out path. ## Frequently Asked Questions Q: Why should I create a custom unsubscribe link instead of using the default one? A custom unsubscribe link allows you to maintain brand consistency and control the entire opt-out process — from link text to confirmation page — delivering a much better user experience than a generic default. Q: Can I customize the unsubscribe confirmation page? Yes. You can design the unsubscribe landing page to match your branding and include messages or options for users to manage their preferences. Q: How does the “Set Contact DND” action work? The “Enable/Disable DND” action marks the contact as Do Not Disturb for the channel(s) you specify — typically Email — which stops them from receiving any further communications on that channel. Q: Is it necessary to include an unsubscribe link in all emails? Yes. Including an unsubscribe link in all marketing emails is a legal requirement in many countries (including CAN-SPAM and GDPR) and helps maintain strong email deliverability. Q: Can I track who has unsubscribed from my emails? Yes. Patient Copilot allows you to monitor contacts who have clicked the unsubscribe link through the trigger link analytics, and DND status is visible on each contact record. Q: Do emails sent from workflows include the unsubscribe link automatically? No. Workflow emails do not automatically include an unsubscribe link. You must manually add the unsubscribe trigger link to each email template used inside your workflows to remain compliant. Q: What happens if a contact marked DND is re-added to a list? DND status persists on the contact record. Even if they’re added to a new list or workflow, they won’t receive emails on the channel set to DND unless a user manually toggles it off on the contact profile. Q: Can I use the same unsubscribe trigger link across multiple email templates? Yes — that’s the whole point. One trigger link can be reused across every email template, campaign, and workflow. Set up the flow once, then drop the same link wherever you need it. Was this article helpful? That’s Great! Thank you for your feedback Sorry! We couldn’t be helpful Thank you for your feedback Feedback sent We appreciate your effort and will try to fix the article