How to create an Embedded Voice AI Chat Widget
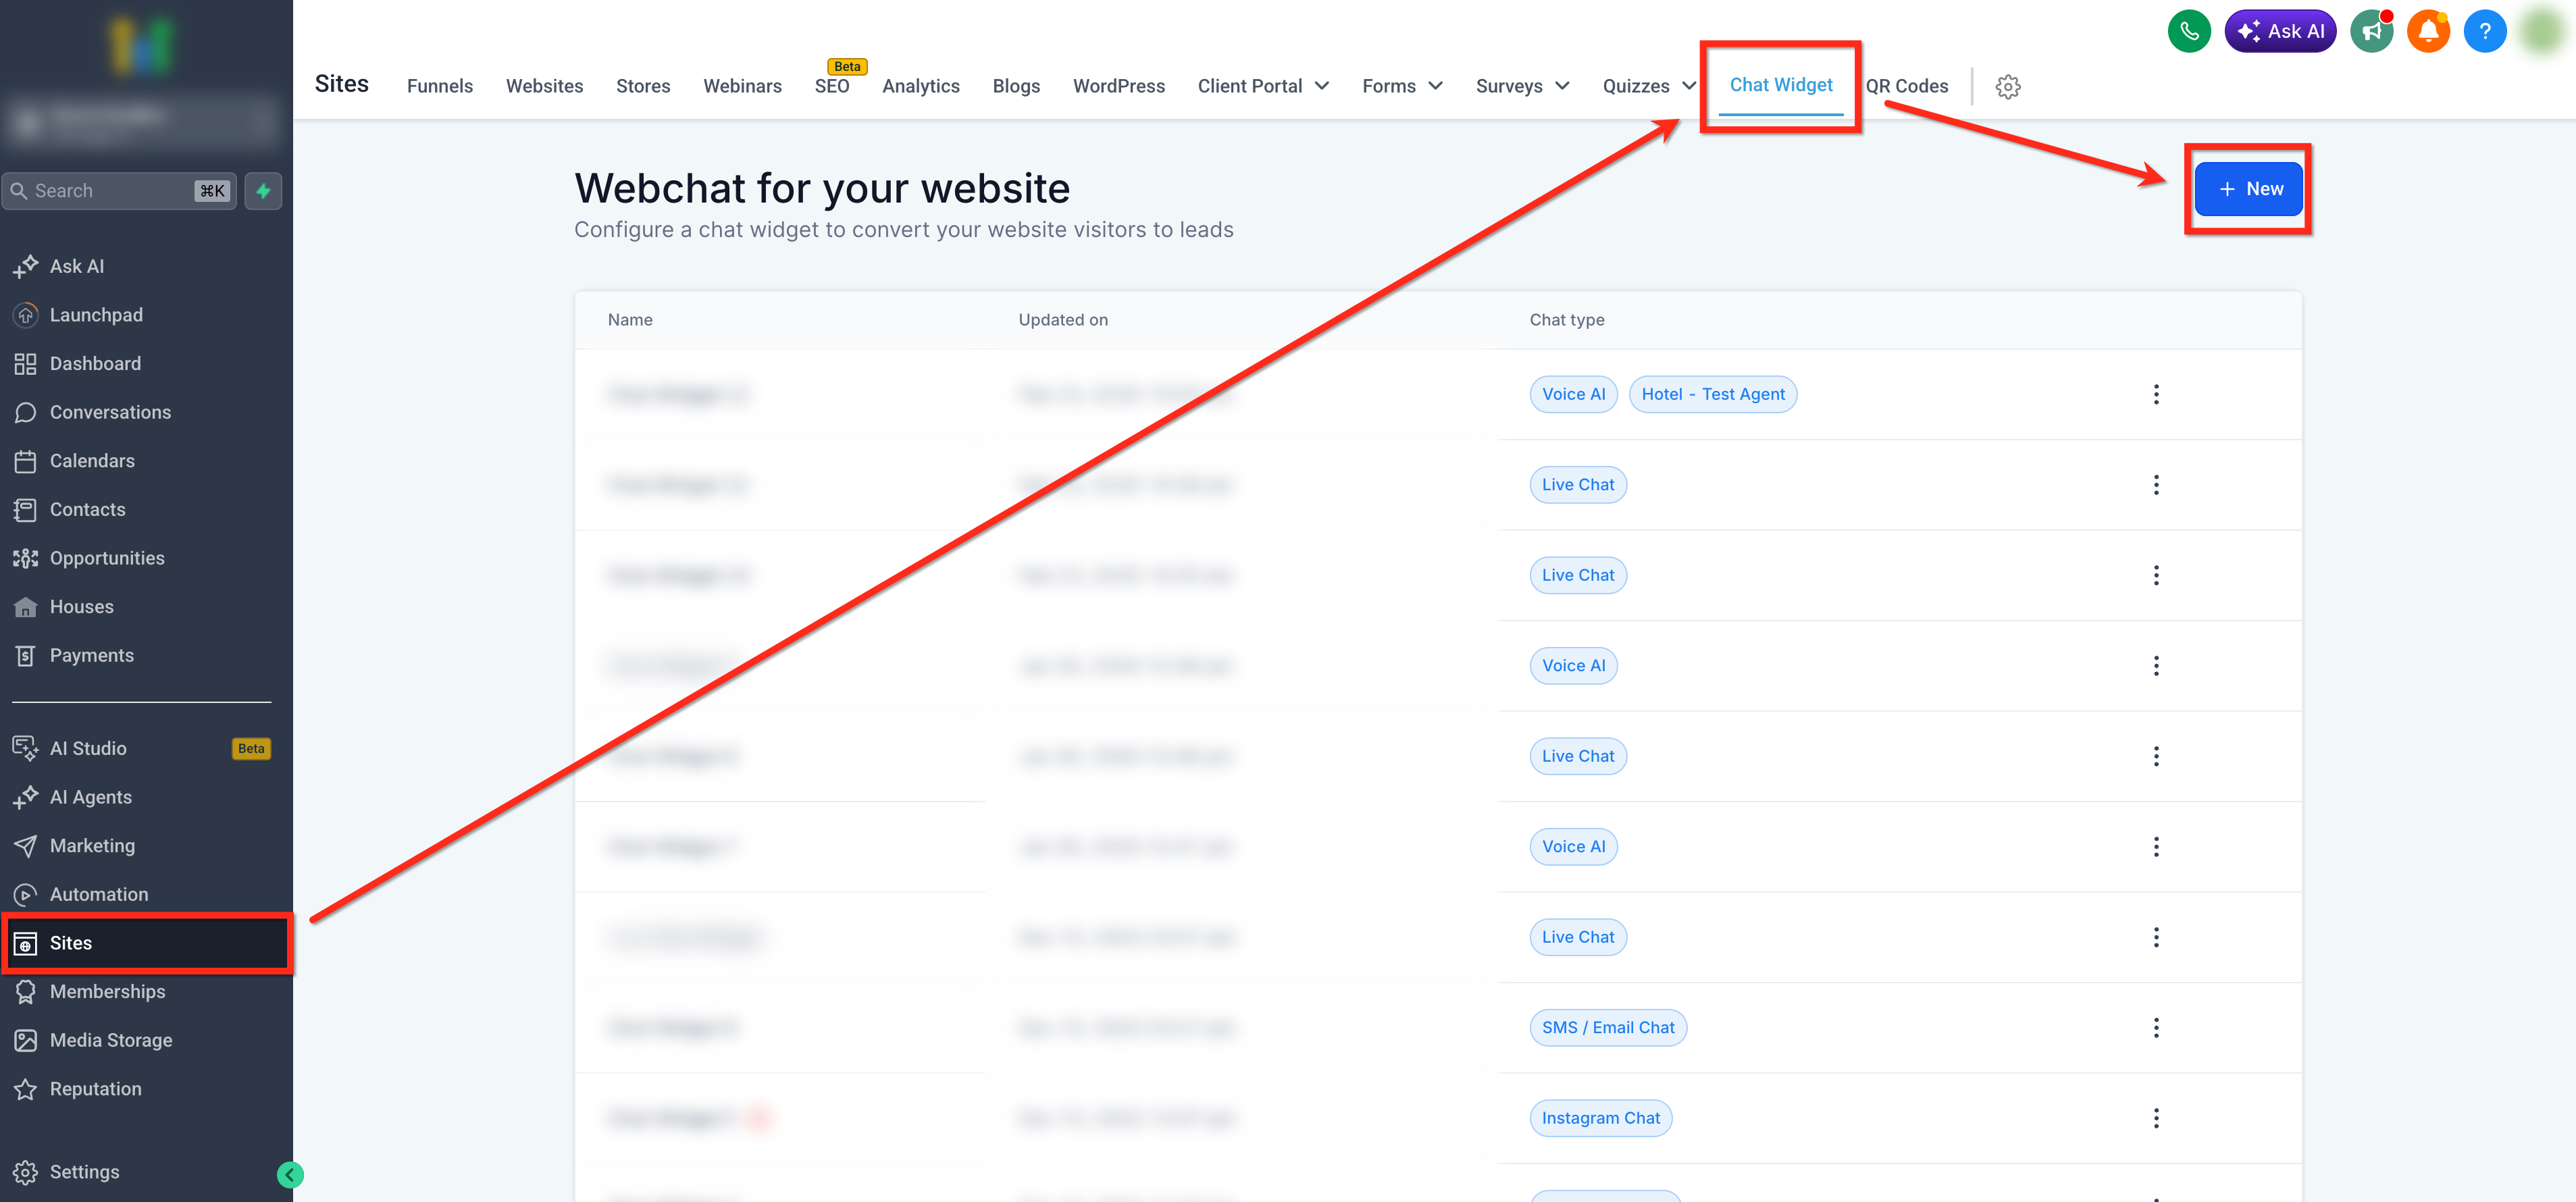
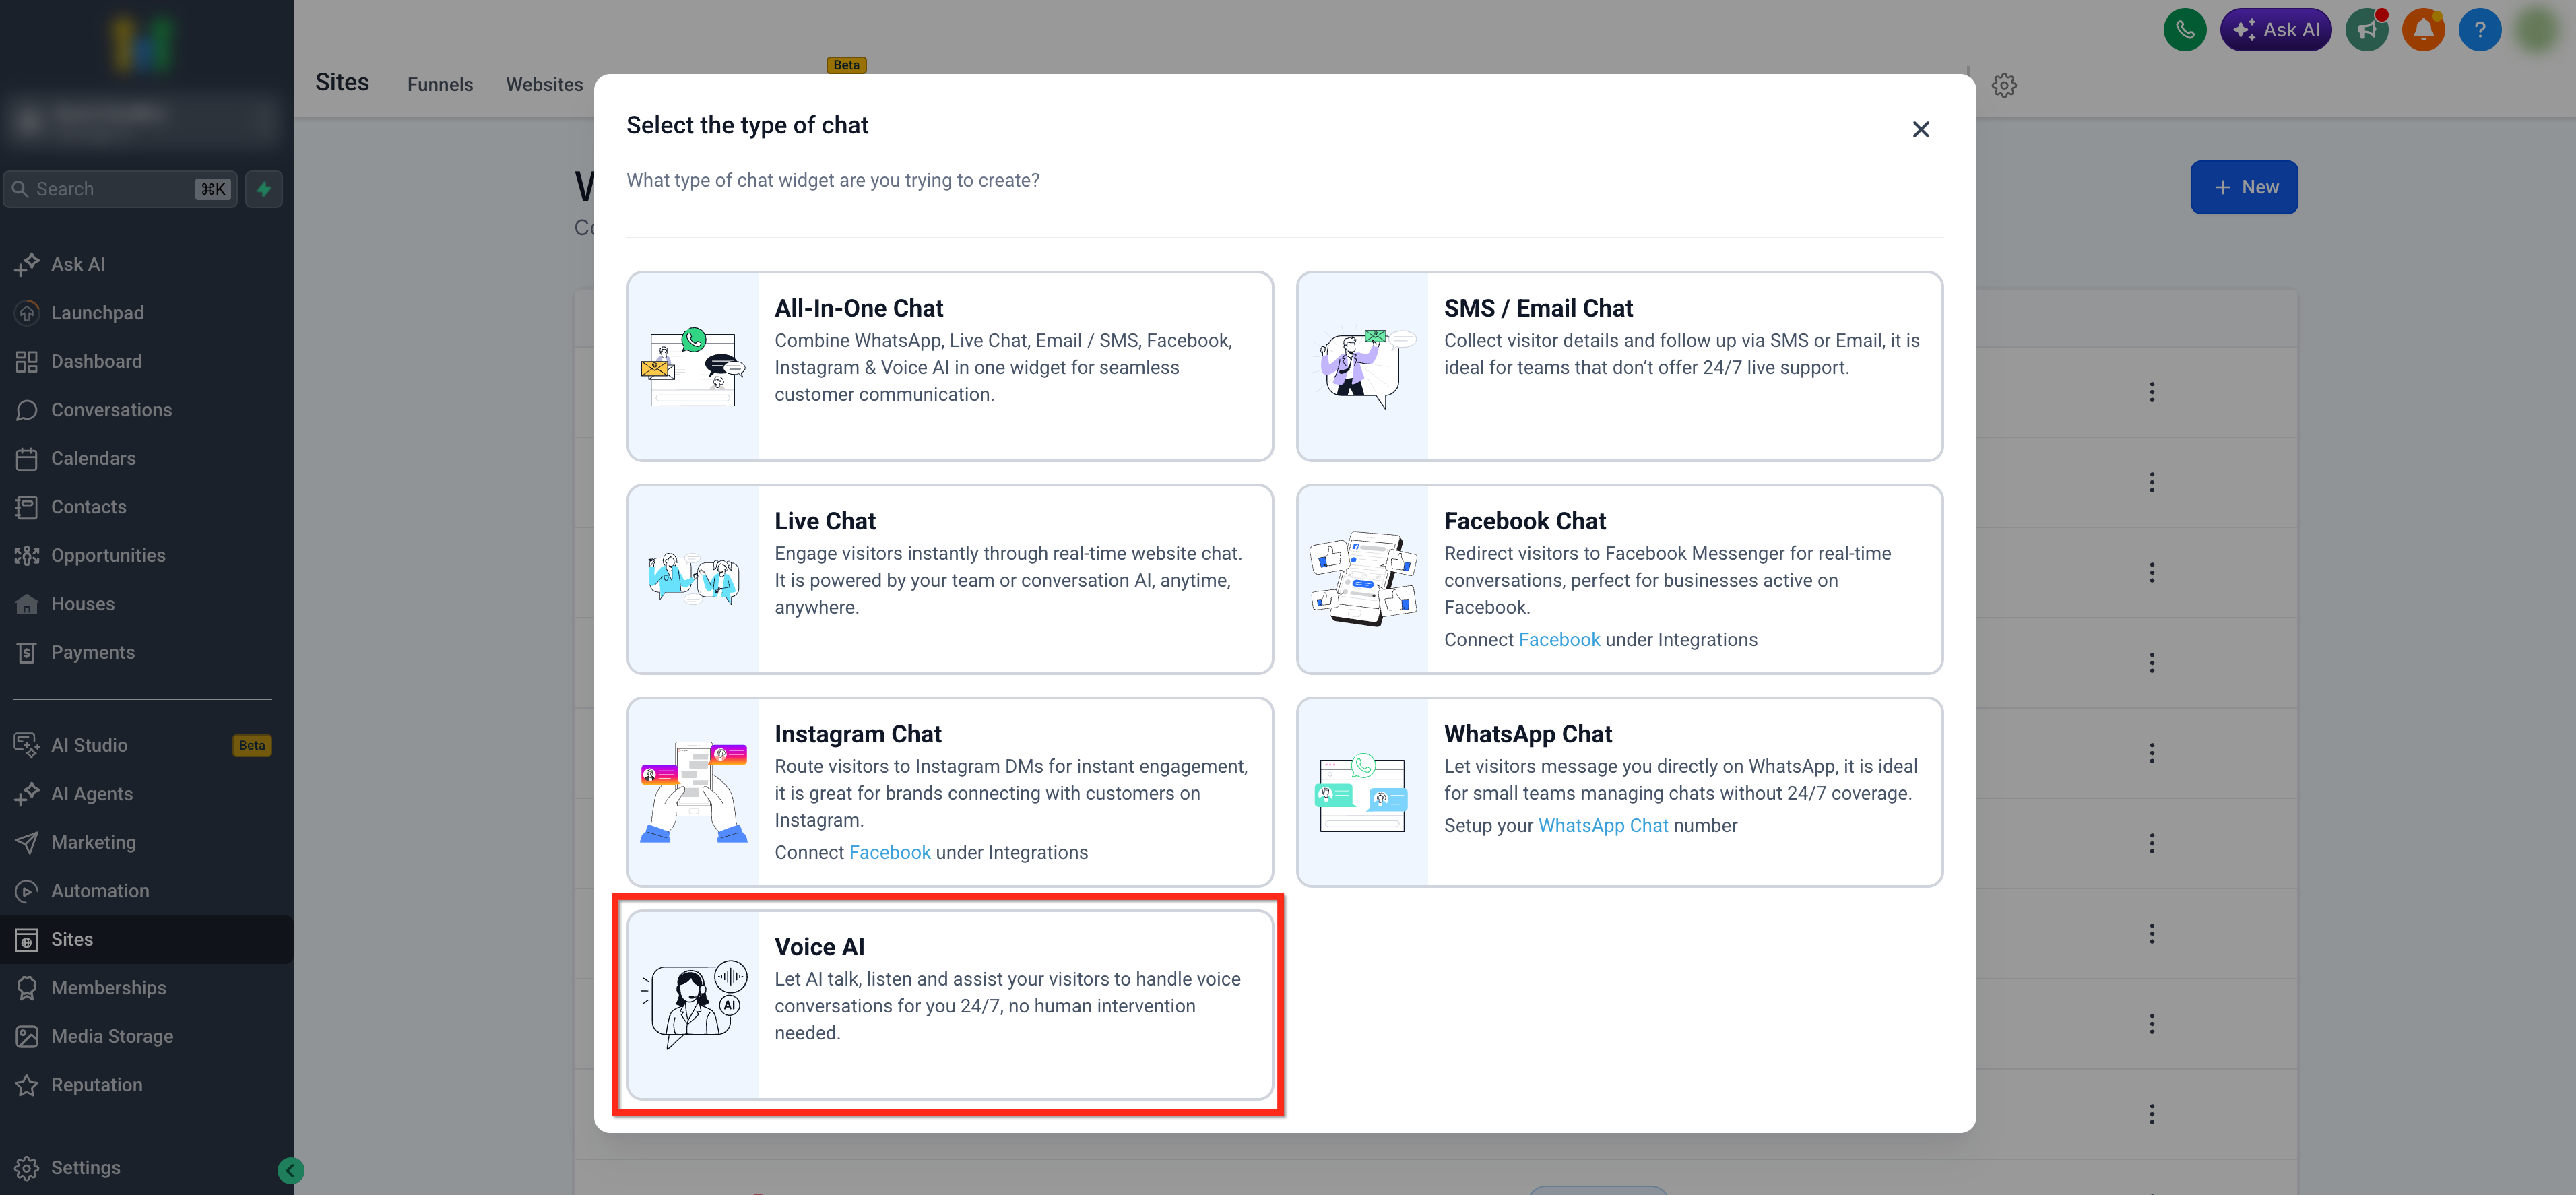
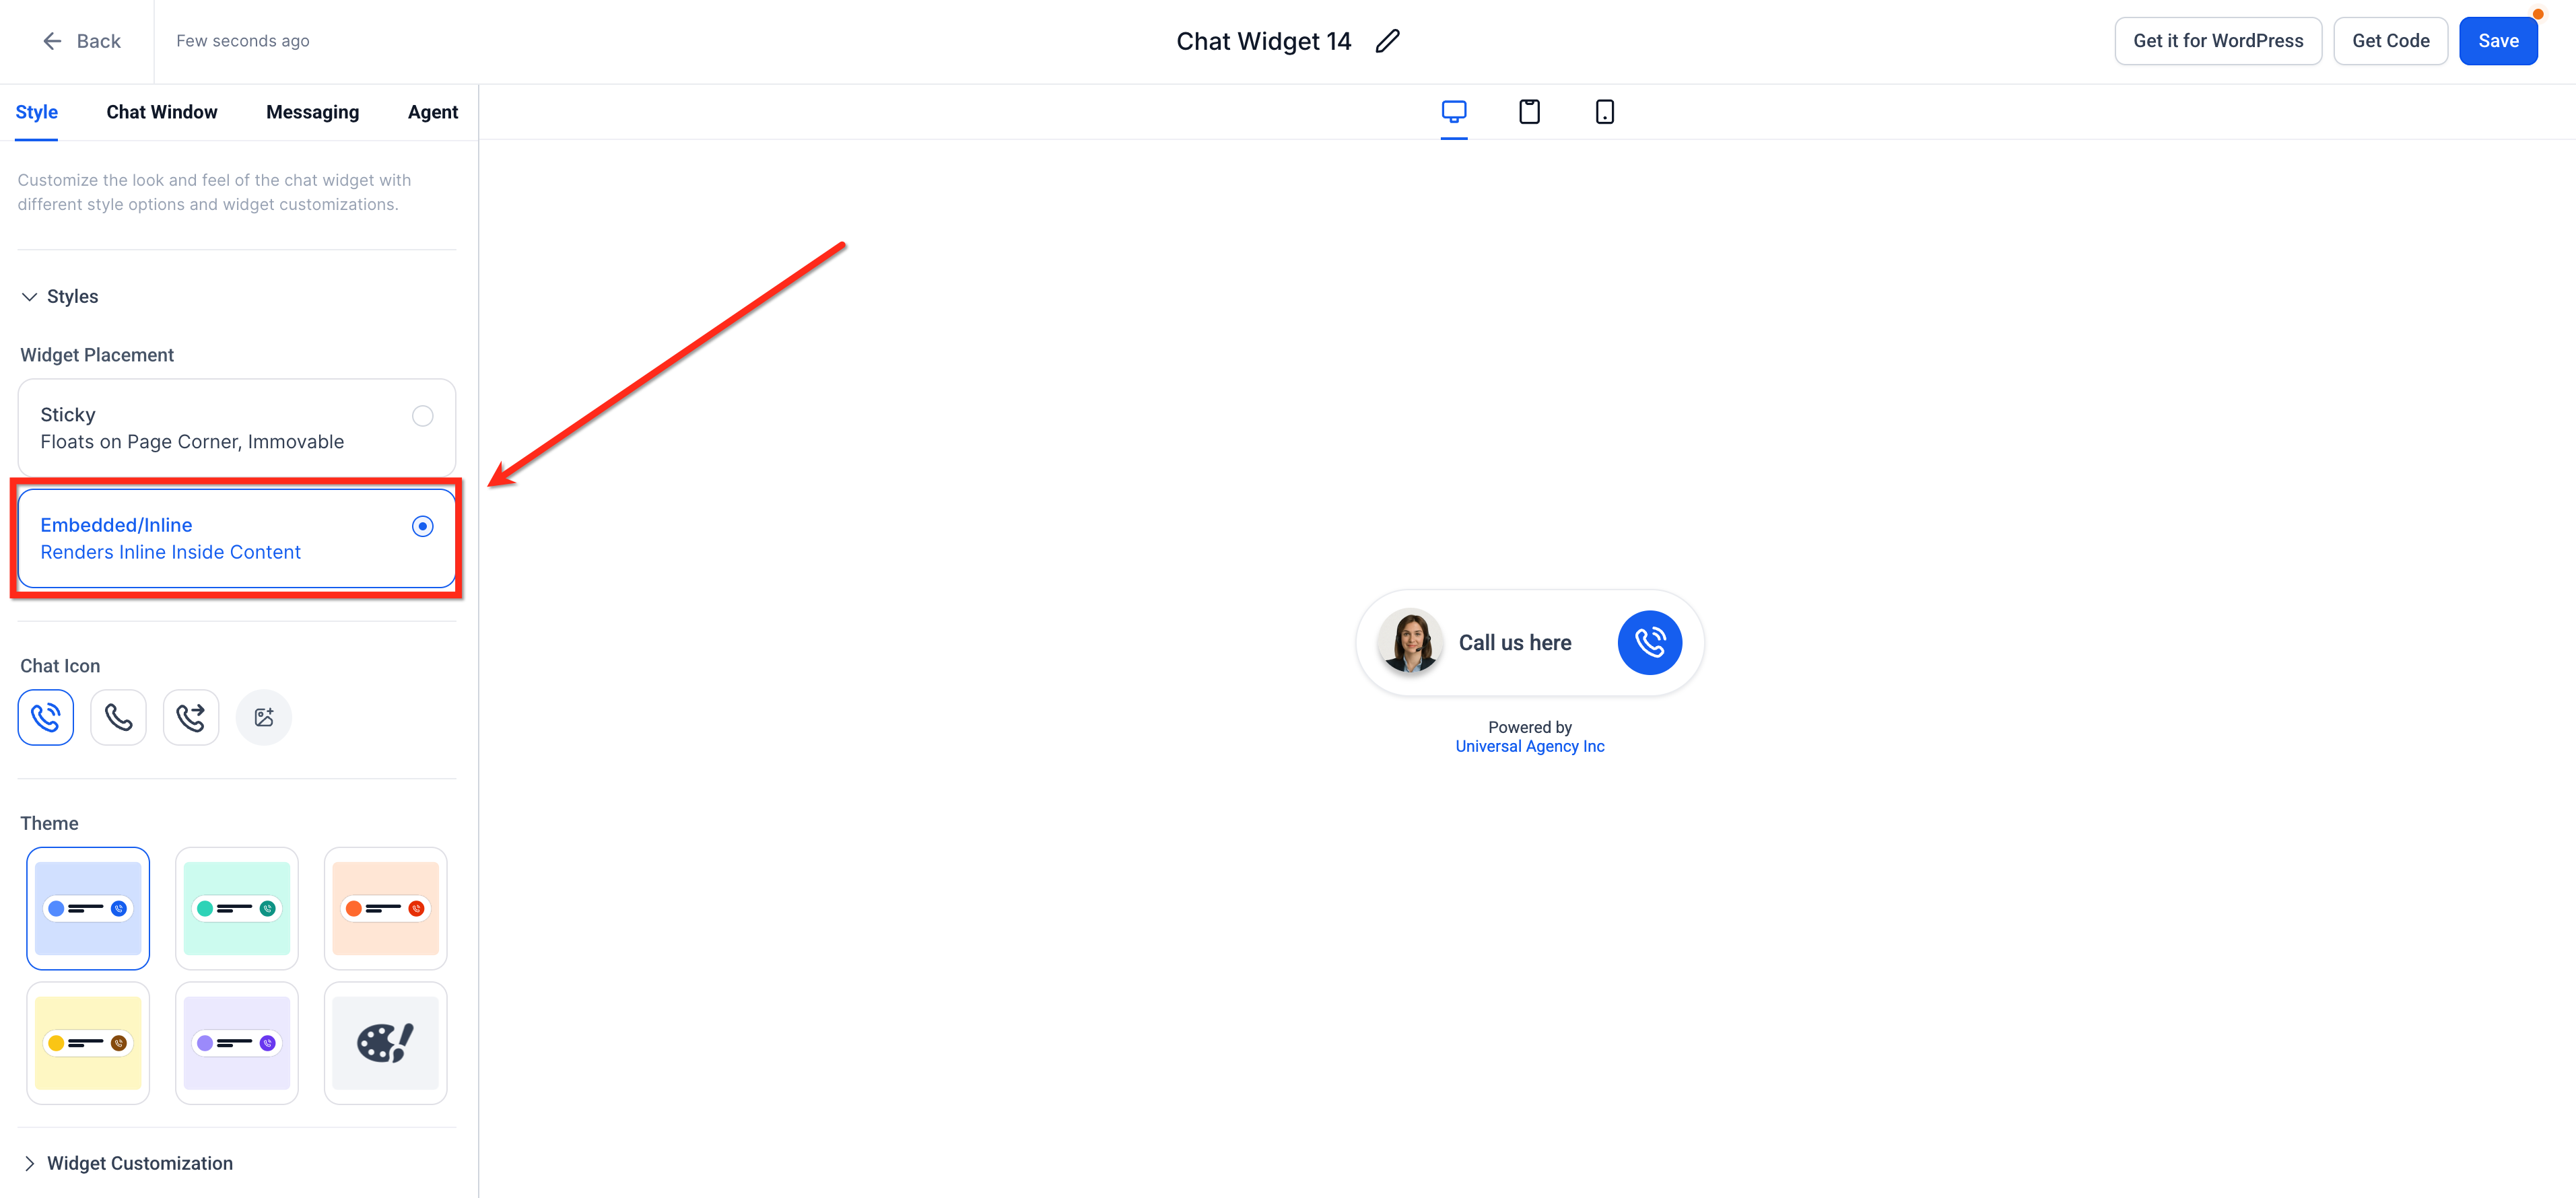
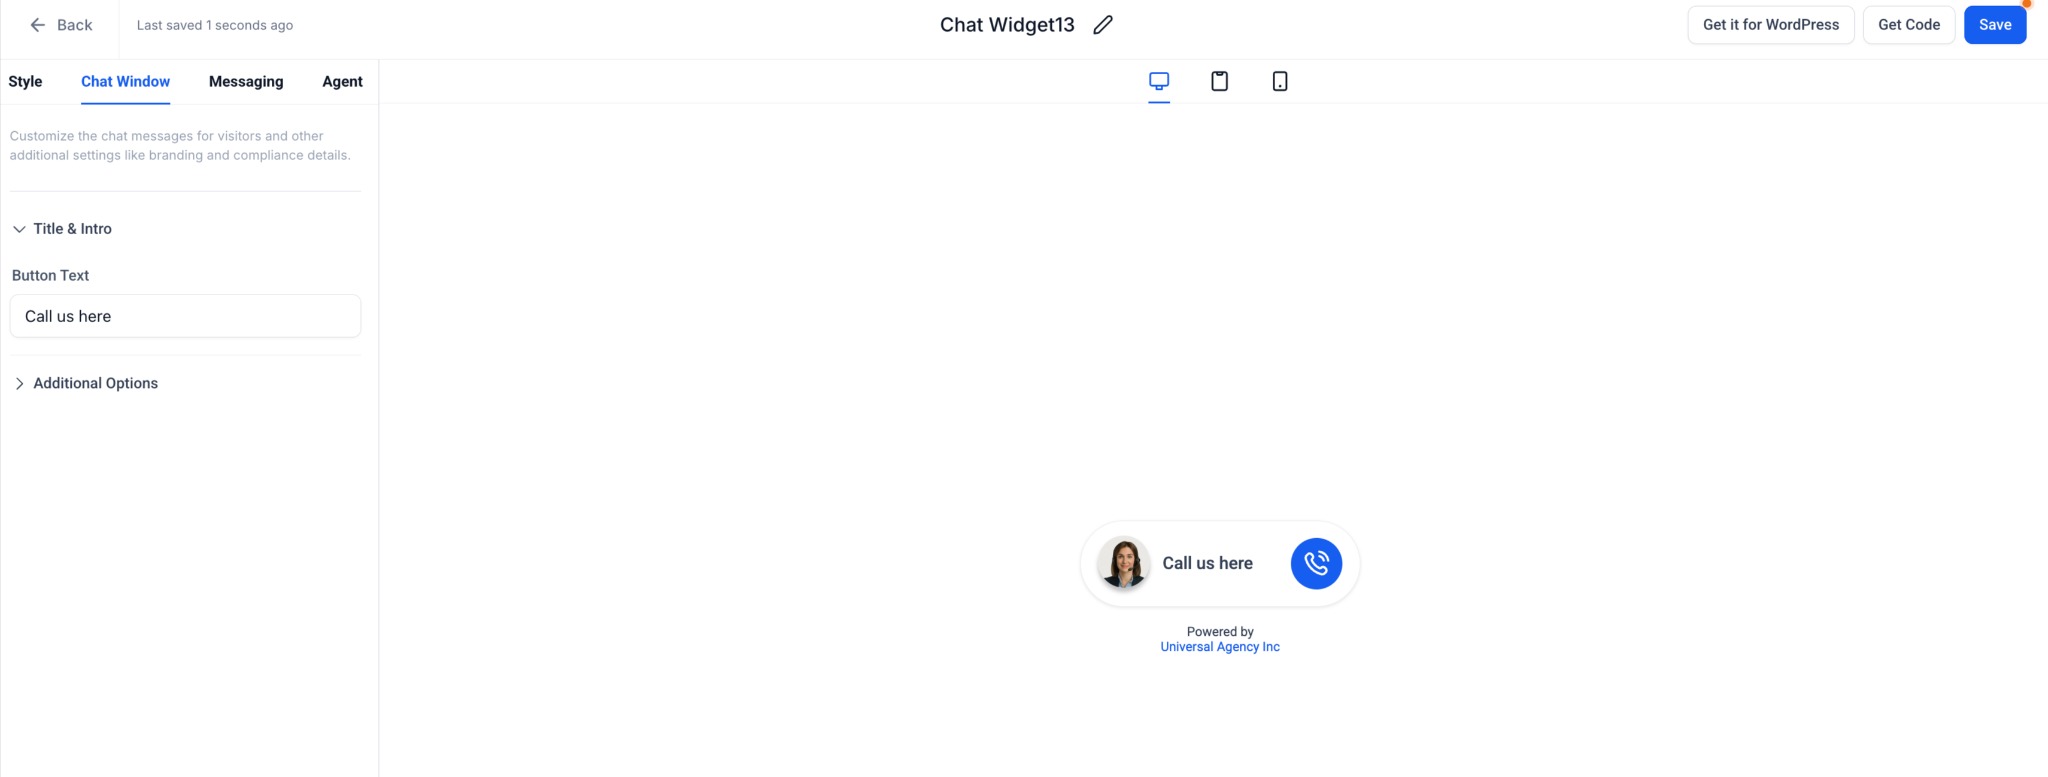
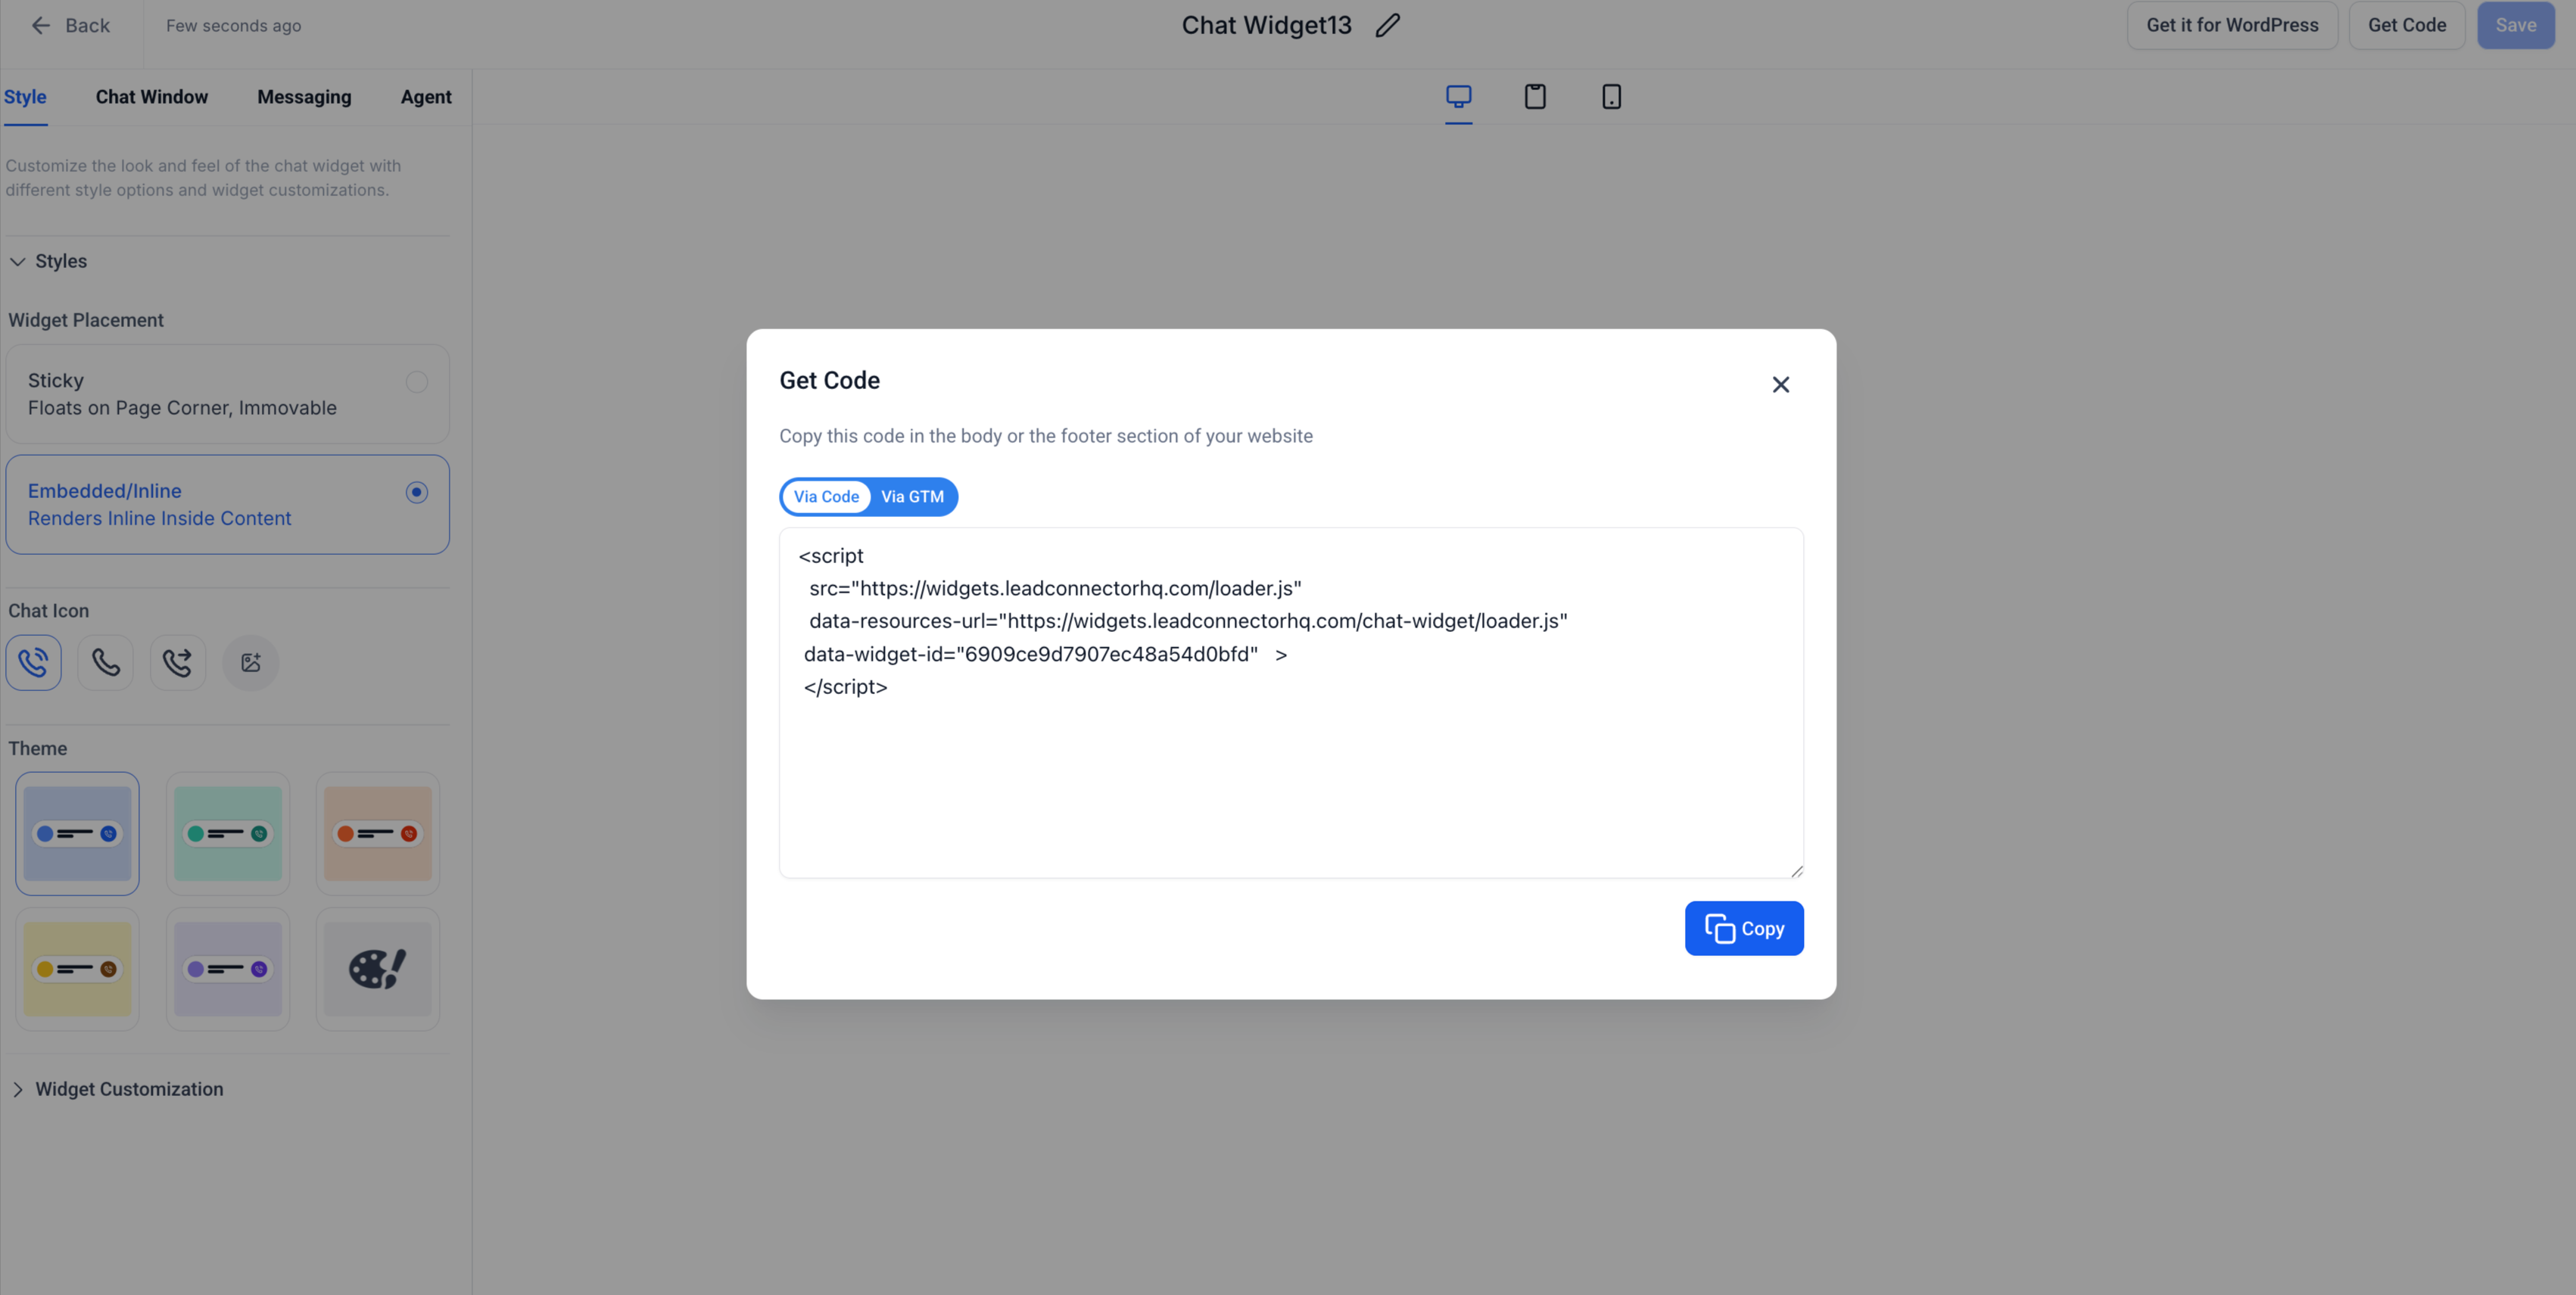
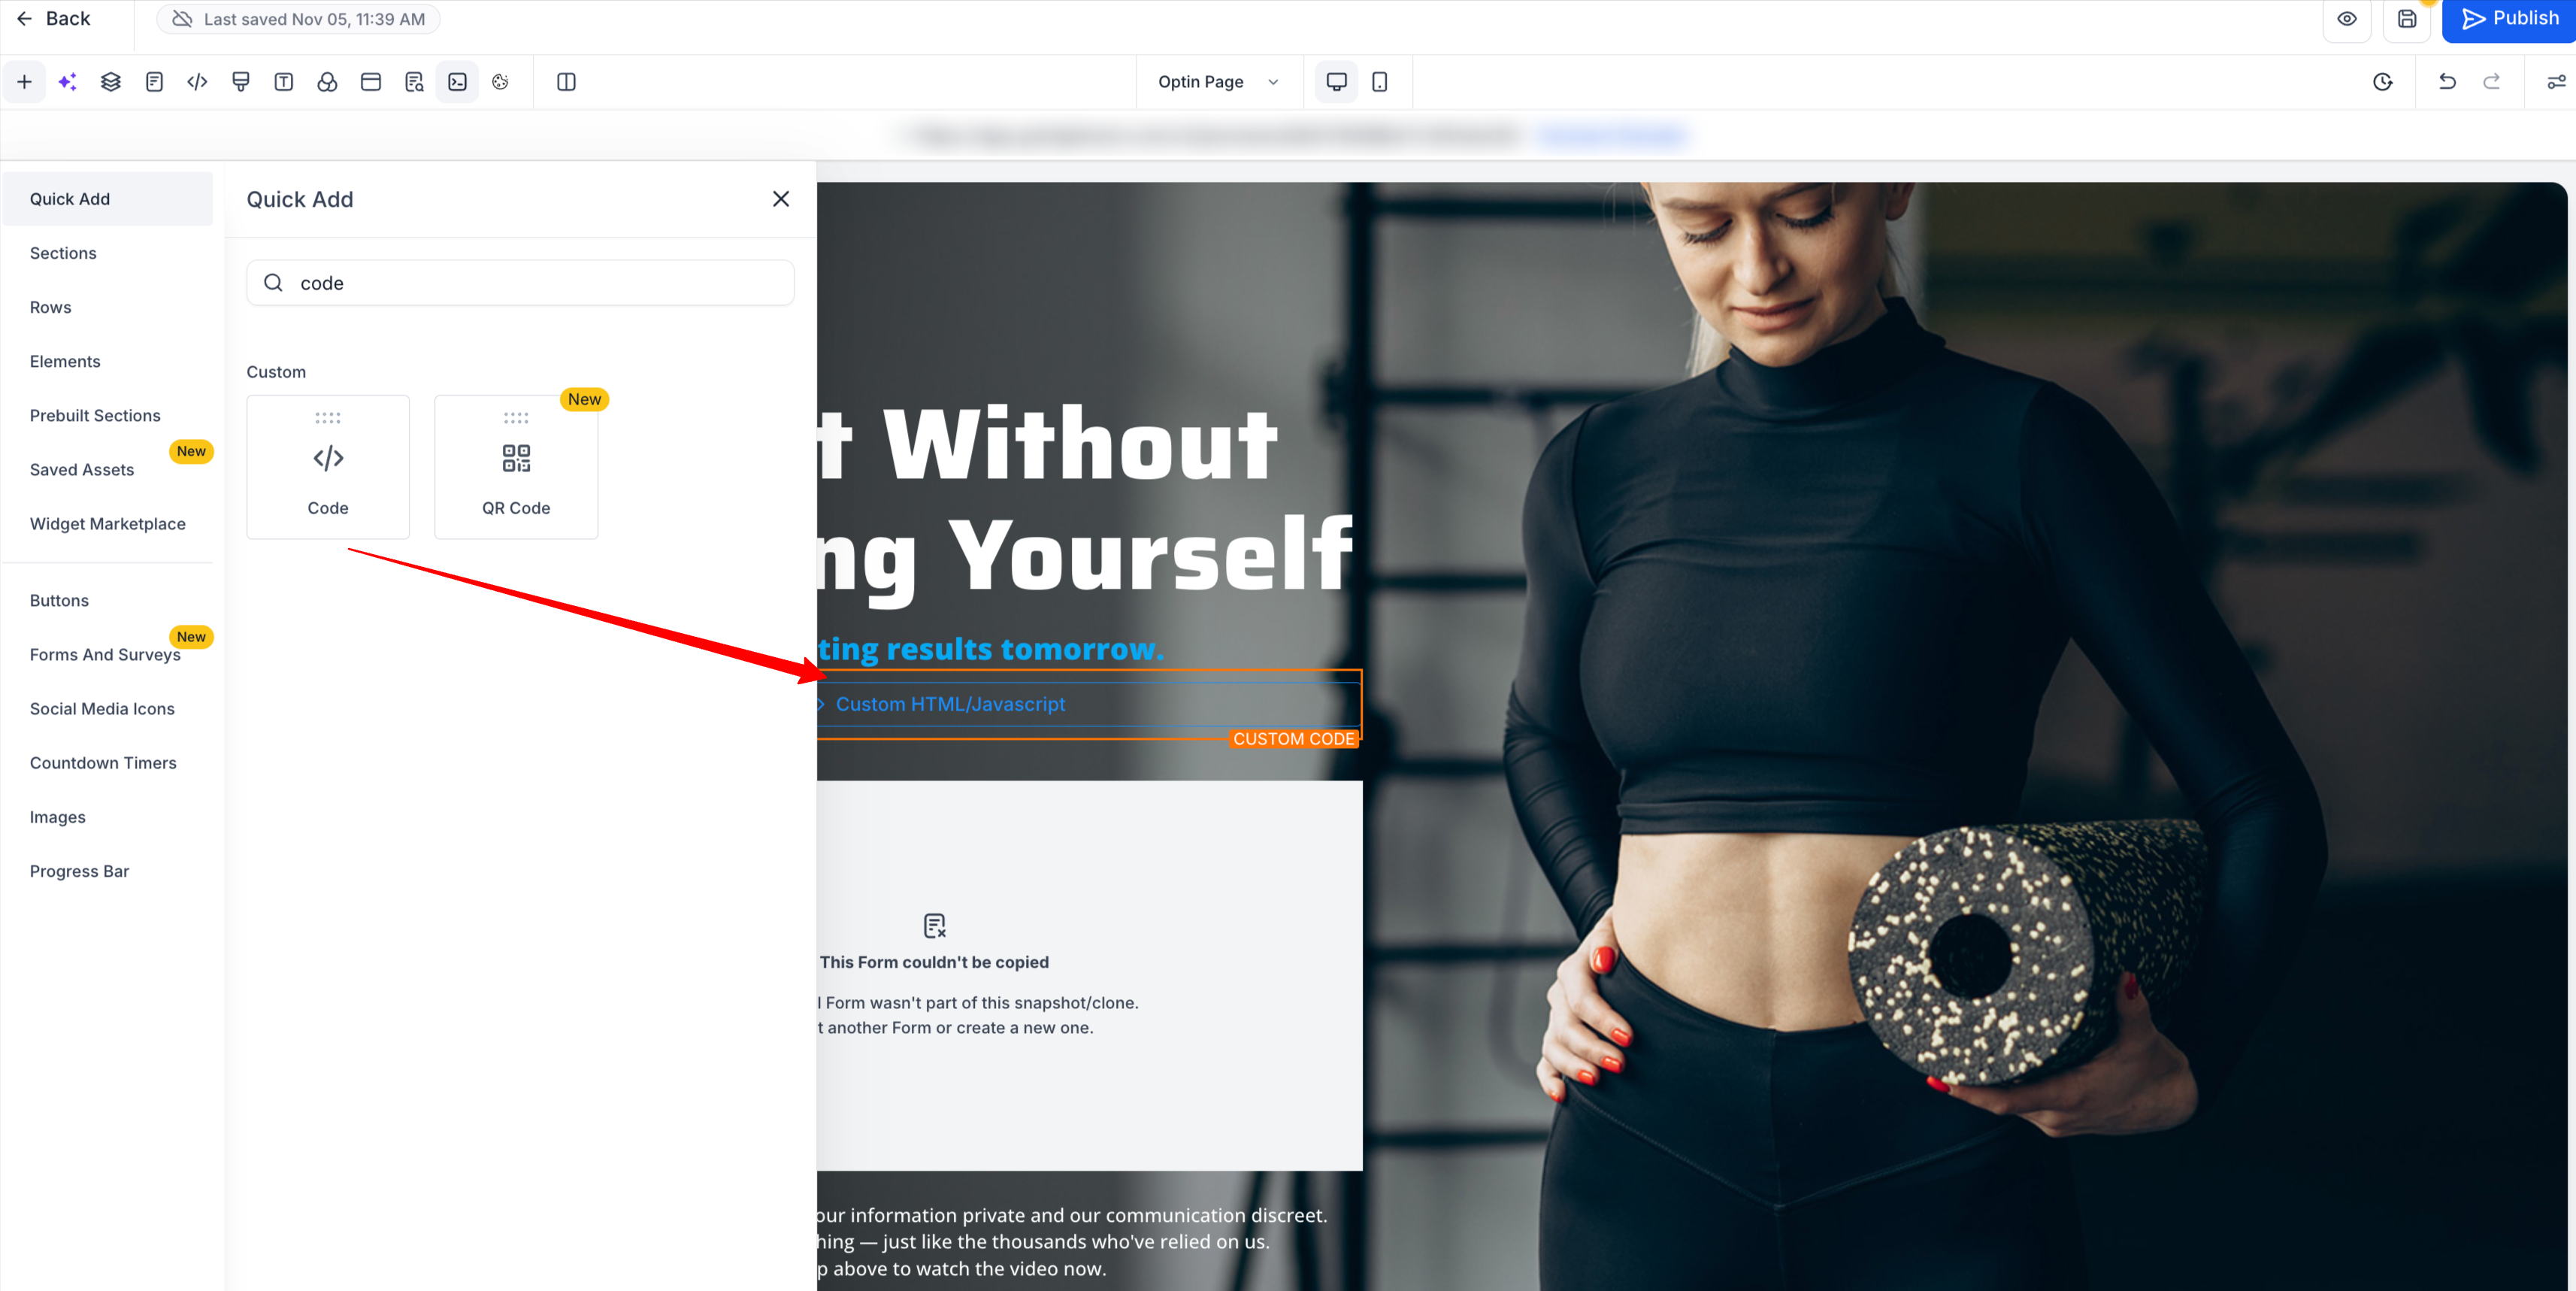
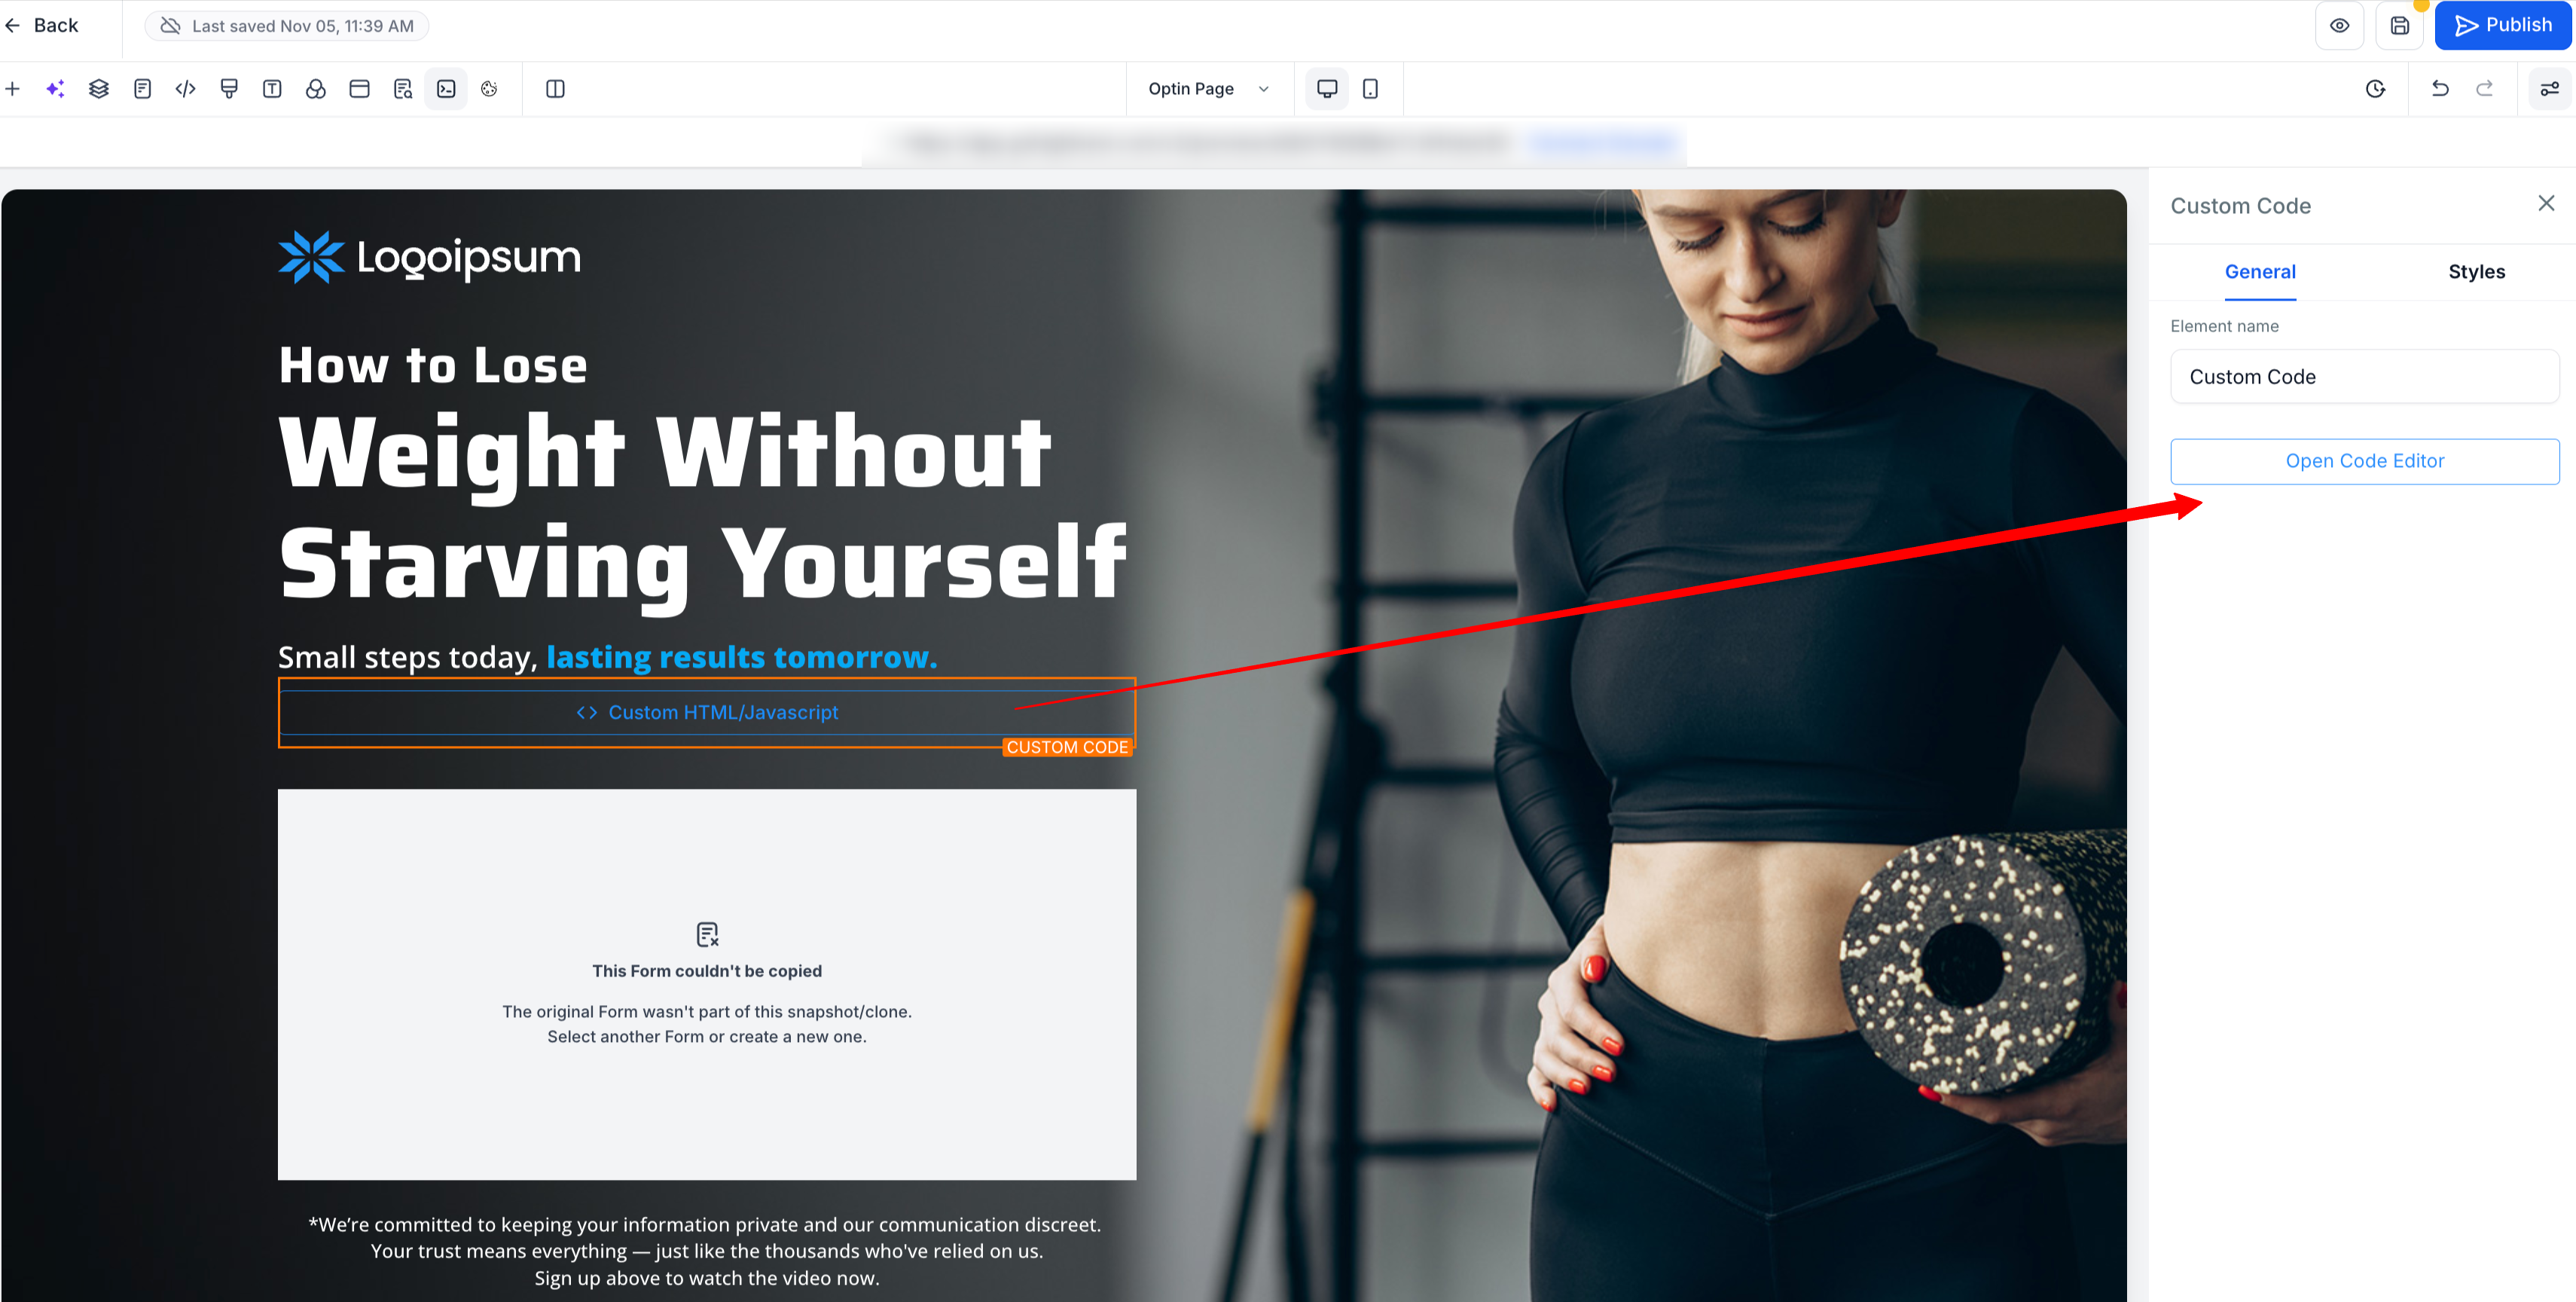
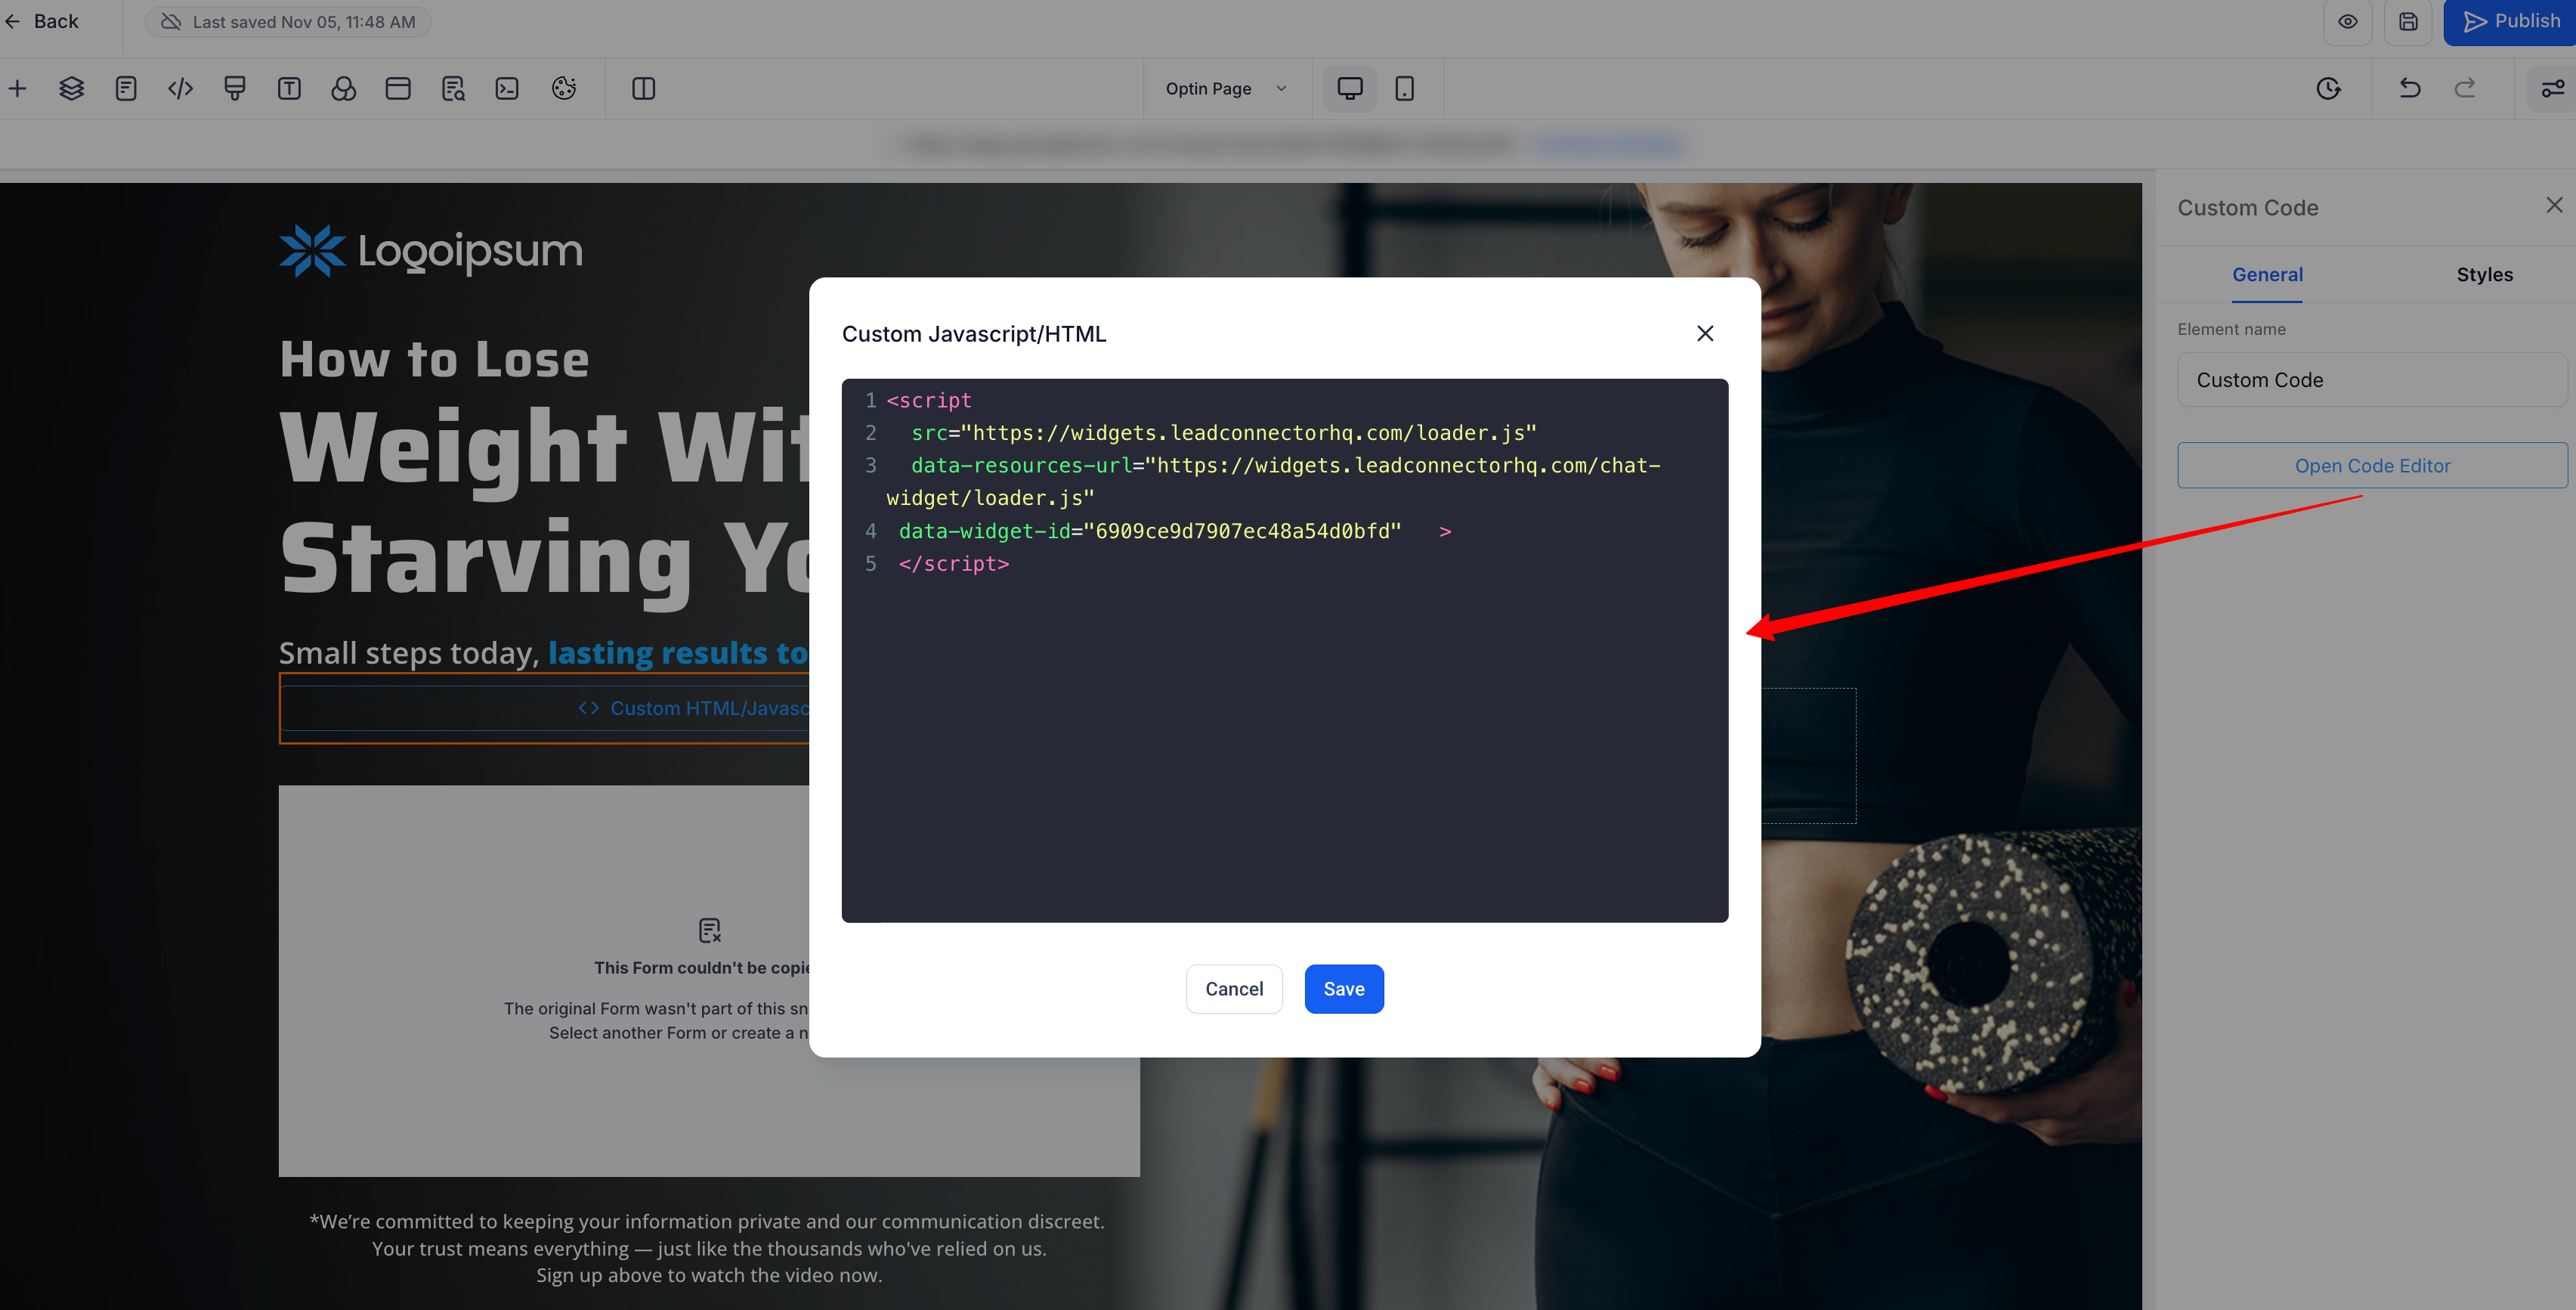
Add a Voice AI Chat Widget directly inside your website or funnel content for a more natural, on-page conversation experience. Patient Copilot’s Embedded/Inline placement gives you more control over where the widget appears, making it easier to match your layout, branding, and conversion flow. This setup is ideal for businesses that want Voice AI to feel like part of the page instead of a floating element. * * * ## Where Embedded Voice AI Chat Works Best Embedded Voice AI Chat can be used on: - Other supported pages where Chat Widgets can be installed The embedded widget is also mobile responsive by default, so it adjusts automatically for smaller screens while remaining part of the page content. * * * Proper setup ensures the widget appears exactly where you want it and behaves consistently across your website or funnel. #### Step 1: Create a New Chat Widget Go to Sites → Chat Widget then click + New or open an existing widget.!(https://assets.patientcopilot.ai/e8464bc57248b58d.png) #### Step 2: Select Voice AI Chat Choose the Voice AI chat option.!(https://assets.patientcopilot.ai/2a5d514eb8c1b70d.png) #### Step 3: Set Widget Placement to Embedded 1. Navigate to the Style tab 2. Under Widget Placement, choose: Embedded / Inline (Renders inside content) This ensures the widget will appear within your page layout instead of floating on the screen.!(https://assets.patientcopilot.ai/498b6c930e6a3251.png) #### Step 4: Customize Your Widget In the Chat Window tab, edit the Button Text, this appears below the avatar in the inline layout. - Example: Change “Call us here” to “Talk to our AI” or “Ask a Question.” Optionally, open Additional Options to adjust branding elements like the business name or compliance footer. The preview on the right updates in real time to show your embedded widget design. Click here for more information on customizing chat widgets.!(https://assets.patientcopilot.ai/0b635d20a1c76857.jpg) #### Step 5: Generate the Embed Code Once your widget looks good, click the Get Code button in the top right corner. A pop-up window will appear with your unique Embed Code Snippet. Click Copy to save it to your clipboard.!(https://assets.patientcopilot.ai/a1dc6cbd0901b32f.png) #### Step 6: Embed the Widget on Your Website or Funnel You can place the widget anywhere on your site or funnel using a Code Block element. 1. Go to Sites > Funnels and open the funnel page where you want to add the widget. 2. Click Edit Page. 3. On the left sidebar, search for “Code” under Quick Add > Custom and drag the Code Element onto your page.!(https://assets.patientcopilot.ai/c6ca47d8cd5e2ea2.png) 4. Click Open Code Editor.!(https://assets.patientcopilot.ai/d0cae9dddf3233b6.png) 5. Paste the Embed Code you copied from the Chat Widget Builder.!(https://assets.patientcopilot.ai/ce3eae28d00db2ee.png) 6. Click Save, then Publish your page.!(https://assets.patientcopilot.ai/9ea9b466966a9ff0.png) Once published, the Voice AI widget will appear embedded inline just like any other content block. * * * ## Important Behavior Notes - The embedded widget is fully mobile-responsive, it resizes automatically on smaller screens.
- You can have multiple embedded widgets on the same site or funnel, all linked to the same Voice AI agent.
- You can even use a mix of embedded and sticky widgets across different sections for maximum engagement. * * * ## Best Practices A well-placed widget can support conversions without interrupting the page experience. The goal is to make chat feel helpful and timely, not distracting. - Place the widget near high-intent content such as forms, offers, booking areas, or support prompts. - Match the widget branding to the page for a more seamless appearance. - Test spacing and alignment so the widget does not look cramped inside narrow sections. - Review mobile layout after publishing to confirm readability and spacing. - Keep intro and acknowledgment messages clear and action-oriented. * * * ## Frequently Asked Questions Q: Where should I place the embedded widget on my page? Good placement options include hero sections, offer sections, lead capture areas, service pages, and other high-intent areas where visitors are likely to engage. Q: Why did some customization settings disappear after selecting Embedded/Inline? Some controls are automatically hidden because they only apply to floating widgets. In Embedded/Inline mode, Patient Copilot shows only the settings that are relevant to inline placement. Q: Can I use the Embedded/Inline placement for Live Chat widgets as well? Yes, embedded/inline support is available for Live Chat. For more information, click here. * * * ## Related Articles - **(https://help.patientcopilot.ai/en/support/solutions/articles/155000006648)**(https://help.patientcopilot.ai/en/support/solutions/articles/155000006648)[How to set up and use the Voice AI Chat Widget](https://help.patientcopilot.ai/en/support/solutions/articles/155000006648)
- Voice AI Chat Widget
- Getting Started with Chat Widget
- Overview of Chat Widget Customizations
- Facebook and Instagram Chat Widgets